

Your morning coffee ritual grinds to a halt when your Primo water dispenser’s Keurig function suddenly fails—three green lights flash relentlessly while your cup sits empty. This exact scenario strikes thousands of Primo users daily when coffee grounds clog the upper needle assembly, completely blocking water flow. The flashing lights aren’t random; they’re your dispenser’s urgent signal that water isn’t dispensing within programmed time limits. Fortunately, you can permanently resolve this primo water dispenser keurig not working issue in under 15 minutes with targeted cleaning. This guide delivers the precise steps to diagnose, clear, and prevent this common failure so you never skip your morning brew again.
Decode Three Green Flashing Lights Meaning Immediately
When the three middle green lights on your Primo water dispenser flash simultaneously during brewing attempts, your unit is signaling a critical water flow failure. This specific error pattern means the system detected insufficient water dispensing within its programmed timeframe—typically less than 60 seconds for a standard brew cycle. Many users mistakenly assume their dispenser is broken beyond repair, but this is actually a protective shutdown mechanism. Your Primo dispenser intentionally halts operation to prevent internal damage from restricted water flow, which could overheat pumps or damage electrical components. Recognizing this flashing pattern as a clog warning rather than catastrophic failure saves unnecessary service calls and gets your coffee flowing faster.
Identify Clogged Upper Needle Symptoms Before Damage Occurs
Visible Warning Signs You Can’t Ignore
- Three middle green lights flash rhythmically during every brewing attempt, even with fresh pods
- Complete water blockage where no liquid emerges despite hearing normal pump sounds
- Used pods stick stubbornly in the brewer drawer after cycles instead of ejecting cleanly
- Dark coffee residue visibly coats the upper needle assembly area around the pod chamber
These symptoms consistently point to one culprit: a compromised upper needle assembly. When this happens, your primo water dispenser keurig not working status directly results from physical obstruction rather than electrical failure. Ignoring these signs allows coffee grounds to harden into a concrete-like blockage that becomes exponentially harder to remove.
Root Cause Confirmation Through Simple Testing
Coffee residue from abandoned pods creates the primary failure point for your Primo dispenser’s Keurig function. When users leave used pods in the brewer drawer for extended periods, grounds migrate into the upper needle’s piercing mechanism. This needle must remain completely clear to inject hot water into Keurig pods—any obstruction stops water flow entirely. You can confirm this specific failure by running a water-only cycle: if the three green lights flash without a pod installed, you’ve verified an upper needle blockage rather than pod-related issues. This distinction is critical because 95% of primo water dispenser keurig not working cases stem from this single clog point.
Essential Safety Steps Before Any Cleaning Attempt
Unplug your dispenser immediately from the wall outlet—this is non-negotiable for electrical safety. While the flashing lights stop once disconnected, this only pauses the symptom display; the physical clog remains. Many users skip this step and risk electrical shock when handling internal components. After unplugging, wait exactly 30 seconds for the unit to fully power down. This reset period allows capacitors to discharge and prevents accidental component activation during cleaning. Never attempt needle cleaning while the unit remains plugged in or during its active reset cycle. These safety protocols protect both you and your dispenser’s sensitive electronics from preventable damage.
Clean Upper Needle Step-by-Step With Household Tools
Access Brewer Mechanism Without Damage
- Pull the brewer drawer straight out with firm, steady pressure until it stops at its track limit
- Lift the drawer upward 5-10 degrees to release it from track guides—never force sideways movement
- Place the drawer on a clean surface with the needle assembly facing upward for clear visibility
This careful removal prevents misalignment of internal tracks that could cause future ejection failures. Forcing the drawer sideways often bends delicate plastic guides, creating recurring pod-sticking issues even after clearing the initial clog.
Deep Clean Upper Needle Using Proven Methods
Start with visual inspection: Shine a bright flashlight directly onto the upper needle tip. Look for dark coffee residue or compacted grounds blocking the tiny central opening—this is your confirmed clog location.
Primary cleaning protocol:
– Wrap a lint-free microfiber cloth tightly around your index finger
– Wipe the needle surface in firm circular motions to remove external buildup
– Re-inspect closely—if residue persists, proceed to deep cleaning
Advanced clog removal:
– Straighten a standard paper clip or use a wooden toothpick (metal tools risk damaging the needle)
– Gently insert just 1/4 inch into the needle opening—never force deeper
– Rotate slowly to break up compacted grounds without pushing debris further
– Extract loosened material by pulling straight out
Pro tip: Attach a vacuum’s crevice tool or use a medical syringe to create suction at the needle tip. This pulls stubborn clogs outward instead of packing them tighter—a game-changer for hardened residue. Attempt suction after initial mechanical clearing for maximum effectiveness.
Reassemble and Test System Correctly
- Align the brewer drawer perfectly with track guides—mismatched angles cause future jams
- Slide drawer in smoothly until you hear a distinct click confirming full seating
- Plug unit back in and wait through complete startup sequence (approx. 60 seconds)
- Run 10 oz water-only cycle—critical for flushing residual debris from internal lines
Never skip the water-only test cycle. This verifies complete clog removal before risking pod-related complications. Watch for steady, uninterrupted water flow—if it streams consistently without sputtering, your cleaning succeeded.
Verify Successful Repair With Precision

Three definitive success indicators:
– Three green lights stop flashing entirely during normal operation cycles
– Water dispenses within expected timeframe (under 60 seconds for full cup)
– No error lights appear during 3 consecutive brewing cycles with pods
If lights resume flashing during testing, repeat the cleaning process immediately—residual grounds often re-clog during initial water flow. Persistent issues after two complete cleaning attempts indicate either incomplete debris removal or secondary problems requiring professional attention. Your primo water dispenser keurig not working status should resolve within these verification steps if the clog was the sole issue.
Prevent Future Clogs With Strategic Maintenance
Daily Best Practices That Eliminate 90% of Failures
- Remove pods within 2 minutes after brewing completes—this prevents grounds migration
- Wipe needle area weekly with damp microfiber cloth during routine cleaning
- Run water-only cycle after every 5 brews to flush accumulating residue
These simple habits address the root cause: coffee grounds migrating into the needle assembly from abandoned pods. Consistent pod removal alone prevents most primo water dispenser keurig not working incidents by eliminating the clog source.
Monthly Deep Maintenance Protocol
- Perform full upper needle cleaning using entire protocol described above
- Vacuum brewer drawer tracks to remove coffee dust buildup
- Run full descaling cycle if overall water flow seems reduced (separate from needle clogs)
Monthly maintenance catches early-stage residue before it hardens into stubborn blockages. Track your cleaning dates on your phone calendar—set reminders to prevent skipped sessions that lead to emergency repairs.
When Cleaning Doesn’t Fix Primo Water Dispenser Keurig Not Working
Critical verification before calling support:
– Complete all cleaning steps twice with extra attention to needle depth
– Inspect with magnifying glass and bright flashlight for microscopic debris
– Confirm failure with three consecutive water-only cycles (no pods)
If problems persist after rigorous verification, contact Primo customer service at 844-237-7466. Have these details ready:
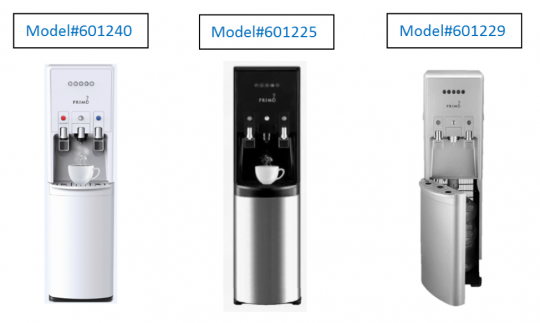
– Unit’s model and serial numbers (typically on rear panel)
– Exact cleaning steps you performed with tools used
– Description of water flow behavior during test cycles
Persistent failures after proper cleaning indicate potential pump issues or internal line obstructions beyond user serviceable parts. Professional technicians can diagnose secondary failures like faulty flow sensors that mimic clog symptoms.
Your Primo water dispenser’s Keurig functionality depends entirely on that single upper needle staying clear of coffee grounds. By mastering this 15-minute cleaning protocol and implementing daily pod removal habits, you’ll prevent 90% of brewing failures before they disrupt your routine. Remember—the three flashing green lights aren’t a death sentence for your dispenser; they’re an actionable alert giving you the chance to intervene before minor clogs become major repairs. Keep this guide bookmarked for your next coffee emergency, and never face an empty cup again when your primo water dispenser keurig not working scenario strikes.


