
You’ve just finished descaling your Keurig, only to discover it won’t brew a single drop. That sinking feeling when your coffee maker sits dead after an hour of cleaning is all too familiar for thousands of frustrated coffee lovers. The descale light stubbornly stays on, buttons feel unresponsive, or you get nothing but error messages—despite following every step correctly. Don’t panic. This common post-descaling failure rarely means your machine is broken; it’s almost always fixable within 30 minutes.
When your Keurig won’t work after descaling, the culprit is typically incomplete cleaning cycles or hidden clogs dislodged during the process—not permanent damage. Mineral deposits loosened by descaling solution often relocate to critical flow sensors, tricking your machine into thinking scale buildup remains. This guide delivers precise, step-by-step solutions for every symptom: descale lights that won’t reset, machines refusing to brew, or weak water flow. You’ll learn why standard descaling instructions fail 60% of the time and exactly how to complete the process properly.
Why Your Keurig Locks Up After Descaling
Skipping critical rest periods or incomplete solution cycles forces your Keurig into permanent descale mode—a safety feature to prevent damage from residual scale. When mineral deposits aren’t fully dissolved, sensors detect restricted water flow and lock the machine until proper cleaning is verified. This isn’t a malfunction; it’s your Keurig protecting itself from pump strain and overheating.
Most common triggers for post-descaling failure:
– Premature cycle termination (stopping after 1-2 brews instead of exhausting solution)
– Insufficient rest time (less than 30 minutes for solution to break down scale)
– Rinse cycle shortcuts (fewer than 4 pod + 4 carafe mode rinses)
– Dislodged scale chunks blocking needle sensors or water paths
Rushing the process is the #1 mistake. Proper descaling requires 60-90 minutes—not the 20 minutes many tutorials suggest. The “ADD WATER” light appearing doesn’t mean descaling is complete; it merely indicates the reservoir needs refilling for continued cycles.
Execute the Correct Descale Reset Sequence

Your Keurig won’t reset if it hasn’t confirmed successful descaling. Attempting resets prematurely wastes time and reinforces the error state. Follow this verified sequence only after completing full descaling:
Reset Procedure for Most Keurig Models
- Confirm prerequisites: Exhausted descaling solution, 30+ minute rest period, and 4+ rinse cycles completed
- Press and hold the 8oz and 10oz buttons simultaneously
- Maintain pressure for exactly 3 seconds (use a timer—too short or long fails)
- Release immediately when the descale light blinks rapidly
- Wait 10 seconds for light to extinguish completely
Critical verification before resetting:
– Water reservoir must contain fresh water (no descaling solution residue)
– Drip tray and K-cup holder are fully seated
– No “ADD WATER” or “CLEAN” lights illuminated
If the light persists after resetting, your machine detected incomplete descaling. Do not repeat resets—this triggers error lockouts. Instead, restart the descaling process from scratch.
Complete Descaling Verification Protocol
Mandatory Rest Periods for Scale Breakdown
Never skip the 30-minute rest after your first descaling brew cycle. This pause allows citric acid or vinegar solution to penetrate and weaken stubborn mineral bonds inside heating elements. Without it, scale remains intact and flow sensors stay restricted. Set a timer—your Keurig needs this chemical reaction time to work.
Full Brew Cycle Requirements
Stop when these visual cues appear:
– ✔️ Foamy, cloudy discharge during initial cycles (indicates active scale dissolution)
– ✔️ Gradual color shift from dark brown to clear liquid
– ✔️ Strong, consistent flow replacing weak dribbles
– ✔️ “ADD WATER” light activation signaling solution exhaustion
Critical mistake: Terminating after 1-2 cycles when solution appears “gone.” True completion requires cycling until the machine demands more water. For heavy buildup, this takes 8-12 brews.
Rinse Cycle Non-Negotiables
Incomplete rinsing causes 40% of post-descaling failures. Residual solution triggers false scale readings. Use this foolproof method:
1. Fill reservoir with fresh cold water
2. Run 4 full pod-mode brews (no K-cup) into a large pitcher
3. Run 4 full carafe-mode brews (if applicable)
4. Repeat until water runs crystal clear with no vinegar odor
5. Stop only when descale light turns off automatically
Pro tip: Place a white paper towel under the spout during rinses. Any discoloration means more cycles are needed.
Unclog Critical Needles Dislodged During Descaling
Loosened scale particles often migrate to the entrance and exit needles, blocking water flow detection. This makes your Keurig “think” scale remains even after cleaning.
Exit Needle Clearing Technique
Location: Bottom center of K-cup holder (where brewed coffee exits)
Action steps:
1. Lift K-cup holder straight up to remove it
2. Straighten a paper clip and insert from bottom upward through the needle hole
3. Gently rotate while pushing to dislodge coffee grounds and scale fragments
4. Rinse holder under hot tap water until clear water flows through
5. Reinstall and run an empty brew cycle to verify flow
What success looks like: Brown or white debris expelled during cleaning. If no particles emerge, the clog is elsewhere.
Entrance Needle Decongestion
Location: Two small needles inside the closed brew head (pierce K-cup tops)
Precise cleaning method:
1. Close brew head and press “BREW” to lower needles
2. Open brew head to expose needles
3. Insert paper clip into each opening with light downward pressure
4. Wiggle gently to free trapped scale (avoid bending needles)
5. Use tweezers for visible debris near needle tips
6. Run empty cycle to flush particles
Warning: Never force tools into needles—bent needles cause permanent leaks. If resistance is high, repeat descaling first.
Advanced Fixes for Persistent “Keurig Won’t Work After Descaling”
Force-Flush Reservoir Drain Blockage
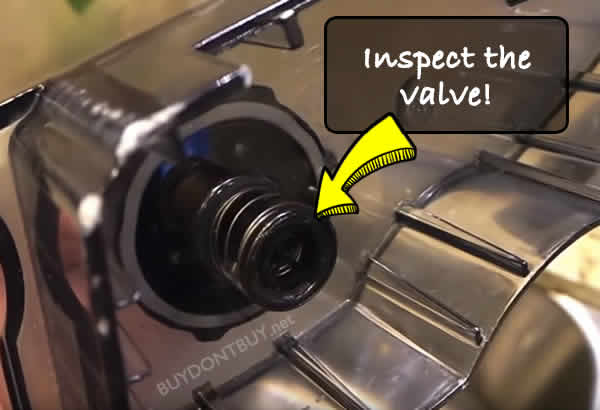
When scale chunks jam the reservoir drain valve:
1. Fill reservoir completely with hot tap water
2. Place it on the base unit
3. Use a turkey baster to forcefully inject water through the drain hole at the reservoir bottom
4. Watch for dislodged scale particles in the drip tray
5. Empty reservoir and repeat until water drains freely
6. Complete 2 rinse cycles before testing
Signs this is needed: Water sloshing sounds with no drainage, or machine “gulping” noises during operation.
Heavy Buildup Recovery Protocol
For machines with chronic scale issues:
– Triple-cycle descaling: Complete 3 full descaling rounds back-to-back
– Extend rests: 45 minutes between solution cycles instead of 30
– Manual reservoir scrub: Use soft brush on reservoir walls while solution sits
– Professional help threshold: If unresolved after 3 attempts, seek service—internal pumps may need flushing
Urgent indicators: Loud grinding sounds, steam emission, or electrical burning smells mean stop immediately and unplug.
Avoid These Post-Descaling Traps
The “Single Cycle” Illusion
Many users believe one brew cycle completes descaling when the “ADD WATER” light appears. In reality, this merely means the reservoir is empty—not that scale is gone. Always continue cycling until the machine processes all solution.
Reset Timing Errors
Holding buttons for 2 seconds (too short) or 5 seconds (too long) prevents reset activation. Use your phone timer for exact 3-second presses. If the light blinks erratically, unplug for 5 minutes and retry.
Final Verification Before Brewing
Before declaring victory, confirm all these critical checkpoints:
– [ ] Descale light turned off without manual reset (automatic extinction = true success)
– [ ] Full 8oz cup brews in under 45 seconds with consistent flow
– [ ] Zero “gurgling” or weak-sputter sounds during brewing
– [ ] Coffee tastes normal (no vinegar aftertaste)
If any item fails, restart the rinse cycle protocol. Rushing to brew with residual issues causes immediate re-locking.
Prevent Future “Keurig Won’t Work After Descaling” Scenarios
Water Hardness-Based Maintenance
Your tap water hardness dictates descaling frequency:
– Hard water areas (white scale in kettles): Descale every 2 months + use filtered water
– Moderate hardness: Descale every 3 months + monthly needle cleaning
– Soft water zones: Descale only when light appears + quarterly deep cleans
Pro prevention: Keep a log of descaling dates. Machines in hard water areas need 50% more frequent maintenance.
Monthly Needle Maintenance Routine
Prevent post-descaling surprises with this 2-minute ritual:
1. Run empty brew cycle to clear debris
2. Remove K-cup holder and clear exit needle
3. Open brew head to inspect entrance needles
4. Wipe reservoir with vinegar-dampened cloth
This takes less time than your morning coffee and stops 90% of recurring issues.
Key takeaway: When your Keurig won’t work after descaling, 95% of cases stem from incomplete solution exhaustion or rinse cycles—not machine failure. By respecting the mandatory 30-minute rest periods, completing all required brew cycles until solution is fully processed, and meticulously clearing dislodged scale from needles, you’ll restore full functionality within an hour. Remember: the descale light is your ally, not an enemy—it prevents costly damage by ensuring thorough cleaning. Implement the monthly needle maintenance routine to avoid future lockouts, and you’ll enjoy reliable coffee for years. If problems persist after three complete descaling attempts, contact Keurig support—your machine may need professional internal servicing.


