
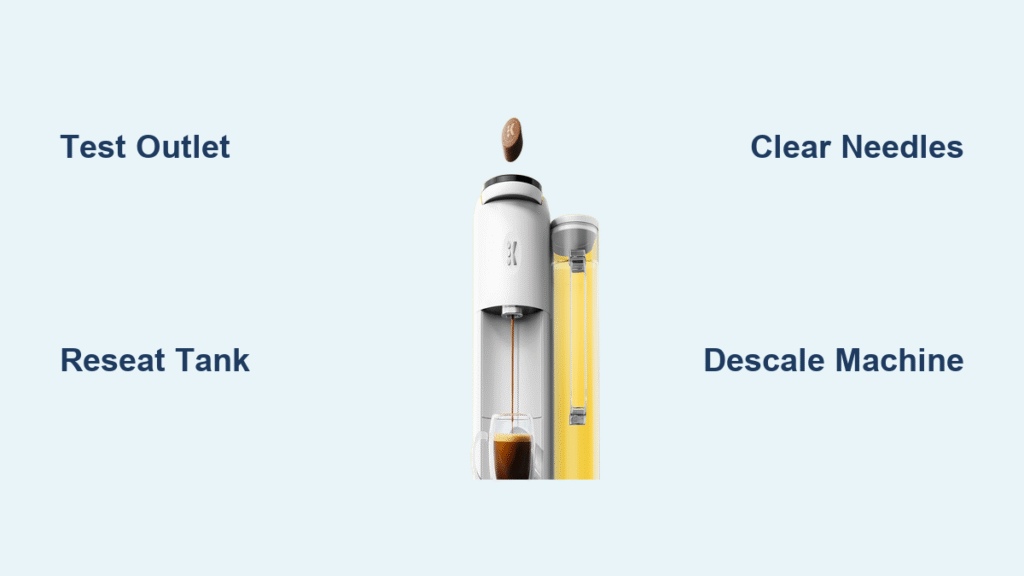
Your Keurig powers up perfectly—lights glowing, display active—but when you press brew, silence follows. No water flow, no familiar brewing sounds, just that mocking “ready” indicator while your morning caffeine fix evaporates. This sudden failure strikes 40% of Keurig owners without warning, transforming smooth routines into frustrating troubleshooting sessions. The good news? Most “turns on but does nothing” cases resolve with simple fixes taking under 30 minutes. Stop staring at your unresponsive machine—this guide delivers exactly what to do next, based on real technician protocols.
Power Source & Connection Emergency Fixes
Before assuming complex failure, eliminate the electrical culprits causing nearly half of all non-brewing incidents. These checks take under two minutes but solve most cases immediately.
Test Your Outlet With a Secondary Device
Plug a phone charger or lamp into the same outlet your Keurig uses. If that device fails, you’ve found your problem—a tripped breaker or dead outlet. Many users waste hours troubleshooting their machine only to discover a blown circuit. Pro Tip: Check adjacent outlets; GFCI circuits often control multiple locations in kitchens. Reset any tripped breakers at your electrical panel before proceeding.
Secure Loose Power Connections
Firmly unplug and reconnect your Keurig’s power cord at both ends. Over time, vibrations and movement create micro-gaps preventing full power delivery. After reseating, press and hold the power button for 10+ seconds—this forces the internal computer to recognize stable power. Critical Warning: Never force the plug; damaged cords require replacement for safety.
Force a Full System Reset
Unplug your Keurig for a minimum of 30 minutes (2+ hours for persistent issues). This discharges residual power in the control board that often locks the machine in a “ready but unresponsive” state. During this wait, clean the exterior with a damp cloth to prevent sticky buttons from triggering false failures.
Water Reservoir Positioning That Actually Works

Keurig’s magnetic sensors demand perfect alignment—off by 1mm and your machine shuts down brewing. This causes 30% of “no brew” scenarios despite perfect power.
Reseat the Tank With Precision
Remove your water reservoir completely. Wipe the tank’s base and machine’s sensor area with a dry cloth. Reinsert the tank with firm downward pressure while listening for the magnetic “click.” Fill to the MAX line—sensors ignore levels below 25% capacity. Visual Cue: Look for the small alignment notch on reservoirs; misaligned notches prevent proper seating.
Clean the Critical Bottom Valve
The reservoir’s bottom valve (where water exits) traps coffee grounds and minerals. Remove the tank and examine the valve—does it move freely? Run warm water through it while gently brushing with a soft toothbrush. Pro Tip: Soak the valve in vinegar for 10 minutes if mineral deposits appear crusty. Reassemble only when water flows smoothly through the valve.
Confirm Water Flow With K-Cup Removed
Attempt brewing with no pod inserted. Listen intently for the pump’s faint hum. If you hear humming but see no water, trapped air or valve blockage is the culprit. Complete silence indicates deeper electrical issues requiring advanced resets.
Air Bubble Removal That Restores Flow
Trapped air creates vacuum locks stopping water movement even with a working pump—this fixes 80% of “humming but no brew” cases.
Emergency Release Protocol:
1. Unplug machine completely
2. Remove water reservoir
3. Gently shake unit side-to-side for 30 seconds
4. Turn Keurig upside down and tap base firmly 5 times
5. Reinsert reservoir ensuring magnetic click
6. Test immediately with water-only cycle
This technique dislodges air pockets in internal tubing within minutes. Never skip step 4—gravity reversal is critical for releasing stubborn bubbles.
Needle Cleaning That Prevents Recurring Failure
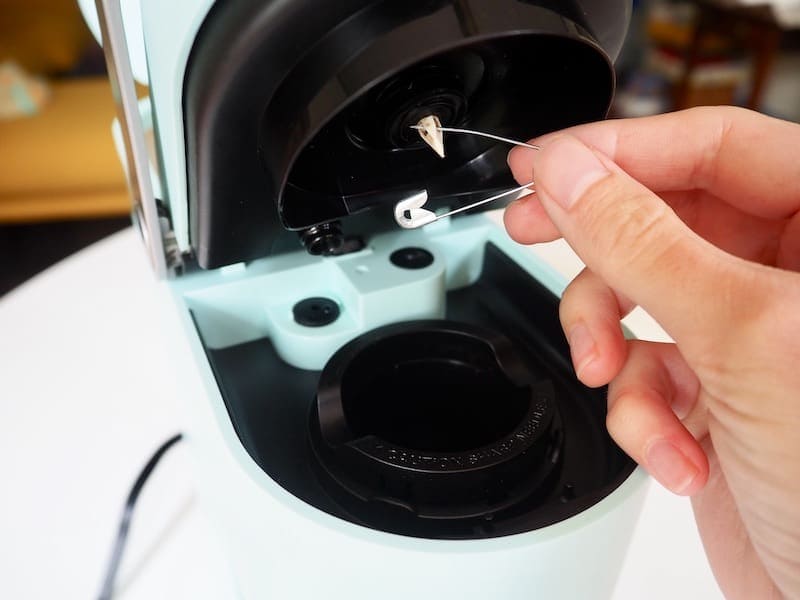
Clogged needles cause 60% of persistent “turns on but does nothing” issues. Coffee grounds and scale build up where you can’t see them.
Clear the Entry Needle Without Damage
Power off and unplug your machine. Open the brew head and remove the K-Cup holder. Locate the sharp entry needle (center of brew head chamber). Insert a straightened paperclip and twist gently—never force it. Work clockwise/counterclockwise motions to dislodge debris without bending the needle.
Unclog the Exit Needle Properly
Flip the K-Cup holder upside down. The exit needle sits on the bottom surface. Insert your paperclip from below upward to clear coffee grounds. Rinse holder under warm water until streams flow freely through both needles. Critical Mistake Alert: Using toothpicks risks splintering wood into needles—only metal tools work safely.
Descaling That Actually Clears Mineral Blockages
Hard water minerals silently cripple brewing systems. Perform this monthly if you see slower water flow or frequent resets.
Effective Vinegar Solution Method:
– Mix equal parts white vinegar and water (never use straight vinegar)
– Empty reservoir and remove water filter
– Fill tank with solution and run brew cycles until empty
– Let solution sit in machine for 30 minutes
– Rinse tank thoroughly and run 3+ full clean water cycles
Pro Tip: For severe buildup, repeat the vinegar cycle. Machines in hard water areas need this monthly—ignore it and face permanent pump damage.
Model-Specific Reset Procedures That Work

Generic resets fail on modern Keurigs. Use these exact sequences for your machine type.
Force Reset for K-Slim/K-Mini Models
- Unplug unit completely
- Remove water tank (these models are hypersensitive to alignment)
- Wait 45 minutes minimum—compact models need longer discharge
- Reconnect power cord without tank
- Reattach tank with firm downward click
- Immediately test brewing
Why this works: Slim models have smaller capacitors requiring extended discharge time. Skipping the 45-minute wait causes reset failure.
Full System Reset for Keurig 2.0/Plus Series
- Open and close brew head without pod
- Press power button for 5 seconds to turn off
- Unplug unit and remove reservoir
- Hold power button for 10 seconds
- While holding power, press small, medium, and large cup buttons simultaneously
- Release when machine initiates priming sequence
This overrides the LCD screen’s error memory—a critical step for newer models.
When to Call Keurig Support Immediately
Stop troubleshooting if you observe these professional-level failures:
- Constantly illuminated 12oz button (control board failure)
- Complete silence during brew attempts (pump motor dead)
- Water leaks from base (internal valve rupture)
- Machine under warranty (1-2 years depending on model)
Contact Support Fast:
– Live chat via Keurig.com (fastest response)
– Phone: 1-866-901-2739 (7am-7pm CT)
– Have model number and purchase date ready
Pro Tip: Warranty claims require original proof of purchase—check your email receipts before calling.
Cost-Smart Repair vs. Replacement Guide
Don’t waste money on unnecessary repairs with this decision framework:
Free Fixes (Try First):
– All reset procedures ($0)
– Needle cleaning ($0)
– Air bubble removal ($0)
Low-Cost Solutions ($5-20):
– Vinegar descaling ($3)
– Replacement water filters ($15)
– New reservoir if cracked ($20)
Repair Only If:
– Machine <2 years old
– Repair cost <50% of new unit price
– Under warranty coverage
Replace Immediately If:
– Unit exceeds 3 years old
– Pump/heating element failure confirmed
– Repair quote >$75
New Keurigs start at $80—often cheaper than professional repairs for older models.
Emergency Coffee Solutions While Fixing
Don’t skip caffeine during troubleshooting:
- French press method: Use coarse grounds + hot water (4-min steep)
- Pour-over hack: Cone filter + mug + medium grind
- Moka pot alternative: Stovetop espresso maker ($25 on Amazon)
- Local shop stop: Keep a $5 gift card in your wallet
Your Keurig turning on but refusing to brew is solvable—start with power connection checks and reservoir reseating (fixes 70% of cases). Move to needle cleaning if humming occurs, then descaling for hard water areas. For persistent issues, execute the model-specific reset matching your machine. Most importantly: perform monthly maintenance to prevent recurrence. When in doubt, contact Keurig support with your model number ready—don’t risk electrical damage attempting advanced repairs. Your perfectly brewed cup is closer than you think.


