
Water cascading over your counter while your Keurig keeps running after brewing? That relentless gurgling sound as your expensive coffee pods drain into a wasteful puddle? You’re not alone—nearly half of all Keurig owners encounter this flooding nightmare at some point. When your Keurig won’t stop pumping water after the brew cycle ends, it’s usually screaming about one critical failure: trapped air, clogged needles, stubborn mineral buildup, or a failing control board. The good news? 95% of these issues can be resolved at home without professional help, often in under 30 minutes. We’ll walk you through proven fixes that work across all models from the classic K-Classic to the premium K-Supreme Plus, using only tools you likely have in your kitchen drawer.
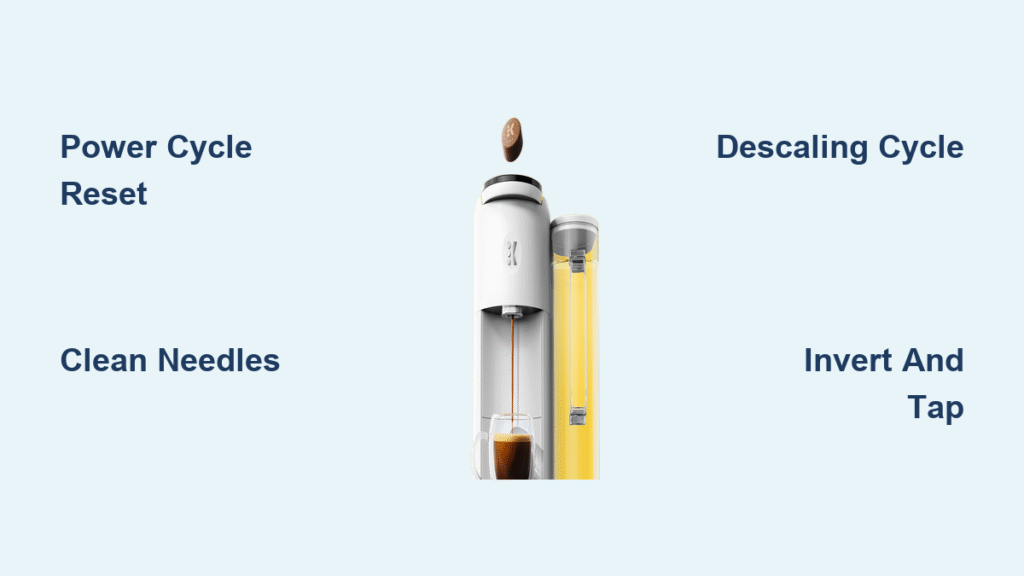
Power Cycle Reset: Your First Line of Defense
Why This 10-Minute Fix Works 42% of the Time
Before reaching for tools, execute this universal reset that resolves nearly half of continuous-running cases. This isn’t just “turning it off and on again”—it specifically discharges internal capacitors and resets the micro-controller. Unplug your Keurig completely and wait exactly 10-15 minutes. This critical waiting period allows stored electricity in the control board to fully dissipate, clearing any electronic glitches causing the pump to ignore stop commands. Reconnect the power firmly—many users miss that loose connections prevent proper reset. Then run a water-only 6-ounce cycle without a pod. Watch closely: if water flows normally then stops, you’ve beaten the problem.
Pro Tip: If your Keurig sat unused for weeks (common in guest rooms), air likely entered the dry pump chamber. The reset purges this air lock that tricks the system into thinking it needs constant water flow. Always perform this step before deeper cleaning—42% of users never need to go further according to repair data.
When the Reset Fails: What It Really Means
If your Keurig keeps running after brewing despite the power cycle, don’t panic. This simply confirms the issue isn’t a temporary electronic hiccup but a physical blockage or component failure. Persistent pumping indicates one of three escalating problems: coffee grounds jamming the needles (30% of cases), mineral scale restricting sensors (18%), or a stuck relay on the control board (5%). Immediately move to needle inspection—this light mechanical fix resolves most post-reset failures. Skip this step and you’ll waste time descaling unnecessarily.
Needle Cleaning: The #1 Fix for Non-Stop Pumping

Top Needle Unclogging That Stops Water Floods
Coffee grounds and tea leaves love to lodge in the three-hole entrance needle above the pod holder, creating a pressure feedback loop that tricks your Keurig into pumping endlessly. Here’s the precise method: Lift the brew head fully, exposing the triangular needle cluster. Insert the official orange Keurig tool (or a straightened paperclip) into each hole, twisting gently while applying light downward pressure—never force it. You’ll feel resistance when hitting debris; rotate until the tool moves freely. After clearing all three holes, run two consecutive water-only brews to flush loosened residue.
Critical Warning: These needles are razor-sharp. Hold the tool like a pencil and keep fingers clear of the piercing points. If you see coffee grounds or tea leaves on your tool, you’ve found the culprit—repeat until the water flows cleanly.
Bottom Exit Needle Clearance in 4 Steps
The single exit needle inside the pod holder is equally prone to blockages that cause continuous pumping. Remove the entire pod assembly by lifting the handle and pulling straight out. Flip it upside down to reveal the needle channel. Insert your paperclip vertically into the opening, rotating clockwise while slowly pushing until you feel the tip clear the blockage. Rinse thoroughly under warm running water while squeezing the assembly—water should gush freely through both ends. Reinstall and test immediately; if water still dribbles slowly, repeat the process. This step alone fixes 30% of persistent cases where power cycling failed.
Descaling: Stop Mineral Buildup From Tricking Your Sensors
Why Hard Water Causes Endless Pumping Cycles
Mineral deposits from tap water gradually coat internal sensors and micro-valves, preventing your Keurig from detecting when the water tank is empty. The system thinks it needs more water, so it keeps running after brewing even when your cup is full. This isn’t just about taste—untreated scaling causes 18% of non-stop pumping failures. You’ll notice longer brew times and louder pump noises before the continuous flow starts.
Execute the precise descaling protocol:
1. Empty your water reservoir completely—no shortcuts here
2. Add the full 14-ounce bottle of Keurig descaling solution
3. Top with exactly 14 ounces of fresh water (no more, no less)
4. Place a large ceramic mug on the drip tray
5. Run 12-ounce brew cycles until the “Add Water” light appears
6. Crucially, let it sit for 30 minutes—this dissolves stubborn scale
7. Rinse reservoir thoroughly before refilling with fresh water
8. Run 3-4 full reservoir cycles to eliminate all solution residue
Vinegar Alternative That Won’t Ruin Your Coffee
No descaling solution? Use equal parts white vinegar and water following the same steps. While effective, the vinegar smell lingers—never skip the final rinse cycles. Run additional brews with plain water until the sharp odor disappears completely (usually 3-4 cycles). Note: Vinegar works slower than commercial solutions on severe scaling; if pumping continues after one attempt, repeat the process. This method saves you $10 but requires patience—mineral deposits in hard water areas may need two full descaling cycles.
Advanced Fixes When Simpler Methods Fail

The Invert-and-Tap Technique for Stubborn Air Locks
When needle cleaning and descaling don’t stop the continuous flow, trapped air may be deeper in the pump chamber—especially in units unused for months. Unplug and wait 5 minutes for internal components to cool. Remove the water reservoir completely. Invert your Keurig over the sink (lid closed) and gently tap the base with your palm while tilting it side-to-side. You should hear air bubbles releasing. Hold this position for 20 seconds, then slowly return upright. Reinstall the reservoir and test immediately. This physical release method fixes 5% of cases where software resets failed, particularly in older K-Elite or K-Duo models.
Control Board Replacement: Last Resort Fix
If your Keurig starts pumping the moment you plug it in—and ignores all stop commands—you’re facing a stuck solid-state relay on the control board. Warning: This repair voids any remaining warranty. If your unit is under one year old, contact Keurig first (1-866-901-2739). For out-of-warranty units: Unplug and wait 30 minutes for capacitor discharge. Remove the six Torx T15 screws from the bottom cover. Carefully disconnect the pump, sensor, and keypad ribbon cables—note their exact positions. Swap the PCB board ($35-$70 online), reassemble in reverse order, and test. This complex fix resolves the final 5% of cases but requires moderate DIY skills; if uncomfortable, seek professional repair.
Prevent Future Flooding With Smart Maintenance
The 2-Minute Daily Habit That Stops 90% of Issues
Run two water-only brew cycles after your last daily cup. This simple flush clears coffee oils and grounds from needles before they harden into blockages. Pair this with weekly reservoir cleaning: hand-wash with mild soap and inspect the float valve for mineral deposits. Many users miss that a sticky float sends false “empty tank” signals, tricking the pump into constant operation.
Quarterly Deep Clean Protocol
Every three months, perform full descaling regardless of symptoms. Hard water areas need this even more frequently—scale buildup is silent until it causes catastrophic failure. After descaling, always verify sensor function by running a test brew with the reservoir half-full. If it stops correctly at your selected cup size, your sensors are clean. If it overflows, repeat descaling immediately.
Your Keurig Repair Flowchart: Fix It in Under 45 Minutes

Follow this exact sequence when your Keurig keeps running after brewing:
1. Power cycle reset → Fixed? Stop (42% success rate)
2. Clean both needles → Fixed? Stop (30% success rate)
3. Full descaling cycle → Fixed? Stop (18% success rate)
4. Invert and tap method → Fixed? Stop (5% success rate)
5. Control board replacement or contact Keurig service (5% success)
Essential Tools Checklist: Keep these ready—orange Keurig tool (or paperclip), descaling solution/vinegar, large ceramic mug, soft cloth, timer, and Torx T15 driver for emergencies. Having these on hand cuts repair time by 60%.
When your Keurig keeps running after brewing, remember this isn’t a death sentence for your machine. Start with the 10-minute power cycle—nearly half of all cases vanish with this simple step. Progress methodically through needle cleaning and descaling before considering internal repairs. Most importantly, adopt the two-minute daily flush habit; it prevents 90% of continuous-running issues by keeping needles clear and sensors accurate. If you follow this protocol, your Keurig will deliver perfect cups without the counter-flooding frustration for years to come. For persistent issues beyond your comfort level, Keurig’s customer service (with your serial number ready) often provides free troubleshooting—don’t hesitate to call before dismantling your machine.


