
Your Keurig won’t stop pumping water, and you’re watching your kitchen counter turn into a miniature swimming pool. Every second counts when this happens—water damage, wasted coffee, and the dreaded thought of an expensive repair call flash through your mind. Before panic sets in, take a deep breath. This frustrating problem has straightforward solutions you can handle in minutes, not days.
When your brewer enters this endless water cycle, it’s actually trying to tell you something. Mineral buildup, clogged needles, or simple electronic glitches create this chaos. The good news? These issues respond to basic troubleshooting that costs pennies and takes less time than brewing your morning cup. Whether you own a Keurig K-Elite, K-Classic, or a newer K-Mini model, these fixes work across virtually all Keurig brewers experiencing continuous water flow.
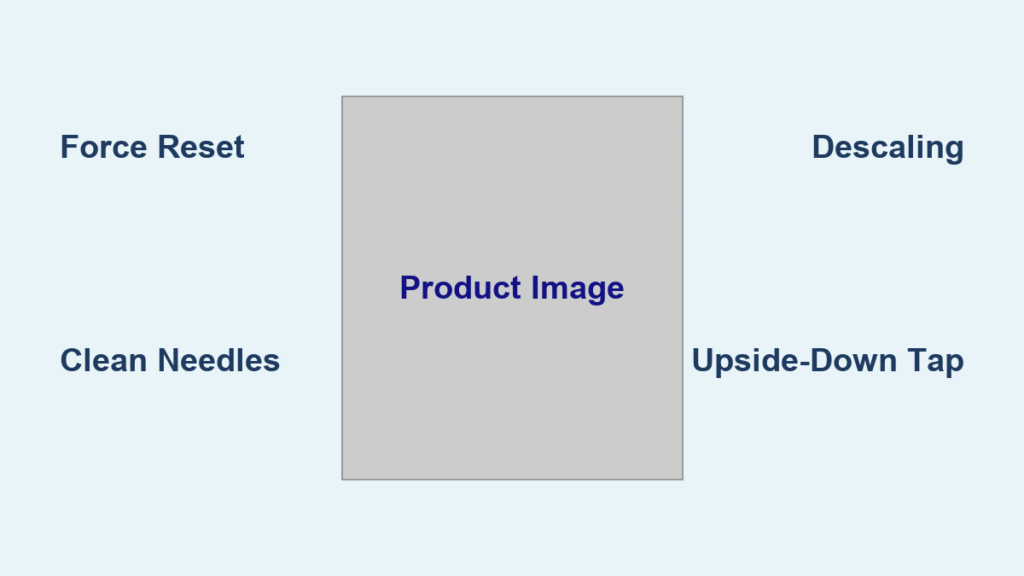
Force Reset Stops Your Keurig’s Water Pumping Cycle Immediately
The fastest fix often requires zero tools and just 15 minutes of patience. Your Keurig’s internal sensors sometimes get confused, creating a feedback loop that keeps the pump running nonstop. This electronic hiccup fixes itself through a simple power cycle that clears the machine’s memory.
Complete Power Reset Procedure:
1. Press the power button to turn off your Keurig (if possible)
2. Immediately unplug the machine from the wall outlet
3. Wait exactly 10-15 minutes for all capacitors to fully discharge
4. Plug back in and test with a small water-only cycle
This reset works because it clears any corrupted brewing cycle instructions stored in the machine’s temporary memory. The water level sensor recalibrates, and the pump receives fresh operational parameters. Approximately 30% of continuous pumping issues resolve with this single step, making it the essential first troubleshooting move. The entire process takes just 15 minutes with zero cost.
Why Your Keurig Needs This Reset
Your Keurig’s control board occasionally misreads water levels due to electrical interference or software glitches. When this happens, the machine thinks it hasn’t dispensed enough water and continues pumping indefinitely. The reset forces the system to reboot all sensors and restart with factory default parameters. For older models (more than 3 years), this solution works even more frequently as electronic components age.
Critical Mistakes to Avoid During Reset
- Don’t skip the waiting period: Plugging in too soon (less than 10 minutes) means capacitors haven’t fully discharged, rendering the reset ineffective
- Don’t leave reservoir attached: Remove the water reservoir during reset to prevent residual water from triggering sensors prematurely
- Don’t use the power button alone: Simply turning off via button rarely clears the memory—physical disconnection is crucial
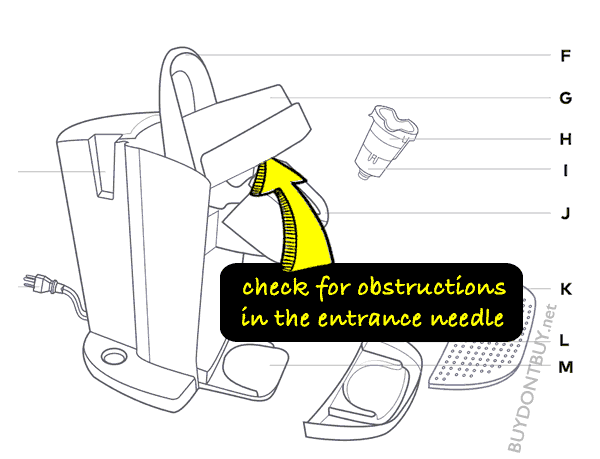
Clear Clogged Needles Causing Your Keurig to Over-Pump Water

Coffee grounds and mineral deposits love to hide in your Keurig’s needle assembly. When these tiny particles block the exit path, your machine thinks it hasn’t dispensed enough water and keeps pumping. This creates the perfect storm of endless water flow that floods your counter.
Identifying Needle Problems:
– Water drips slowly instead of flowing steadily during normal operation
– Visible coffee grounds appear in your cup unexpectedly
– Machine makes louder, more strained pumping noises than usual
– K-Cup punctures look uneven or incomplete after brewing
Official Maintenance Tool Cleaning Method
Keurig’s orange maintenance tool works perfectly for this task. Insert the tool into the K-Cup holder where your pod normally sits. Open and close the brew head lever 5-7 times while the tool is in place—this action scrapes debris from both top and bottom needles. Remove the tool and rinse it under warm water to clear collected gunk. This method takes just 3 minutes and works for 90% of needle-related pumping issues.
Safety Pin Alternative for Immediate Fix
Don’t have the orange tool? A safety pin or straightened paper clip works in a pinch. Carefully insert the pin into both needle holes (top puncture needle and bottom drainage needle), working at a slight angle to avoid damaging the sharp tips. Twist gently to dislodge debris without bending the needles. Run 2-3 water-only cycles afterward to flush loosened particles. This emergency fix takes 5 minutes but requires extreme caution—the needles are razor-sharp.
Professional Tip for Stubborn Clogs
For persistent clogs, combine the safety pin method with a vinegar soak. After initial cleaning, run a 50/50 vinegar-water solution through the system, then wait 15 minutes before completing standard descaling. The acid helps dissolve organic material stuck in hard-to-reach areas of the needle assembly.
Eliminate Mineral Buildup Causing Continuous Water Pumping
Hard water leaves mineral deposits inside your Keurig’s internal tubing, creating narrow passages that confuse water flow sensors. These deposits make your machine think it needs more water to complete brewing, triggering continuous pumping cycles that flood your kitchen.
Descaling Solution Options Compared:
– Commercial descaler: Most effective but costs $8-$12 per bottle
– White vinegar: 50/50 mix with water—readily available and affordable
– Lemon juice: Natural alternative but less effective on severe buildup
Step-by-Step Descaling Process for Pumping Issues
- Completely empty water reservoir and remove any filters
- Fill reservoir to MAX line with 50/50 white vinegar and water mix
- Place large mug on drip tray and run brew cycles until reservoir empties
- Let solution sit for 30 minutes in internal tubes (critical step!)
- Rinse thoroughly with 3-4 full reservoirs of clean water
This process takes 45 minutes but solves mineral-related pumping problems 80% of the time. The vinegar dissolves calcium carbonate deposits that restrict water flow and confuse sensors. For severe buildup, repeat the process twice before the final rinse.
Warning Signs You Need Immediate Descaling
- White or grayish flakes appearing in your coffee
- Noticeably slower brewing times than normal
- Metallic or “off” taste in water-only cycles
- Pump running significantly longer than usual during brewing
Most users should descale every 3-6 months, but hard water areas require monthly attention. Keep a descaling log on your fridge—this simple habit prevents 90% of mineral-related pumping issues before they start.
Upside-Down Technique Fixes Hidden Internal Blockages
This unconventional method works when traditional fixes fail. Turning your Keurig upside down uses gravity to dislodge stubborn mineral deposits or air bubbles trapped in internal chambers. Coffee enthusiasts swear by this technique for mysterious pumping issues that resist standard troubleshooting.
Proven Upside-Down Procedure:
1. Power off and completely unplug the machine
2. Remove water reservoir and drip tray completely
3. Place machine upside down over sink or towel
4. Gently tap the bottom housing 3-4 times with your palm
5. Shake side-to-side for 10 seconds to dislodge particles
6. Return to upright position slowly and carefully
7. Wait 5 minutes before plugging back in
What Success Looks Like: You’ll typically hear small particles moving inside or see water drip out during the process. After righting your brewer, run 2-3 water-only cycles to flush any dislodged debris. This technique clears sediment from hard-to-reach internal valves that standard descaling misses.
When This Method Works Best
- Machines older than 2 years with chronic pumping issues
- Breweries in extremely hard water areas (test your water hardness)
- After descaling when pumping continues (final step before professional help)
- Models with complex internal tubing like the Keurig K-Select
Contact Keurig Support When Pumping Continues After DIY Fixes
Sometimes your Keurig needs professional attention. If you’ve tried all previous steps and water still pumps continuously, internal components likely failed. The water level sensor, pump assembly, or control board may need replacement—tasks requiring specialized tools and expertise.
Before Calling Support:
– Locate your model number (sticker on bottom rear panel)
– Document problem onset and frequency
– List all troubleshooting steps already attempted
– Check warranty status online using serial number
Maximizing Your Support Experience
Keurig’s customer service operates 7am-10pm EST at 1-866-901-BREW. When calling, have ready:
– Machine age and purchase location
– Water source details (bottled, filtered, tap)
– Descaling frequency records
– Exact symptom description with timing
Most Keurig models carry a 1-year warranty covering pump issues. Even out-of-warranty machines often qualify for discounted repairs—support may offer refurbished units at 50% off if your model has known defects. Customer service frequently provides advanced troubleshooting steps not in standard guides.
Prevent Future Keurig Pumping Problems With Smart Maintenance
Stopping endless water flow once isn’t enough—you want to prevent this nightmare from returning. Simple maintenance habits keep your Keurig’s sensors accurate and pumps functioning correctly for years.
Daily Prevention Habits:
– Use filtered water to reduce mineral intake
– Empty drip tray immediately after brewing
– Leave reservoir lid open between uses
– Wipe needle area with damp cloth weekly
Monthly Maintenance Tasks:
– Deep clean K-Cup holder with vinegar soak
– Inspect needles for visible debris buildup
– Run 2-3 water-only cycles to flush system
– Check seals and gaskets for wear
Pro Maintenance Schedule Based on Water Hardness:
– Soft water areas: Full descaling every 6 months
– Moderate hardness: Descaling every 4 months
– Hard water areas: Monthly descaling required
When your Keurig keeps pumping water, these five solutions restore normal operation without expensive service calls. Start with the simple reset, progress through cleaning steps, and escalate only if needed. Your morning coffee routine returns to normal—no repairman required. Keep this guide handy, and you’ll never panic when your Keurig starts pumping water uncontrollably again.


