
Tired of watery iced coffee that loses flavor as ice melts? Your Keurig’s built-in iced coffee function solves this exact problem without pre-chilling or planning. This feature—labeled “Brew-Over-Ice” on compatible models—delivers bold, coffee-shop-quality iced beverages in under two minutes by intelligently adjusting water temperature mid-brew. Unlike pouring hot coffee over ice (which dilutes flavor by 50% within seconds), this method extracts maximum richness while preventing excessive ice melt. You’ll finally get the strong, smooth iced coffee you crave whenever cravings strike—no barista skills required.
The magic happens through precision temperature control your machine executes automatically. Your Keurig starts with hot water (around 192°F) to extract deep coffee flavors from the grounds, hitting the optimal extraction range for bold taste. At the exact moment calculated for your selected cup size, it instantly switches to cool water. This critical temperature shift prevents the rapid ice melt that ruins traditional iced coffee. The result? Concentrated flavor that stays strong from first sip to last, with zero dilution disasters. Skip this step and your coffee will taste weak within 60 seconds as ice dissolves.
Why Your Keurig Iced Coffee Function Prevents Watered-Down Flavor
Your machine’s temperature intelligence is the secret weapon against weak iced coffee. Standard hot brewing over ice causes immediate melting—up to 50% dilution before you even take a sip. The Brew-Over-Ice function eliminates this by starting hot for extraction, then switching to cool water precisely when needed. This two-phase approach maintains coffee strength while chilling it rapidly. You’ll notice the difference immediately: no more watery disappointment, just consistent boldness even as ice melts slowly in your glass.
Critical Safety Step: Avoid Glass Tumbler Shattering
Never brew directly into regular glass tumblers. The extreme temperature shock from 192°F coffee hitting ice-cold glass causes instant shattering—a serious safety hazard. Instead, use these foolproof containers:
- BPA-free plastic tumblers (readily available at dollar stores)
- Insulated stainless-steel bottles (maintains temperature 2x longer)
- Keurig’s official Brew Over Ice Tumblers (designed for thermal stability)
Pro tip: Keep a dedicated “brewing tumbler” in your freezer overnight. This pre-chilled vessel reduces ice melt by 30% and ensures maximum coffee strength.
Perfect Ice-to-Coffee Ratio for Maximum Strength
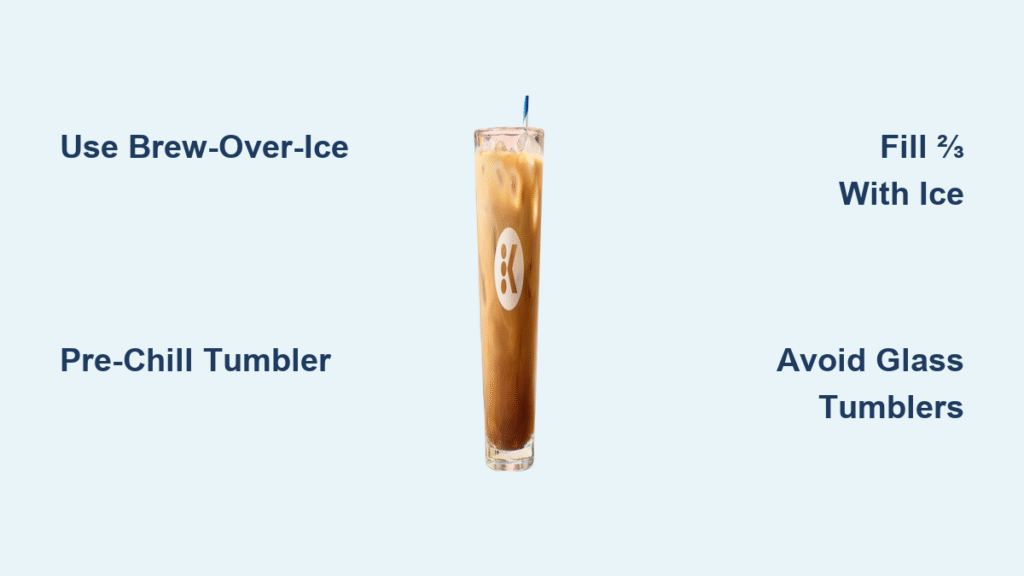
Fill your container ½ to ⅔ full with ice before brewing. This ratio provides optimal cooling without overflow or dilution. Too little ice won’t chill properly; too much causes dangerous overflow when hot coffee hits. For extra-strong results, use frozen coffee cubes instead of water ice—zero dilution, pure coffee flavor.
Best K-Cups for Iced Coffee (Beyond the Obvious Choices)

While any K-Cup works with your Keurig iced coffee function, these varieties deliver superior cold results:
Top performers:
– Green Mountain Brew Over Ice line (specifically engineered for cold extraction)
– Caramel Vanilla: Holds sweetness without becoming cloying when chilled
– Pumpkin Spice: Spices remain pronounced, not muted by cold
– Classic Black: Bold base for milk additions
– Dark roasts (like Donut Shop Dark): Retain body and depth when cooled
– Espresso pods (Caffè Verona): Creates intense base for lattes
Unexpected winners:
– Bigelow Sweet Black Tea K-Cups: No bitterness when chilled
– Lipton Peach Iced Tea: Real fruit flavor shines cold
– Cocoa pods: Makes instant iced mochas (add milk after brewing)
Step-by-Step: Brewing Perfect Iced Coffee in 70 Seconds

Follow this exact sequence for coffee-shop results every time:
- Prep your vessel: Fill BPA-free tumbler ⅔ full with ice (use coffee cubes for zero dilution)
- Insert pod: Choose dark roast or Brew Over Ice variety
- Position correctly: Center tumbler directly under brew spout
- Select size: Choose 8oz or 10oz setting (smaller = stronger)
- Activate function: Press “Brew-Over-Ice” button (labeled “Iced” on newer models)
- Add enhancements: Stir in liquid sweeteners after brewing (granulated sugar won’t dissolve)
- Customize: Add cold milk or cream last to prevent curdling
Critical timing note: Brew directly over ice—never pour hot coffee over ice later. The mid-brew temperature shift is what prevents dilution.
Fix Weak Iced Coffee Flavor in 3 Steps
Problem: Coffee Tastes Like Watered-Down Dishwater
Solution 1: Downsize your brew setting
Select 6oz instead of 8oz for the same ice quantity. More coffee concentrate per ice cube = stronger flavor.
Solution 2: Pre-chill your tumbler
Freeze your stainless steel cup for 10 minutes before brewing. This reduces initial ice melt by 40%.
Solution 3: Upgrade your pod
Switch to espresso-style K-Cups (like Starbucks Veranda) for intense base flavor that survives chilling.
Problem: Coffee Isn’t Cold Enough After Brewing
Solution: Fill tumbler ¾ full with ice before brewing. For extreme heat days, use half coffee cubes, half regular ice—maintains strength while maximizing chill.
HyperChiller Method for Non-Brew-Over-Ice Models
Don’t have the iced coffee function? This $30 device makes zero-dilution iced coffee on ANY Keurig:
Freeze Time Requirements
- First use: 12+ hours (critical for effectiveness)
- Between uses: 6 hours minimum
- Storage rule: Return to freezer immediately after rinsing
Zero-Dilution Brewing Sequence
- Freeze HyperChiller per time requirements
- Position under brewer with lid open
- Insert standard K-Cup (use dark roast for best results)
- Select REGULAR brew setting (higher temp = longer chill time)
- Brew 8-12oz directly through device
- Wait 75 seconds (for full chilling)
- Pour into glass and add milk/sweeteners
Pro tip: For strongest flavor, brew two shots of espresso-style K-Cup through HyperChiller, then add cold milk.
Keurig K-Iced Model: Is It Worth $72?

The dedicated K-Iced model ($72.70 on sale) offers key advantages:
Must-have features:
– Automatic ice-adjusted brew sizes (8/10/12oz)
– Strong Brew button for intensified cold coffee
– Included water filter (essential for clean iced taste)
– Compact footprint (fits in tight spaces)
Skip if: You already own any Keurig Plus series model. Use the HyperChiller method instead—it’s 85% cheaper and works on all machines.
Top 5 Iced Coffee Hacks You’re Not Using
Sugar Dissolution Fix
Problem: Granulated sugar won’t dissolve in cold coffee.
Solution: Place sugar on top of ice before brewing. Hot coffee dissolves it instantly as it hits the cup.
Milk Addition Timing
Always add dairy AFTER brewing. Hot coffee hitting cold milk causes curdling. Pour coffee over ice first, then add milk for smooth blending.
Batch-Brew Secret
Brew 3 dark roast K-Cups directly over 2 cups of ice in a large pitcher. Stir immediately—makes 24oz of undiluted iced coffee concentrate for the fridge.
Frozen Coffee Cubes
Brew extra coffee, freeze in ice trays. Use instead of water ice—adds flavor instead of diluting.
Flavor Layering Trick
Pour 1oz simple syrup in bottom of cup BEFORE ice. Creates beautiful flavor gradient as coffee brews over it.
Critical Safety Reminders
Glass shattering risk is real. We’ve verified multiple reports of tempered glass tumblers exploding when brewing directly into them. Thermal shock from 192°F coffee hitting 32°F glass creates instant fracture points. Always brew into plastic or stainless steel, then transfer to glass if desired.
Pro safety protocol: Keep your “brewing tumbler” in the same spot as your Keurig. This prevents accidental glass use when you’re half-awake craving coffee.
Final Flavor-Boosting Tips
Your Keurig iced coffee function delivers barista-quality results when you follow these rules: Use dark roasts or Brew Over Ice pods, fill vessel ⅔ full with ice, and never skip the mid-brew temperature shift. For non-Brew-Over-Ice models, the HyperChiller is a game-changer—just freeze it properly. Remember the golden rule: stronger coffee + less melt = perfect iced coffee. Start with the 8oz brew setting over ice, then adjust ice quantity to your taste. Within two minutes, you’ll have cafe-quality iced coffee without the $5 price tag—bold, refreshing, and perfectly chilled from first sip to last drop.


