
Your morning ritual shatters when your Keurig dispenses cold coffee instead of that perfect hot brew. This frustrating issue strikes thousands of coffee lovers daily, but most heating failures can be resolved without professional help. When your Keurig heater not working properly, it typically stems from three interconnected systems: water flow, heating element functionality, and clear internal pathways. Ignoring these problems only leads to complete machine failure, so addressing them promptly saves your morning routine and extends your appliance’s lifespan.
Most Keurig heating issues originate from mineral buildup, water pump problems, or component failures. The good news? Over 90% of “Keurig heater not working” cases can be fixed with basic troubleshooting and maintenance. Let’s get your machine back to delivering that perfect cup of hot coffee in the shortest time possible.
Why Your Keurig Delivers Cold Coffee Instead of Hot
Immediate Cold Brew Output
When your Keurig dispenses room-temperature coffee despite selecting hot settings, the heating element isn’t activating. This typically indicates either water flow problems preventing the heater from engaging or direct heating system failure. Without proper water movement through the heating chamber, the safety mechanisms shut off the heating element to prevent dry heating damage. Check if water flows at all during brewing—if completely absent, the pump likely isn’t moving water to the heating element.
Gradual Lukewarm Water Issues
Partial heating that worsens over time signals mineral buildup interfering with heat transfer. The heating element works but can’t reach proper temperature due to insulating calcium deposits on its surface. This gradual decline often begins with slightly cooler coffee that progressively becomes lukewarm. Hard water areas accelerate this problem, with visible white or brown deposits around the water reservoir opening serving as early warning signs.
Complete Water Flow Failure
If you hear brewing sounds but no water emerges from the spout, the pump can’t push water through the heating chamber. This critical safety feature prevents dry heating that could permanently damage the heating element. No water movement means the machine detects insufficient flow and automatically disables heating. Check for obstructions in the water pathway before assuming component failure.
Immediate Steps to Restore Keurig Heating Function
Verify Water Reservoir and Power Connection
Ensure your water reservoir contains at least 6 ounces of water and sits properly aligned in its slot. Remove and reseat the reservoir to establish full contact with the intake valve. Examine the water pickup area for visible debris blocking flow—coffee grounds or mineral deposits often accumulate here. Check that the power cord connects securely to both the machine and wall outlet without damage.
Execute Proper System Reset Procedure
Unplug your Keurig for 30 seconds minimum to clear electronic glitches affecting the heating system. Plug back in, press POWER, and hold the button for 10 seconds if it doesn’t illuminate immediately. Run a water-only brew cycle without a coffee pod to test heating function. This simple reset resolves temporary electronic malfunctions in approximately 30% of “Keurig heater not working” cases.
Measure Actual Temperature Output
Place a thermometer in your cup and run a 6-ounce water-only brew cycle. Proper coffee temperature ranges from 192-196°F. Anything below 180°F indicates heating problems requiring deeper troubleshooting. If the water feels warm but not hot, mineral buildup likely insulates the heating element. If completely cold, check water flow and pump function before proceeding.
Eliminate Mineral Buildup Causing Heating Problems
Identify Scaling Before It Worsens
White or brown deposits around the water reservoir opening signal internal scaling. Slow brew times, reduced water volume, and declining temperature all point to mineral accumulation. Hard water areas experience these issues more frequently, with scaling beginning within weeks of regular use. Check your machine’s brew speed—if it takes longer than 2 minutes for a 6-ounce cup, scaling has likely begun affecting performance.
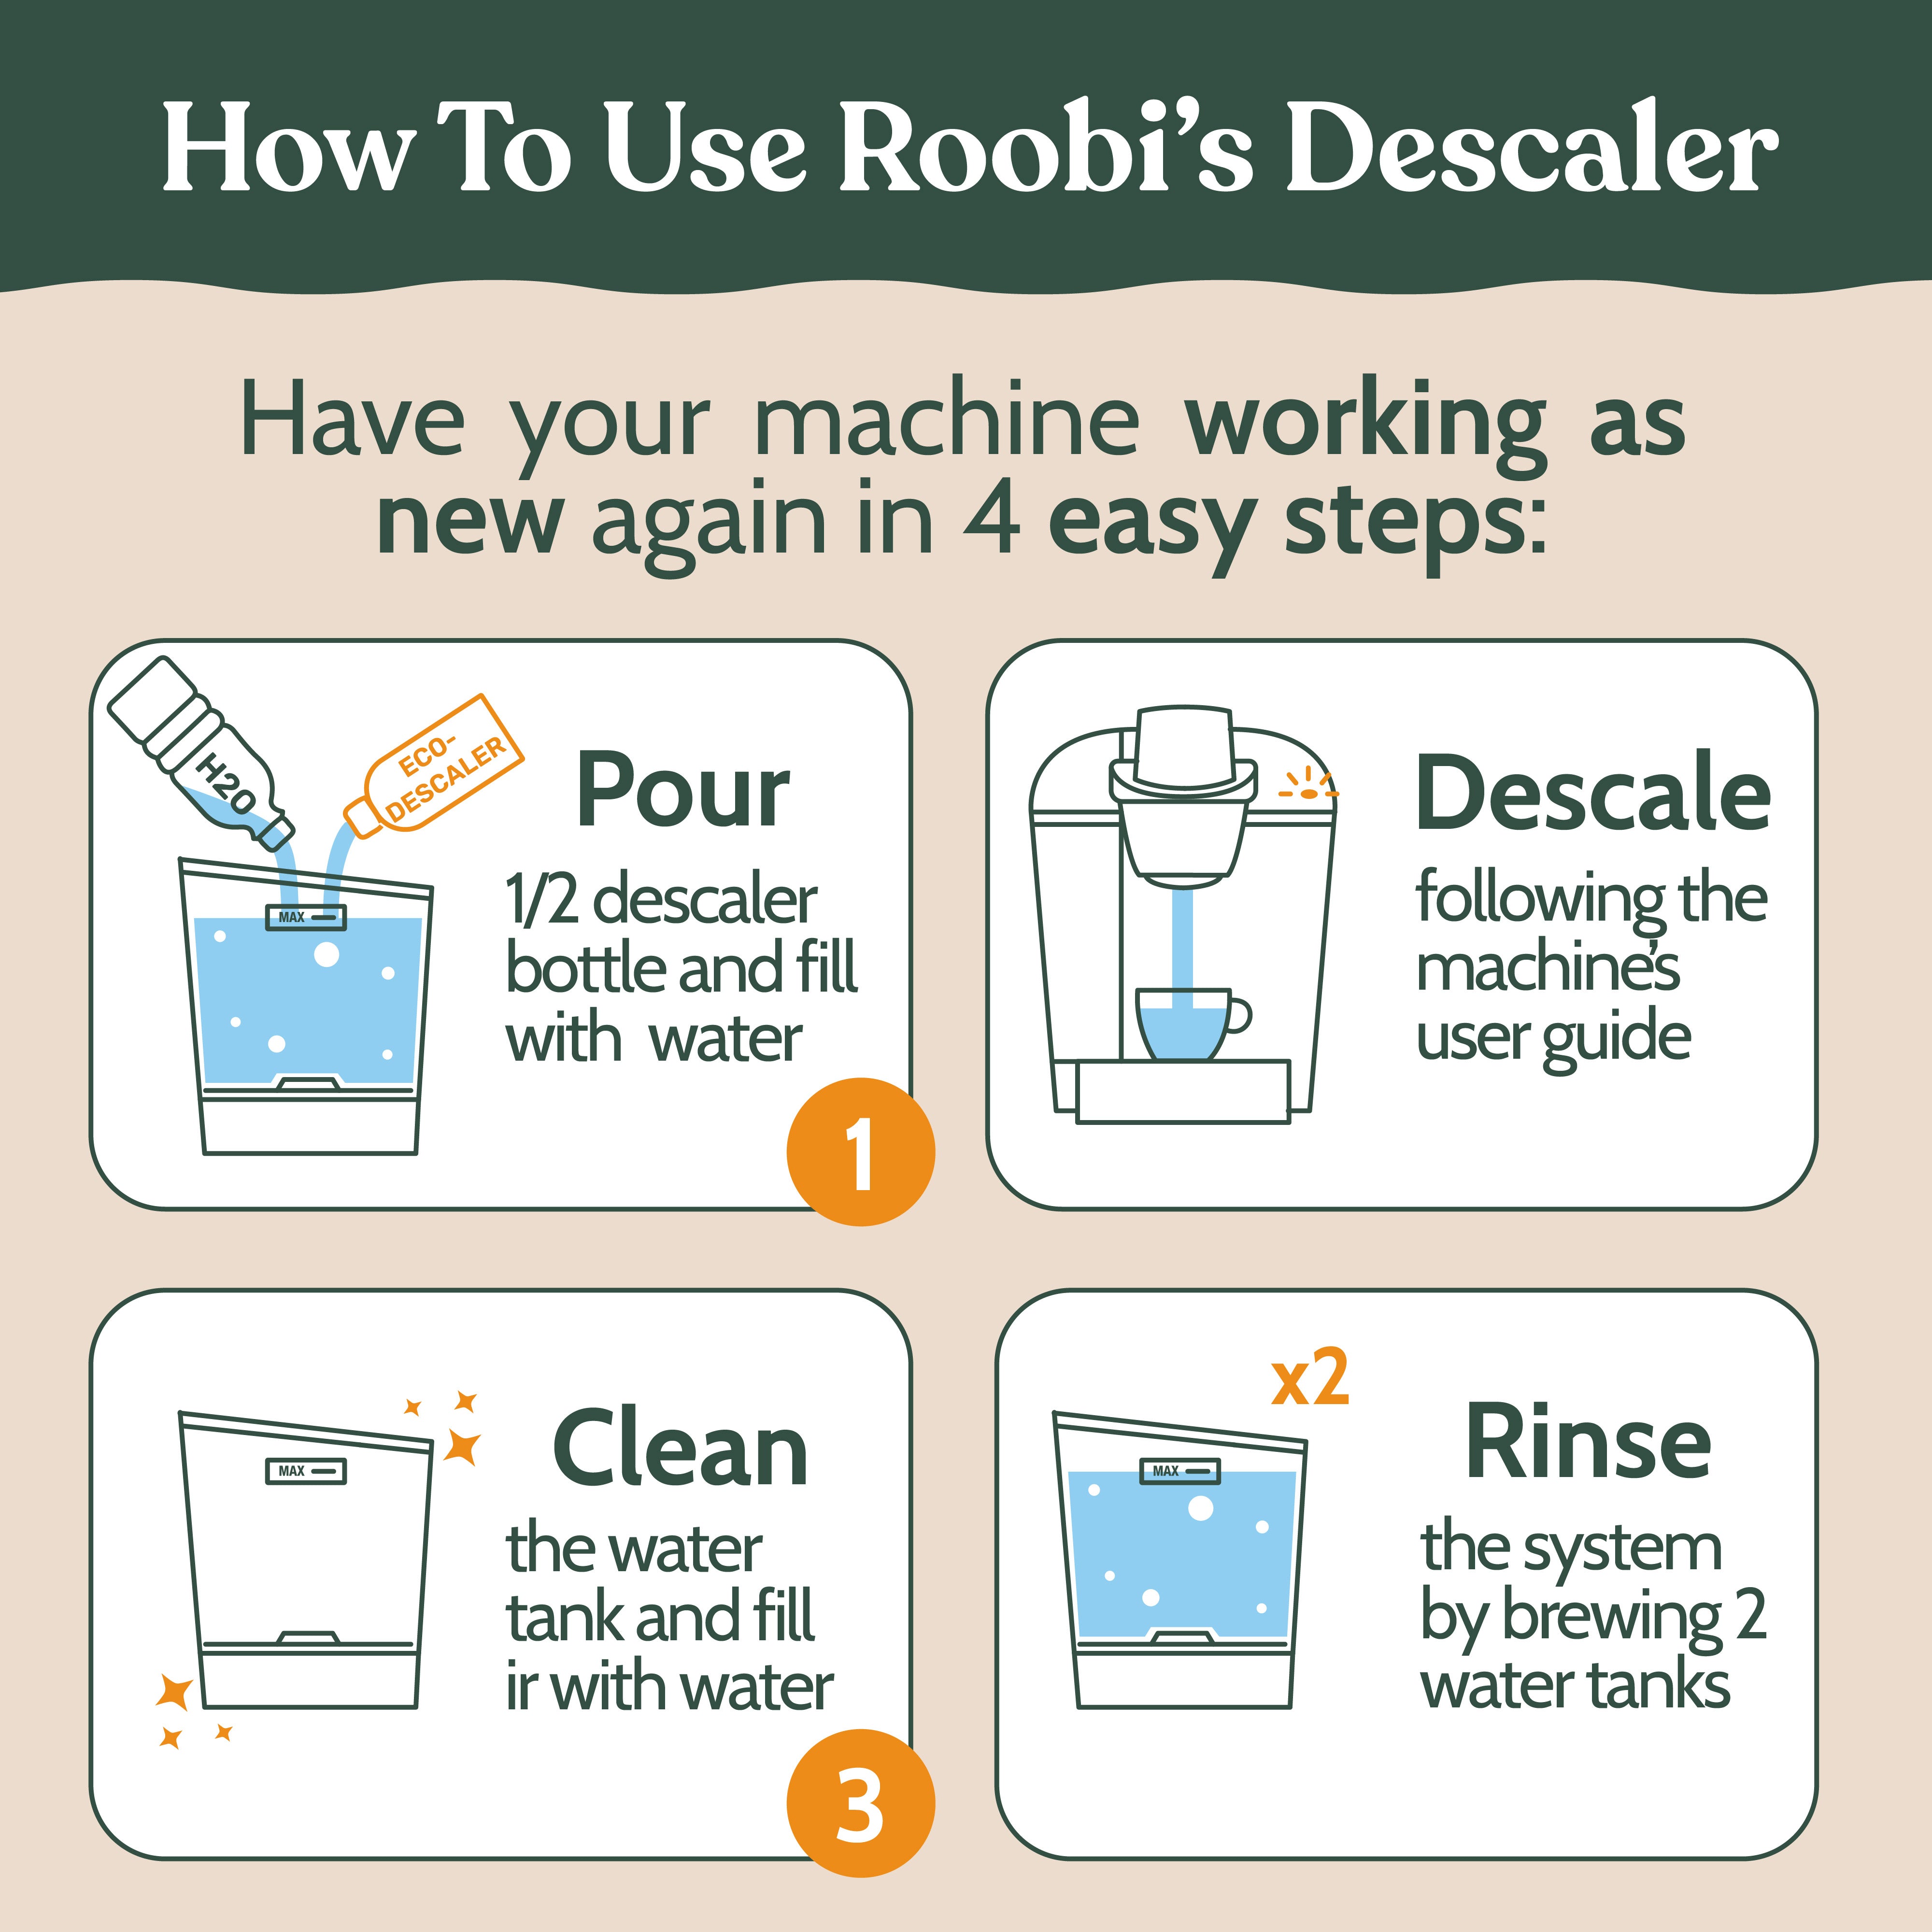
Complete Descaling Solution Process
Fill the reservoir with descaling solution or white vinegar mixed 1:1 with water. Run brew cycles until the reservoir empties, discarding each cup. Let the machine sit for 30 minutes with power on to break down stubborn deposits. Rinse thoroughly by running 3-4 full reservoirs of clean water through the system to eliminate vinegar taste. This process removes calcium deposits from the heating element and water pathways, restoring proper heat transfer.
Implement Effective Buildup Prevention
Switch to filtered water to reduce mineral content significantly—this single change extends heating system life by 2-3 years in most regions. In hard water areas, descale monthly; soft water regions need descaling every 3-4 months. Never use distilled water—it confuses sensors and worsens heating issues. Empty the reservoir completely each evening to prevent stagnant water mineral concentration.
Diagnose and Resolve Water Pump Issues
Listen for Critical Pump Sounds
During brewing, you should hear steady humming from the pump. Clicking, grinding, or complete silence indicates pump failure preventing water from reaching the heating element. No water flow means no heating occurs as a safety measure. If you hear the pump running but no water emerges, check for blockages between the reservoir and pump.
Measure Water Flow Rate Accuracy
Time a 6-ounce brew cycle. Normal completion takes under 2 minutes. Slower times suggest pump strain from blockages or failing components. Extremely fast emptying indicates pump bypass issues where water flows around rather than through the heating chamber. Consistent flow problems require professional pump replacement.
Clear Common Pump Blockages Yourself
Remove the water reservoir and locate the intake valve. Use a paperclip to gently clear any visible debris. Check the water line from reservoir to pump for kinks or obstructions. Persistent flow problems after clearing visible blockages indicate internal pump failure requiring professional service.
When Professional Heating System Repairs Become Necessary
Recognize Thermostat Failure Indicators
If descaling doesn’t restore heat, the thermostat may fail to signal the heating element. Symptoms include inconsistent temperature output or sudden shutdowns during brewing. Thermostat testing requires professional diagnosis as it involves internal electrical components and safety mechanisms.
Assess Heating Element Replacement Cost
Complete heating failure after confirming water flow indicates element burnout. This manifests as no heat generation despite proper water flow and electrical function. Element replacement typically costs 60-80% of a new machine price, making replacement more economical for older models.
Identify Control Board Malfunctions
Error codes or erratic heating patterns point to control board issues. The board manages heating cycles, temperature regulation, and safety shutoffs. When the display shows error messages or heating behavior becomes unpredictable, professional service becomes necessary for board-level repairs.
Smart Decisions for Persistent Keurig Heater Problems

Evaluate Warranty Coverage Immediately
Contact Keurig if your machine remains under warranty. Document all troubleshooting steps attempted, including descaling dates and any error codes displayed. Warranty coverage typically includes heating system failures not caused by mineral neglect, potentially saving you significant repair costs.
Prioritize Electrical Safety Concerns
Stop troubleshooting immediately if you notice burning smells, visible damage to the power cord, or electrical shorts. These indicate dangerous internal failures requiring professional service. Unplug the machine and do not attempt further repairs—electrical issues pose fire and shock hazards.
Calculate Repair Versus Replacement Value
Professional heating element replacement costs $80-150. If your Keurig is over 3 years old or this isn’t the first major repair, replacement often proves more economical. Compare repair quotes against new machine prices, considering that newer models may offer improved efficiency and features.
Prevent Future Keurig Heating Failures Completely
Maintain Strict Descaling Schedule
Mark your calendar for regular descaling based on water hardness. Set phone reminders for monthly checks in hard water areas. Consistent maintenance prevents 90% of heating failures caused by mineral buildup. Keep a descaling log on your machine noting each cleaning date—this prevents both over and under-maintenance while providing warranty claim documentation.
Implement Daily Maintenance Routine
Empty the reservoir completely each evening to prevent stagnant water mineral concentration. Wipe the reservoir opening weekly to remove buildup before it enters internal systems. Check the K-cup holder for coffee grounds that might contaminate water pathways and cause blockages.
Optimize Water Quality for Longevity
Install an inline water filter or use filtered water exclusively to minimize mineral deposits. Test your water hardness quarterly and adjust descaling frequency accordingly. Avoid distilled water as it affects sensor readings and can trigger false error codes in your Keurig’s heating system.
Quick Keurig Heater Fix Protocol
When your Keurig heater not working properly, follow this streamlined approach: First, verify water levels and perform a system reset. If cold coffee persists, run a complete descaling cycle using vinegar solution. Test water flow and listen for proper pump operation. Most heating problems resolve with thorough descaling and proper maintenance—mineral buildup causes 70% of cases, pump issues 20%, and component failure just 10%.
Pro tip: Keep a descaling log on your machine noting each cleaning date. This prevents both over and under-maintenance while providing warranty claim documentation if needed. Consistent care ensures your Keurig delivers perfect hot coffee for years rather than months, turning frustrating cold brew mornings into reliable hot coffee satisfaction.


