
Your Keurig powers on, lights up, but nothing flows from the brew head. Sound familiar? You’re not alone—pump issues represent the #1 failure mode across all Keurig models. The good news: 80% of these problems resolve with simple DIY fixes you can complete in under 15 minutes. This guide walks you through proven solutions for every pump symptom, from complete water stoppage to frustrating partial cups, using only household items and basic tools.
Most Keurig coffee maker pump problems start suddenly—your morning routine derailed by silence where the satisfying gurgle should be. Whether you own a budget K-Classic or premium K-Supreme, understanding these core failure patterns saves time, money, and caffeine withdrawal headaches. Let’s diagnose and fix your stubborn brewer right now.
Diagnose Your Exact Pump Failure Type
No Water Flow Emergency Symptoms
When your Keurig refuses to dispense any liquid, these specific signs pinpoint the cause:
- Complete silence after power-on: The pump never engages despite normal indicator lights
- Grinding or humming with zero output: Motor strains but water won’t move
- “Add Water” light stays lit despite a full reservoir (common with float issues)
- Persistent “Prime” errors that won’t clear after standard reset attempts
Partial Flow Frustrations
If your brewer produces weak streams or incomplete cups, watch for these telltale clues:
- Sputtering streams instead of steady flow (often scale-related)
- Consistent under-pouring (e.g., 4 oz instead of selected 8 oz)
- Excessively slow cycles exceeding 75 seconds for a 10-oz brew
- Mid-brew shutdowns where flow stops abruptly halfway through
Critical Diagnostic Test: Remove the reservoir and tilt your Keurig 45° forward over the sink. If water suddenly gushes into the drip tray, you’ve confirmed an air lock—the most common culprit behind Keurig coffee maker pump problems.
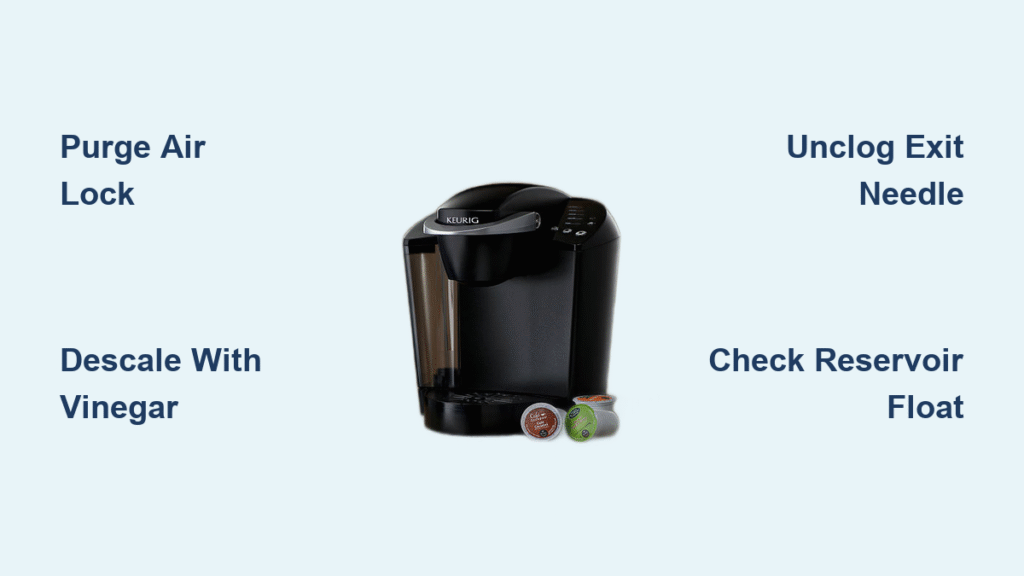
Purge Air Locks in 7 Simple Steps
Air trapped in internal lines prevents pump priming—a fixable issue in 70% of “no flow” cases. Complete this sequence before attempting complex repairs:
- Power down your Keurig and unplug it from the wall
- Empty the water reservoir completely and remove the drip tray
- Invert the entire brewer over your sink (base facing up)
- Tap the bottom firmly 5-7 times with your palm to dislodge air pockets
- Reinstall the reservoir filled precisely to the MAX line with fresh water
- Run a 6-oz cleansing brew cycle (no K-Cup)
- Repeat twice more if flow remains weak or sputtering
Pro Tip: Prevent recurring air locks by always refilling when 1 cup of water remains in the reservoir. Never add cold water to a hot machine—let it cool 10 minutes first.
Eliminate Scale Buildup With Vinegar
Hard water minerals clog pump valves and boiler passages, causing slow flow and partial cups. This vinegar method outperforms expensive descaling solutions:
Mix: Equal parts white vinegar and water (500 mL each for most models)
Descale Process:
– Fill reservoir with solution
– Start a 10-oz brew cycle, then pause mid-stream by lifting the handle
– Let solution soak for 30 minutes to dissolve scale
– Complete the cycle and repeat until “Add Water” appears
– Rinse thoroughly with three full reservoirs of fresh water
Success Check: Time your next 10-oz brew—properly descaled machines complete cycles in under 75 seconds. Visible white flakes in the drip tray confirm scale was the issue.
Unclog Exit Needles in 2 Minutes

Coffee grounds jamming the exit needle create back-pressure that stalls your pump. Use this foolproof clearing technique:
Tools Needed: Straightened paperclip or Keurig maintenance tool
Clearing Steps:
1. Power off and remove the K-Cup holder
2. Insert paperclip into the exit needle (bottom of holder)
3. Work the clip in/out 5-6 times to dislodge debris
4. Rinse holder under warm water while shaking vigorously
5. Reinstall and test with a cleansing brew
Monthly Maintenance: Prevent 90% of needle clogs by running this paperclip method every 30 days—especially if using tea or hot chocolate pods.
Repair Stuck Reservoir Floats

A jammed magnet float sends false “empty” signals, tricking your pump into inactivity. Here’s the fix:
Diagnose First: Slide the float (rear-right corner of reservoir) with your finger—it must move freely up/down
Cleaning Protocol:
– Soak reservoir in hot, soapy water for 10 minutes
– Scrub the float cavity with a soft toothbrush
– Rinse thoroughly and wipe dry before reinstalling
Replacement Tip: If cleaning fails, float assembly kits cost $8-12 (search “Keurig K200 float assembly”). Replace if the float sticks or shows visible cracks.
Model-Specific Pump Fixes That Work

K-Classic (K55/K50) Owners
- Force descale reset: Hold 8-oz + 10-oz buttons for 3 seconds when “Descale” light appears
- Check reservoir seal: Inspect the rubber gasket for cracks every 6 months—replace if hardened
K-Mini Series Users
- Internal air lock fix: Invert unit completely and shake vigorously for 30 seconds
- Accelerated descaling: With no external reservoir, scale builds faster—descale monthly
K-Supreme SMART Models
- Multi-stream needle care: Use the included orange maintenance pod monthly
- Hidden error check: Open Keurig app > “Brewer Health” to uncover suppressed pump errors
Prevent Future Pump Failures
| Maintenance Task | Frequency | Critical Insight |
|---|---|---|
| Vinegar descaling | Every 3 months (soft water) or 6 weeks (hard water) | Vinegar works as well as $15 branded solutions |
| Needle clearing | Monthly | Takes 2 minutes, prevents 90% of flow issues |
| Float inspection | Quarterly | Check during routine reservoir cleaning |
| Reservoir seal care | Semi-annually | Apply food-grade silicone grease to O-rings |
Hard Water Hack: If your tap exceeds 120 ppm hardness (common in Midwest/Southwest), descale every 6 weeks. Run two cleansing brews after using filtered water pitchers—they release micro-bubbles that cause air locks.
Repair vs Replace Decision Guide
Repair immediately when:
– Your unit is under 3 years old
– DIY parts cost less than 50% of a new machine ($45+ for entry models)
– Problem is air lock, scale, or minor electrical (thermal fuse/diode)
Replace instead when:
– Multiple components fail simultaneously (pump + heater)
– Pump coil measures open circuit (>200 Ω resistance)
– Original cost was under $100 and unit is 4+ years old
Warranty Note: Keurig covers pump failures under their 1-year warranty—contact support before DIY repairs. Have your purchase receipt ready.
Emergency No-Tools Fixes for Immediate Relief
Total flow failure with power light on:
1. Remove reservoir and firmly reseat it
2. Turn unit upside down for 10 seconds
3. Refill and retry
Only partial cups dispensing:
1. Run a 4-oz cleansing brew (no pod) to clear minor clogs
2. Tap reservoir sides gently to free stuck float
3. Select original brew size again
Loud grinding noises:
1. Power off immediately to prevent damage
2. Remove pod holder and inspect for foreign objects
3. Clean exit needle with paperclip before retrying
Final Checklist Before Professional Help
- [ ] Completed air lock purge procedure (inversion + tapping)
- [ ] Descaled with vinegar solution (including soak time)
- [ ] Cleaned exit needle thoroughly with paperclip
- [ ] Verified reservoir float moves freely
- [ ] Tested unit on different electrical outlet
Most Keurig coffee maker pump problems resolve within these steps. If flow remains restricted after following this guide, contact Keurig support with your troubleshooting history—they’ll often expedite warranty service when you’ve documented completed diagnostics. Remember: 80% of pump failures stem from preventable issues like scale buildup and air locks. With monthly maintenance, your Keurig will deliver perfect brews for years. For persistent electrical issues (open coil, failed diode), replacement pumps cost $18-25—making repair worthwhile for machines under warranty or high-end models. Don’t let pump problems derail your morning ritual; tackle them today with confidence.


