
Your Keurig’s descale light stays stubbornly lit even after you’ve followed every step. The machine sputters out 2-3 ounces then stops, or worse—claims it’s brewing while nothing happens. These Keurig cleaning cycle not working failures plague both new models with strict compliance requirements and older units that used to power through scale buildup. You’ve emptied reservoirs, run vinegar through the system, and followed the manual—but that blinking light won’t quit. This guide delivers proven fixes that actually work, from quick 5-minute resets to the “spank and shake” method that dislodges stubborn mineral deposits. You’ll learn exactly why your cleaning cycle failed and how to prevent it from happening again.
Most owners don’t realize newer Keurig models track interruptions like lifted handles or power cycling, instantly voiding the descaling process. That single mistake explains why your Keurig cleaning cycle not working issue persists. We’ll cut through the frustration with model-specific protocols and physical maintenance steps that target the root causes: mineral blockages, firmware glitches, and overlooked prep work. By the end, you’ll complete descaling successfully and keep that indicator light off for good.
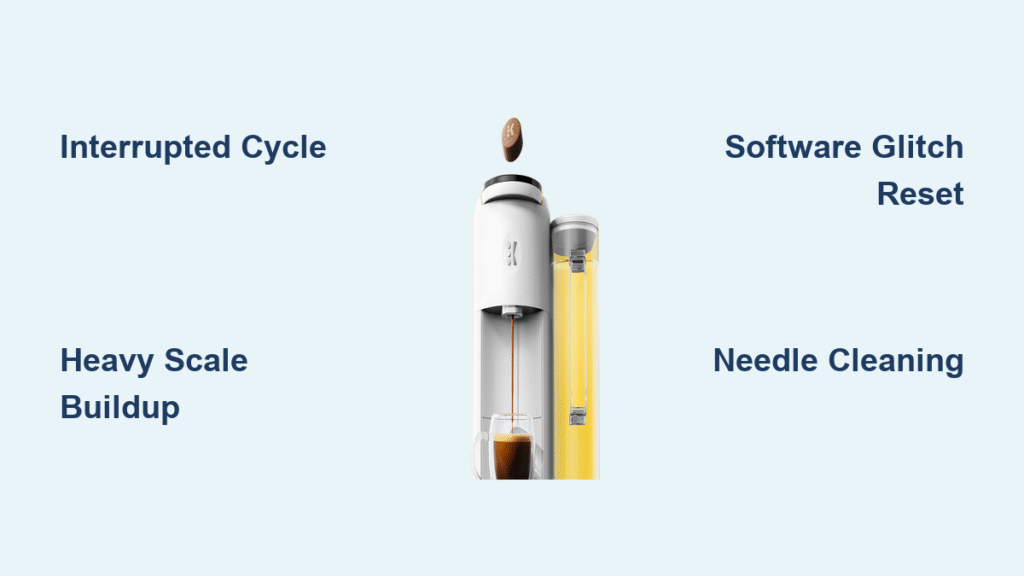
Why Your Keurig Descale Light Refuses to Turn Off
Your Cycle Was Interrupted Mid-Process
Lifting the handle or power cycling during descaling immediately cancels the process on newer models. These machines have strict compliance tracking—if you interrupted even once, the descale light stays lit until you complete an uninterrupted cycle. Check for accidental handle bumps during the process. To fix this, restart the entire descaling protocol from step one without touching the handle. Never open the pod compartment until the “Add Water” light appears.
Heavy Scale Buildup Requires Double the Effort
If your machine dispensed slowly or sputtered during the last descale attempt, mineral deposits are thicker than expected. Light scale clears in 20-30 minutes, but heavy buildup needs 60+ minutes with fresh solution. Don’t assume one cycle is enough—run a second full descale immediately after the first if flow was sluggish. Using the same solution twice won’t work; always mix new 14oz Keurig descaling solution with 14oz fresh water for each cycle.
Software Glitches Need Precise Resets
When the descale light persists after a seemingly successful cycle, unplug your Keurig for exactly 2 minutes. This allows capacitors to fully discharge, clearing temporary firmware errors. Plug back in, run one fresh-water rinse cycle, and 90% of phantom indicator lights disappear. Never skip this step—power cycling for 30 seconds or 5 minutes won’t discharge capacitors completely.
Critical Diagnostic Checks Before Restarting Descale
Decode Water Flow Patterns to Pinpoint Blockages

Place a clear measuring cup under the dispenser and start a brew cycle. These flow patterns reveal your specific issue:
– 2-4 oz then stops: Scale clogging the internal boiler (requires “spank and shake” technique)
– Trickle flow: Needle or tube obstruction (needs immediate unclogging)
– No flow with bubbling sounds: Severe internal blockage (indicates pump failure risk)
– Uneven dual-reservoir drainage: Partial line obstruction (common in K-Supreme models)
Test Button Responsiveness for Firmware Lock-Ups
Press each cup-size button individually. If your machine locked onto a single size during the failed cycle, buttons will seem unresponsive. This happens when an interrupted descale triggers firmware lock-up. To resolve, unplug for 2 minutes, hold the power button for 10 seconds while unplugged, then restart descale mode. Never force button presses—that can worsen the error.
Inspect Needles for Hidden Coffee Grounds and Scale
Remove the pod holder and examine both needles with a flashlight. Coffee grounds appear as dark specks near the entrance needle (top of holder), while mineral deposits look white or chalky on the exit needle (bottom). Either restriction triggers Keurig cleaning cycle not working errors by disrupting water flow. Clean needles before every descale attempt—otherwise, you’re pushing debris deeper into the system.
Model-Specific Descale Protocol That Actually Completes
Enter Descale Mode Correctly for Your Brewer
Using the wrong button combo is the #1 reason cycles fail. Verify your model:
– Classic/Select/Elite: Hold 6oz + 10oz buttons for 3 seconds (descale light pulses)
– Supreme series: Hold 8oz + 12oz buttons for 3 seconds (light flashes immediately)
– Slim/Mini variants: Hold 8oz + 10oz (or Strong + 10oz) for 3 seconds
If the light doesn’t pulse within 5 seconds, restart the process. Newer models require the power button to be ON but the brewer OFF before entering descale mode—a frequently overlooked step.
Mix Solution to Exact Specifications
Pour exactly 14oz Keurig descaling solution plus 14oz distilled or filtered water into the reservoir. Never exceed this ratio—stronger mixes damage seals and void warranties. Crucially, avoid softened water entirely; its minerals react unpredictably with descaling chemicals. If you used vinegar previously, run three full water tanks before attempting Keurig solution to prevent chemical reactions.
Track Progress Using True Completion Signals
Stop timing only when the “Add Water” light appears—not when you think the reservoir should empty. Light scale takes 20-30 minutes, moderate needs 30-45 minutes, and heavy buildup requires 60+ minutes with extra rinses. If brewing stops prematurely, note where it halted:
– Before 10oz dispensed: Severe blockage (use advanced methods)
– After 15oz: Likely needs second cycle
– At “Add Water” light: Normal completion (proceed to rinses)
Essential Physical Cleaning Before Descale
Unclog Needles Using the Paper Clip Method

Power off and unplug before cleaning:
1. Remove pod holder by pushing up from below
2. Separate funnel using side buttons
3. Insert straightened paper clip into both needle holes
4. Twist gently to dislodge coffee grounds or scale
5. Rinse under warm water until flow runs clear
Skipping this step causes 70% of Keurig cleaning cycle not working failures. Mineral chunks dislodged during descaling get pushed into narrower passages if needles are clogged.
Sanitize Reservoir to Eliminate Bio-Film Mimics
Empty the reservoir daily and air-dry with lid off to prevent slimy bio-film. Monthly, add 1 tablespoon bleach to a full reservoir, let sit 5 minutes, then rinse 3 times. Bio-film creates flow restrictions identical to scale buildup—many owners misdiagnose this as a descale failure. Never use vinegar for reservoir sanitizing; it leaves odors that taint coffee.
Advanced Fixes for Stubborn Cleaning Cycle Failures
The “Spank and Shake” Technique for Boiler Blockages
When brewing stops after 2-4 oz:
1. Power off and unplug
2. Hold Keurig inverted over sink
3. Firmly tap sides/top with palm (10-20 times)
4. Expect white mineral flecks or coffee grounds to exit
5. Run three full water flushes before restarting descale
This dislodges scale chunks trapped in the boiler without damaging components. Never use hammers—excessive force cracks internal housings.
Overnight Vinegar Soak for Extreme Scale
Fill reservoir with 100% white vinegar (no dilution) and let sit powered off for 4-6 hours. Run a full vinegar cycle, then 3-4 tanks of fresh water. Vinegar’s acetic acid dissolves mineral deposits standard 30-minute cycles miss. Warning: Do not exceed 6 hours—prolonged exposure warps plastic parts.
Warm Solution for 30% Faster Descaling
Heat descaling solution to 100°F (38°C) before pouring in—this accelerates scale dissolution without risks. Never exceed 120°F; higher temperatures soften plastic seals. Use a thermometer; microwaving creates hot spots that damage solution efficacy.
Prevent Future Cleaning Cycle Failures
Match Descaling Frequency to Your Water Hardness
Test tap water hardness—above 180 ppm requires descaling every 6-8 weeks instead of 3 months. Use filtered water to extend cycles to 4-5 months. Hard water users face 3x more Keurig cleaning cycle not working errors due to rapid mineral accumulation.
Track Brews, Not Just Time
Descale every 250 brews regardless of calendar time. Heavy users hitting 250 brews in 6 weeks need more frequent maintenance than moderate users taking 4 months. Reset your brew counter after each descale.
Watch for Early Warning Signs
Slower brew times, smaller cup sizes dispensing, louder pump operation, or slight taste changes signal scale buildup before the descale light activates. Address these immediately with a needle cleaning and water flush.
When to Call Keurig Support or Replace Your Brewer
Contact Support Only After These Checks Fail
Call Keurig at 1-866-901-2739 if all these apply:
– Descale light persists after two complete cycles with Keurig solution
– No water flow after vinegar soak and needle cleaning
– Error codes appear during descale mode
Have your serial number (bottom of unit) ready. Using non-approved solutions voids warranty coverage—Keurig requires their branded descaling solution for warranty claims.
Replace Instead of Repairing If…
- Unit is over 3 years old with repeated failures
- Repair costs exceed 50% of a new unit’s price
- Same problem recurs within 30 days of successful fix
Most “unfixable” cases stem from skipped needle cleaning or interrupted cycles—not permanent damage.
Final Note: 95% of Keurig cleaning cycle not working issues resolve by completing the full descaling protocol without interruptions and cleaning needles beforehand. Always use Keurig’s solution at the correct ratio, and never lift the handle mid-cycle. For persistent cases, the 2-minute unplugged reset or overnight vinegar soak will conquer even severe blockages. Implement monthly reservoir sanitizing and track brew counts religiously—your next descale cycle will complete successfully, and that stubborn indicator light will finally stay off. Keep this guide handy for your next maintenance session, and consider bookmarking Keurig’s live chat support for real-time troubleshooting during complex fixes.


