

That dreaded morning ritual—you press “brew,” hear the pump struggling, and watch water drip onto your counter instead of filling your mug. When your Keurig B70 Platinum starts leaking or takes forever to brew, the culprit is almost always the tiny check valve hidden inside. This critical component controls water direction through your machine, and when it fails, your coffee routine collapses. The good news? You can perform this keurig check valve fix yourself using basic tools in under 30 minutes. Forget expensive repairs or replacing your entire machine—this guide delivers the exact steps to eliminate slow brewing and water leaks permanently.
Ignoring a failing check valve leads to worsening leaks, mineral buildup in other components, and eventually complete brewing failure. But replacing this $5 part restores factory performance immediately. By the end of this guide, you’ll know how to diagnose valve failure, safely access the component, install a replacement, and prevent future issues—all while saving $150+ in repair costs.
Why Your Keurig Check Valve Fails and How to Confirm It

Mineral Buildup Clogs Water Flow
Hard water minerals accumulate inside the valve over time, preventing the internal flap from sealing properly. You’ll notice brewing times doubling—from 60 seconds to over 2 minutes for an 8oz cup. The machine strains audibly as water fights past the obstruction. Critical visual clue: Check for white crust around the valve connections when you open the machine.
Physical Damage Causes Backflow Leaks
Cracks in the plastic housing or a broken internal flap allow water to flow backward during brewing cycles. This creates pressure that forces water out through seams, forming puddles under your machine or dripping from the K-cup holder area. Don’t confuse this with reservoir leaks—check valve leaks specifically occur during brewing cycles, not when the machine sits idle.
Complete Valve Failure Blocks Brewing
When the flap jams shut or the valve cracks internally, water flow stops entirely. Your Keurig powers on and makes pump noises, but no water exits the spout. Quick diagnostic test: Run a brew cycle without a K-cup. If water dribbles weakly or not at all despite a full reservoir, the check valve is likely the culprit.
Essential Tools for Your Keurig Check Valve Replacement
Must-Have Tools:
– Phillips #0 precision screwdriver (standard Phillips strips screws)
– Sharp scissors or wire cutters (for zip ties)
– Replacement check valve (Keurig part #160750-005 or compatible)
Pro Tip: Order valves from appliance parts suppliers like Encompass Parts or salvage from thrifted B70 models. Search “Keurig B70 check valve” on eBay—functional units often sell for under $3. Never skip this step: Attempting the keurig check valve fix without the replacement part wastes time and risks damaging tubing during disassembly.
Critical Safety Prep Before Opening Your Machine
Unplug immediately and wait 15 minutes—this is non-negotiable. Residual heat in the heating element can cause burns, and live electrical components risk shock. Place the unplugged machine on a dry towel to catch any residual water. Warning: Skipping this step risks severe electrical hazards or melting internal wiring during disassembly.
Accessing the Check Valve: Top Cover Removal
Remove Lid Mounting Screws
Lift the brew handle fully and open the top lid. Locate the two Phillips screws at the rear corners—these secure the outer shell. Use your #0 screwdriver to remove them slowly (they’re tiny!). Pro tip: Place screws on a magnetized tray to prevent losing them. Forcing stripped screws requires drill extraction—avoid this headache.
Lift the Housing Safely
Press down firmly on the front edge of the lid while pulling it toward you. The cover will release from hidden clips. Watch for resistance—if it sticks, check for missed screws. Yanking can crack plastic mounts. Once free, set the cover aside to reveal the tubing network leading to the puncture needle assembly.
Disconnecting Tubing: Avoiding Costly Mistakes

Release Puncture Needle Mounts
Identify the two small screws securing the water tubing to the needle assembly (the metal spike that pierces K-cups). Remove these screws carefully—overtightening now strips them permanently. Hold the assembly steady with one hand while unscrewing. Note how the tubing angles toward the needle; this matters for reassembly.
Free the First Valve Connection
Locate the check valve—it’s a small cylindrical plastic piece (about 1/2 inch long) with tubing connected on both ends. Grip the valve body firmly and rotate it counterclockwise while pulling straight out. Never twist the tubing—this cracks brittle plastic. If stuck, wiggle gently while rotating. Forcing it breaks the connector.
Cut the Securing Zip Tie
On the opposite side, find the zip tie anchoring the tubing near the valve. Position scissors to cut only the zip tie’s locking head—avoid nicking the tubing. Critical: Leave 1/4 inch of the tie intact for reattachment later. Cutting flush makes re-securing difficult.
Disconnect the Second Valve End
Repeat the counterclockwise twist-and-pull motion on the remaining connection. The old valve should now slide free. Inspect it immediately: Look for white mineral deposits inside, cracks, or a stiff flap. This confirms your diagnosis.
Installing the Replacement Valve Correctly
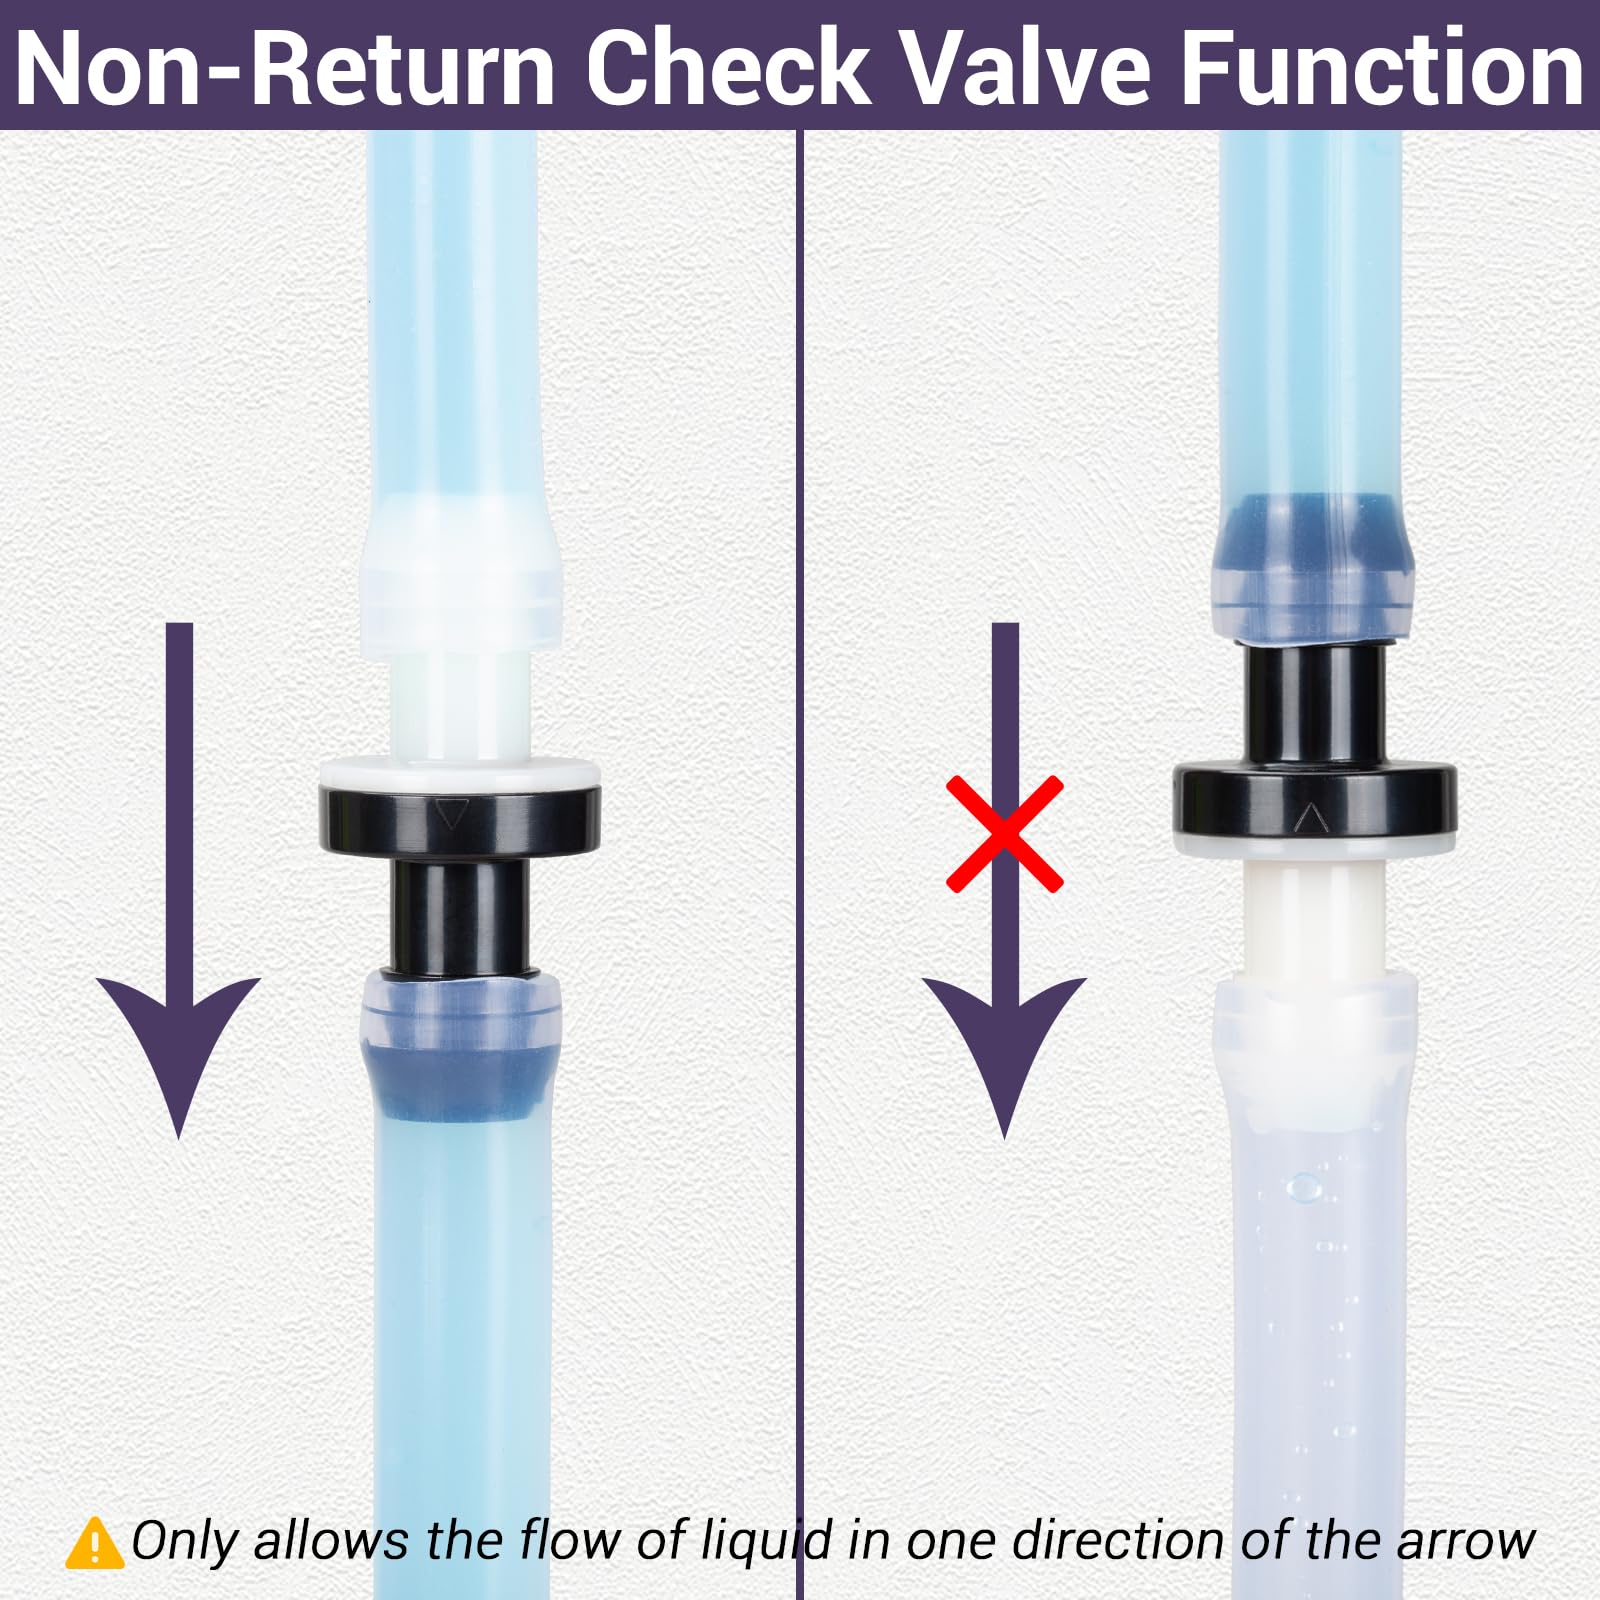
Position Matters: Arrow Direction
Hold the new valve so the molded arrow points toward the puncture needle assembly. This arrow indicates water flow direction—installing backward blocks all brewing. Common mistake: Rushing this step causes “no water” symptoms after reassembly. Double-check before connecting tubing.
Secure Tubing Connections
Push each tubing end firmly onto the valve’s barbed connectors until they seat completely (you’ll hear a faint click). Test connection security: Gently tug on each tube—no movement should occur. Loose connections cause immediate leaks during testing.
Reattach Tubing with New Zip Tie
Use a fresh 4-inch zip tie (included with replacement valves) to secure the tubing. Slide it through the existing anchor point, loop around the tubing, and tighten until snug. Warning: Overtightening pinches the tube and restricts flow—stop when resistance increases slightly.
Reassembly: Avoiding Costly Errors
Reconnect Puncture Needle Assembly
Align the tubing with the puncture needle and reinstall the two small screws. Tighten only until resistance is firm—these screws snap easily. Cross-threading is common; start screws by hand before using the driver.
Reattach Top Housing
Position the cover so it seats evenly over all internal components. Press down firmly along the front edge to engage clips, then replace the two rear screws. Check alignment: Misaligned covers cause lid jams and uneven pressure during brewing.
Testing Your Keurig Check Valve Fix
Dry Run Without K-Cup
Fill the reservoir halfway and run a brew cycle without a K-cup. Watch for: Steady water stream (not sputtering), no leaks at valve connections, and completion in under 90 seconds. Leaks here mean loose tubing—recheck connections.
Full Performance Test
Brew an 8oz cup with a K-cup. Success indicators: Full cup in 60-75 seconds, zero leaks, and consistent flow rate. Failure signs: Slow brewing = mineral buildup elsewhere; leaks = improper valve seating; no water = backward valve installation.
Preventing Future Check Valve Failures
Descale Every 30 Days (Non-Negotiable)
Use Keurig’s official descaling solution or a 50/50 white vinegar-water mix. Run 5-6 cleansing cycles monthly. Why this works: Vinegar dissolves mineral deposits before they harden inside the valve. Skipping this causes 90% of repeat failures.
Switch to Filtered Water Immediately
Tap water contains minerals that destroy valves. Using filtered or bottled water reduces deposits by 70%. Pro tip: Keep a dedicated pitcher of filtered water next to your Keurig—this takes 10 seconds but doubles valve lifespan.
Monthly Connection Check
Every 4 weeks, unplug the machine and inspect valve connections for cracks or looseness. Quick test: Squeeze tubing near the valve—it should feel firm, not spongy. Sponginess indicates micro-leaks starting.
Troubleshooting Post-Repair Issues
Persistent Leaks at Valve Connections
Cause: Tubing not fully seated on new valve. Fix: Disconnect and reconnect both ends, ensuring audible click. Replace cracked tubing with 1/4″ ID appliance tubing (sold at hardware stores).
Slow Brewing After Replacement
Cause: Mineral buildup in pump or heater tube. Fix: Run 3 consecutive descaling cycles. If unresolved, flush with 2 cups of undiluted vinegar followed by 5 water cycles.
No Water Flow Post-Repair
Cause: Valve installed backward (arrow facing wrong direction). Fix: Reopen machine, rotate valve 180 degrees, and retest. This solves 95% of “no water” cases after valve replacement.
Sourcing Replacement Valves When Keurig Won’t Sell Them
Keurig intentionally doesn’t sell standalone check valves—they want you to buy new machines. Your best sources:
1. Appliance parts sites: Search “Keurig B70 check valve” on Appliance Parts Pros ($4.99)
2. Thrift store donors: Broken B70 models often have functional valves (check for $5 units)
3. Universal valves: Part #CV-100 fits most Keurig models ($2.50 on Amazon)
Warning: Avoid “compatible” valves sold by coffee accessory sites—many have incorrect internal dimensions causing immediate failure.
Your Keurig B70 Platinum should now deliver perfect cups in record time with zero leaks. This keurig check valve fix costs under $5 and takes less time than your morning coffee run. Remember: monthly descaling with filtered water prevents 90% of future failures. If symptoms return, revisit this guide—you’ll replace the valve faster the second time. Never tolerate slow brewing or countertop puddles again; with this repair in your toolkit, you control your coffee destiny. For immediate troubleshooting, bookmark this page—your future self will thank you when the next leak strikes.


