
That frustrating moment when your morning coffee ritual gets derailed by a sputtering Keurig or weak brew is completely preventable. Regular Keurig brewer maintenance isn’t just about keeping your machine looking clean—it’s the critical difference between a perfect cup and a disappointing morning. When your brewer starts taking forever to heat up, delivering lukewarm coffee, or displaying mysterious error messages, it’s almost always crying out for attention you can provide in minutes.
Whether you’re dealing with funky-tasting coffee, slow brewing times, or simply want to extend your machine’s life beyond the warranty period, this guide covers every maintenance task you need. Most Keurig problems stem from neglected cleaning routines that take less time than your morning coffee break. By following this comprehensive Keurig brewer maintenance schedule, you’ll transform your machine from a source of frustration to your most reliable kitchen companion.
Daily Cleaning Essentials That Take Less Than 2 Minutes
Remove Used Pods Before They Harden
That used K-Cup sitting in your brewer isn’t just unsightly—it’s actively working against your next perfect cup. Coffee residue begins hardening within minutes, creating stubborn buildup that requires aggressive cleaning later. Wait just 2-3 minutes for the pod to cool slightly (to avoid burns), then pop it out and dispose of it immediately. This simple 10-second habit prevents bacterial growth and keeps your pod holder from developing that unpleasant stale coffee smell that lingers for days.
Pro tip: Keep a small trash bin within arm’s reach of your brewer to make this effortless—no more carrying used pods across the kitchen.
Quick Surface Wipe-Down After Every Use
Grab an antibacterial wipe and give your brewer’s exterior a thorough once-over while your coffee finishes brewing. This daily ritual matters most in offices or households where multiple people use the machine. Focus your attention on these high-traffic zones:
- Drip tray: Coffee spills collect here, creating sticky residue
- Handle: The most-touched surface that transfers oils and bacteria
- Control panel: Prevents sticky buttons that malfunction over time
- Water reservoir lid: Stops dust and debris from contaminating your water supply
This 30-second routine prevents the accumulation of grime that becomes exponentially harder to remove with time.
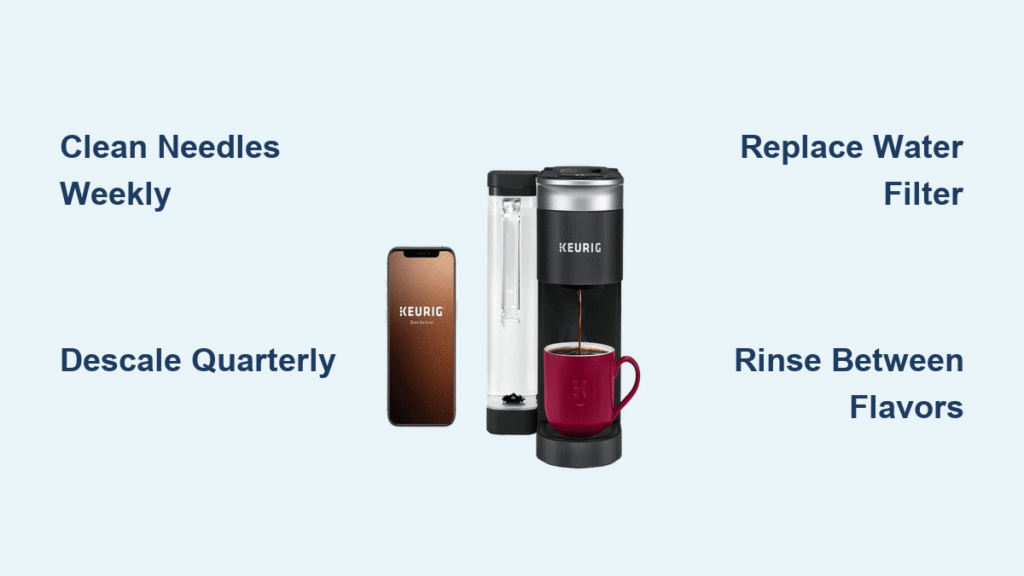
Rinse Between Flavors With One Quick Cycle
Just brewed a sweet caramel macchiato? Don’t let those flavors invade your next cup of dark roast. Run a cleansing brew cycle—simply close the lid without inserting a pod and press the brew button. This flushes residual oils from the internal pathways, preventing flavor transfer that ruins your coffee experience.
When to rinse immediately:
– After brewing flavored coffees or hot cocoa
– Following specialty beverages like chai or matcha
– Before switching between regular and decaf varieties
– After using any non-coffee K-Cup options
Weekly Deep Clean Protocol That Prevents 80% of Problems
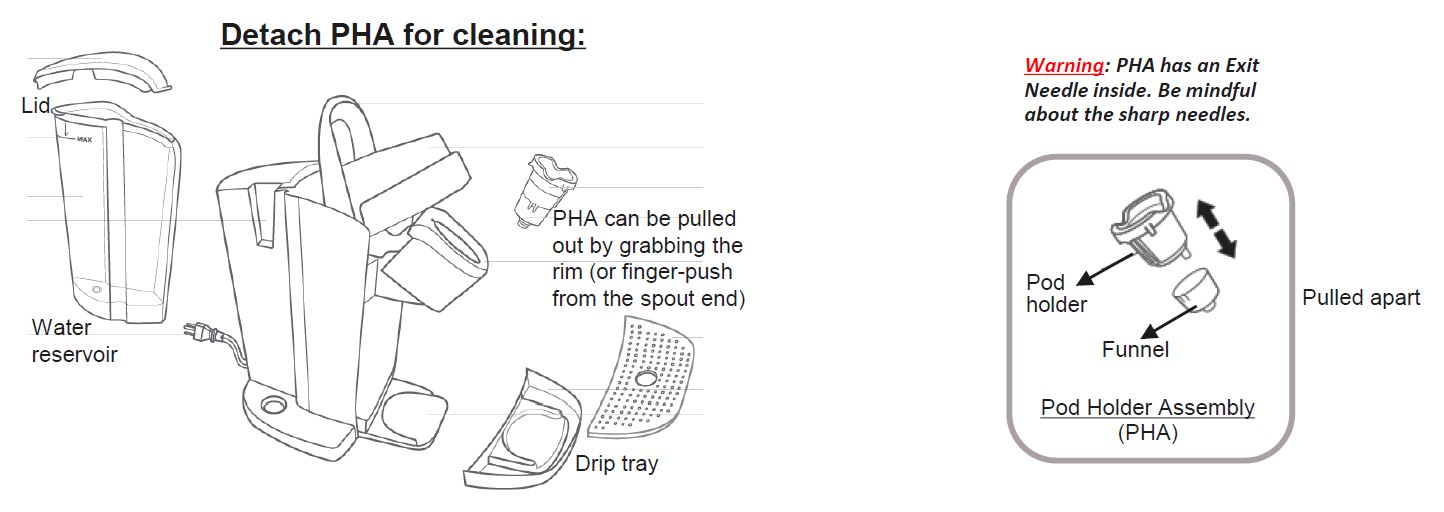
Pod Holder Assembly Cleaning That Most People Skip
Your removable pod holder assembly (PHA) needs weekly attention to maintain optimal performance. Here’s the proper cleaning sequence:
- Power down completely: Unplug your brewer and let it cool for 15 minutes
- Remove PHA: Follow your specific model’s instructions (typically involves lifting and pulling)
- Hand wash: Use regular dish soap and warm water, scrubbing all surfaces
- Rinse thoroughly: Remove every trace of soap residue that could affect taste
- Air dry completely: Never reinstall damp components (takes 30-60 minutes)
- Reinstall properly: Click it back into place until you hear the secure snap
This weekly ritual prevents the coffee grounds buildup that causes weak brews and error messages.
Needle Maintenance That Solves Slow Brewing
That sharp needle puncturing your pods gets clogged with coffee grounds after just a few uses. Clean both needles weekly to maintain proper water flow:
- Upper needle: Located in the brewer’s lid—gently clear with a paper clip
- Lower needle: Inside the pod holder—use Keurig’s cleaning tool or straightened paper clip
- Cleaning method: Insert tool, twist gently, and remove coffee debris
Critical warning: These needles are extremely sharp. Always unplug your brewer first and handle with care to avoid injury.
Quarterly Deep Descaling That Extends Your Brewer’s Life
When to Descale Based on Your Usage Pattern
Descaling frequency depends entirely on your water hardness and usage:
- Standard users (1-3 pods daily): Every 3 months
- Heavy users (8+ pods daily): Every 6-8 weeks
- Storage situations: Before and after any storage over 1 month
- Forgotten pod: If a used pod sat for over a month, descale immediately
Keurig brewer maintenance experts confirm that this single procedure prevents more breakdowns than any other routine task.
Descaling Process Step-by-Step Without Compromising Safety
- Prep: Empty water reservoir completely, remove filter, add full bottle of descaling solution
- First cycle: Run a brew cycle without a pod into a large mug (not your favorite cup!)
- Soak: Let solution sit for 30 minutes to dissolve mineral deposits
- Rinse cycles: Run 12 cleansing brews with fresh water to remove all traces
- Final check: Brew one cup of water to ensure no descaling taste remains
Non-negotiable rule: Always use Keurig’s Descaling Solution. Vinegar and other substitutes can damage internal components and void your warranty.
Water Filter Replacement That Improves Taste Immediately
Swap your water filter every 3 months (or 60 tank refills) for noticeably better-tasting coffee. The replacement process takes 60 seconds:
- Remove old filter: Pull straight up from reservoir
- Soak new filter: Submerge in water for 5 minutes
- Rinse thoroughly: Run under tap for 60 seconds
- Install properly: Push firmly into place until seated
This simple step removes chlorine and impurities that affect coffee flavor without requiring expensive bottled water.
Troubleshooting Common Issues With Targeted Maintenance

Weak Coffee Output? Clean Your Needles Now
Most likely cause: Clogged upper or lower needles restricting water flow
Immediate solution: Clean both needles with paper clip method (takes 2 minutes)
Prevention: Make needle cleaning part of your weekly maintenance routine
Strange Tastes Ruining Your Morning?
Most likely cause: Old water sitting in reservoir or expired water filter
Immediate solution: Empty reservoir, wash with mild soap, refill with fresh water
Prevention: Change water daily and replace filters every 3 months without fail
Machine Won’t Turn On After Overnight Rest
Most likely cause: Mineral buildup on internal sensors
Immediate solution: Perform emergency descaling cycle
Prevention: Stick to your quarterly descaling schedule religiously
Maintenance Schedule That Fits Your Life
Daily (90 seconds):
- Remove used pods immediately after cooling
- Wipe all surfaces with antibacterial wipe
- Run rinse cycle when switching flavors
- Wash removable parts with dish soap
Weekly (8 minutes):
- Deep clean pod holder assembly
- Clean both upper and lower needles
- Use Keurig Rinse Pod for internal cleaning
Quarterly (40 minutes):
- Complete descaling cycle
- Replace water filter
- Inspect all components for wear
Final maintenance truth: A consistent Keurig brewer maintenance routine takes less time than troubleshooting problems caused by neglect. Your coffee will taste noticeably better, your machine will last years longer, and you’ll avoid the frustration of mid-morning brewing failures. Start with the daily basics—these require less time than your coffee break—and build up to the weekly and quarterly tasks. Set calendar reminders for descaling and filter changes, and your Keurig will reward you with perfect coffee every single time. Remember, proper maintenance isn’t an interruption to your routine—it’s what makes your routine possible.


