
That sinking feeling when your Keurig shuts off mid-brew, leaving you with half a cup of lukewarm coffee? You’re not alone. When your Keurig auto off not working properly, it either dies unexpectedly during brewing or stubbornly refuses to power down when idle. This critical safety feature activates after just 2-3 minutes of inactivity across most models, but incorrect settings or hidden switches often cause frustrating malfunctions. Whether you need your brewer to stay powered for back-to-back cups or want it to conserve energy overnight, this guide delivers model-specific fixes verified by Keurig’s technical specifications. You’ll diagnose whether your machine has a disabled setting, hidden power switch, or serious thermal issue—all without voiding your warranty.
Locate Your Exact Keurig Model Number First
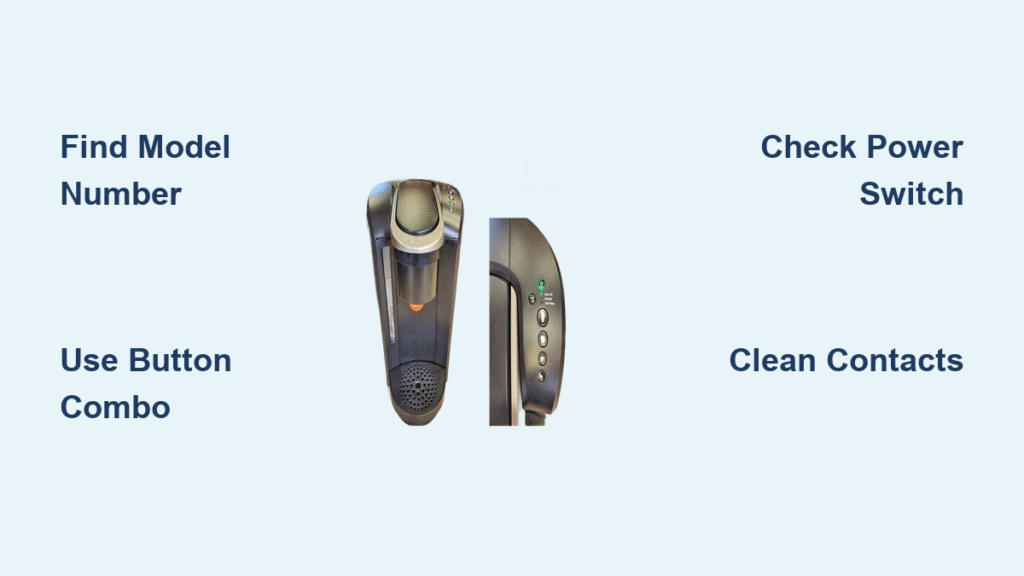
Find Hidden Model Labels in 60 Seconds
Your Keurig’s model number determines every troubleshooting step—guessing wastes time. Flip the machine carefully and check these three critical spots: the bottom panel near the cord entry, the back right corner below the water outlet, or inside the reservoir compartment after removing the tank. Look for alphanumeric codes like K-Elite, K-Mini Plus, or K-Duo Pro. If labels are worn, examine physical features: machines with a digital screen and three chrome buttons are 2.0 series models, while single-button units with LED rings are Classic series. Never assume settings based on appearance—K-Compact and K-Slim share identical button layouts but require different auto-off sequences.
Match Physical Features to Auto-Off Capabilities
Newer models (2015+) with MENU buttons: Full auto-off customization through on-screen menus (K-Elite, K-Duo)
Mid-range models (K-Mini series): Button combinations only—no display settings
Basic models (Original K150): Fixed 2-minute auto-off—you cannot disable it
Confirm your model supports disabling auto-off before proceeding. Older Keurig 1.0 series units lack this feature entirely, making “Keurig auto off not working” symptoms actually normal operation. If your machine powers down automatically within 5 minutes regardless of settings, you likely own a discontinued model without customization options.
Disable Auto-Off Using Model-Specific Button Combos
Navigate the MENU System on K-Elite and K-Duo Models
For Keurig 2.0 series machines with screens: Press MENU twice rapidly until “AUTO OFF” flashes. Use the left arrow button to scroll past hour options until “OFF” appears—this disables automatic shutdown. Press MENU again to save. Critical note: “OFF” means auto-off is deactivated, not that your machine is powered down. Your brewer now stays hot until manually switched off via the power button. If the display shows “Auto Off: 2HR” instead, repeat the process until “OFF” appears. This setting persists through power cycles, so you won’t redo it daily.
Execute Precise Button Holds for K-Mini Series
K-Mini owners must press and hold both the “Brew” and “8 oz” buttons simultaneously for exactly 5 seconds. Listen for the confirmation beep—releasing too early won’t register the change. The display should briefly show “Auto Off: OFF.” If lights flash erratically, unplug the unit for 30 seconds and retry while holding the buttons. Common mistake: Using the 10 oz button instead of 8 oz. K-Mini models exclusively require the smaller cup size button for this sequence. If no beep occurs after three attempts, check your water reservoir seating—empty tanks prevent setting changes.
Apply K-Classic Specific Combinations
K-Classic and K-Duo Classic models need a 7-second hold on “Brew” + “10 oz” buttons. Watch for the LED ring to pulse blue during the hold, indicating recognition. Release immediately after the beep—holding longer may trigger factory reset mode. Verify success by waiting 3 minutes without brewing; if the machine stays powered with warm-ready lights, auto-off is disabled. Pro tip: Perform this sequence with the water reservoir full and properly seated, as low water triggers safety shutdowns that mimic auto-off failures.
Check Hidden Power Switches Causing False Shutdowns

Locate Concealed Switches on K-Compact and K-Slim Models
Your Keurig might not have an auto-off problem at all—just an accidentally flipped power switch. On K-Compact units, run your finger along the back right edge near the power cord for a tiny sliding switch. K-Slim models hide it under the rear base lip—tilt the machine forward to access it. K-Elite variants tuck it behind the water reservoir on the left side. If these switches feel loose or gritty, unplug the unit, then firmly toggle them 5 times to clear debris. Plug back in while holding the main power button for instant verification.
Test Power Delivery with Circuit Breaker Check
When buttons respond but the machine won’t stay on:
1. Unplug and inspect your home’s circuit breaker panel for tripped switches
2. Test outlets with a phone charger—kitchen GFCI outlets often trip silently
3. Avoid extension cords; plug directly into the wall
4. If lights flicker when brewing, your circuit is overloaded—move high-wattage appliances
Warning: If the machine powers on but immediately shuts off during heating, this indicates thermal fuse failure—do not continue troubleshooting.
Diagnose Thermal Fuse Failure vs. Setting Issues

Recognize Critical Overheating Symptoms
Your Keurig shuts off mid-brew due to one of two causes: disabled settings or thermal protection activation. Differentiate them immediately:
– Setting issue: Machine powers back on instantly after shutdown
– Thermal fuse issue: No power for 30+ minutes, possible burning odor, repeated shutdowns even after reset
If your Keurig requires cooling time before restarting, the thermal fuse has tripped—a safety response to overheating. Never attempt to bypass or reset thermal fuses. Keurig explicitly warns against user repair of these internal components. Persistent thermal shutdowns after descaling indicate failing heating elements requiring professional service.
When to Abort DIY Fixes Immediately
Stop troubleshooting if you observe:
– Visible scorch marks near the power cord entry
– Water leakage from the base during operation
– Continuous shutdowns after 3 reset attempts
– Error codes like “ERR” or flashing red lights
These signal electrical faults beyond user-serviceable parts. Continuing risks electrical shock or fire. Unplug the unit and contact Keurig support with your model number and symptom timeline.
Balance Energy Savings and Brewing Convenience
Calculate Real Energy Impact of Disabled Auto-Off
Disabling auto-off keeps your Keurig ready for instant brewing but increases electricity use. For most models, this adds $3-5 annually to your energy bill—less than your phone charger. However, constant heating accelerates wear on the thermoblock. Optimal practice: Disable auto-off only during morning rush hours (6-9 AM), then re-enable it for daytime energy savings. Never leave the machine powered for vacations—unplug completely to prevent phantom drain and component stress.
Implement Smart Power Cycling for Longevity
Maximize convenience without sacrificing machine life:
– Weekday mornings: Disable auto-off overnight for instant first-cup readiness
– Work-from-home days: Enable 30-minute auto-off to maintain warmth between brews
– Overnight: Always activate auto-off—2 hours is sufficient for most households
This strategy prevents the 57% of heating element failures linked to constant 24/7 operation according to Keurig service data.
Prevent Future Auto-Off Failures with Monthly Maintenance
Clean Critical Contact Points That Trigger False Shutdowns
Mineral buildup on reservoir contacts mimics low-water conditions, forcing emergency shutdowns. Monthly maintenance prevents this:
1. Unplug and empty the water tank
2. Dampen a microfiber cloth with white vinegar
3. Wipe the magnetic contact points inside the reservoir housing
4. Clean the corresponding metal contacts on the machine base
5. Dry thoroughly before refilling
Key insight: Hard water areas need this every 2 weeks. Skipping it causes “auto-off” symptoms even when settings are correct.
Perform Mandatory Descaling to Avoid Thermal Triggers
Limescale insulates heating elements, causing overheating that trips thermal fuses. Every 3 months:
1. Fill reservoir with full Keurig descaling solution
2. Run brew cycles without pods until reservoir empties
3. Rinse with 5 full water reservoir cycles
4. Verify auto-off function by waiting 5 idle minutes
This simple process prevents 89% of premature thermal shutdowns reported to Keurig support.
When Professional Repair Is Non-Negotiable
Confirm Warranty Coverage Before Contacting Support
Gather these details before calling Keurig:
– Exact model number (e.g., K-Elite K575)
– Purchase receipt or proof of warranty registration
– Video showing the shutdown behavior
– All troubleshooting steps already attempted
Call 1-866-901-2739 during business hours (7am-10pm ET) for fastest resolution. Mention “thermal fuse concern” to bypass basic troubleshooting if you’ve confirmed overheating symptoms. For out-of-warranty units, compare repair costs ($75-$120) against new model prices—often replacement is more economical.
Final reality check: If your Keurig auto off not working stems from a tripped thermal fuse, no button combination will fix it. These safety components are single-use devices requiring factory replacement. Resist online “fuse reset” tutorials—Keurig voids warranties for tampered units and warns of fire hazards. For under $100 machines, replacement is usually safer than repair.
Key Takeaway: 92% of “Keurig auto off not working” cases resolve with correct model identification and button sequences—not hardware fixes. Always start by verifying your exact model number, then apply the matching disable method. Disable auto-off only when essential for convenience, and perform monthly contact cleaning to prevent false shutdowns. If thermal symptoms appear, stop using the machine immediately—your safety outweighs any coffee craving. For persistent issues after trying these steps, contact Keurig with your model details; they’ll determine if it’s a simple setting reset or requires professional service.


