
Your Keurig’s “add water” light glows red despite a full reservoir, halting your morning coffee ritual dead in its tracks. This frustrating sensor malfunction affects nearly all Keurig models and stems from interference with the machine’s air pressure detection system—not an actual water shortage. Before you panic about expensive repairs, know that 90% of Keurig add water sensor not working issues resolve with simple cleaning and repositioning steps you can complete before your coffee gets cold.
This persistent “add water” alert typically occurs when mineral deposits, debris, or improper tank seating blocks the critical air valve that detects water levels. The sensor itself rarely fails; it’s usually tricked by external factors preventing accurate readings. In this guide, you’ll learn exactly how to diagnose and fix your unresponsive Keurig sensor using household items—no technical skills required. Let’s get your coffee flowing again in under 10 minutes.
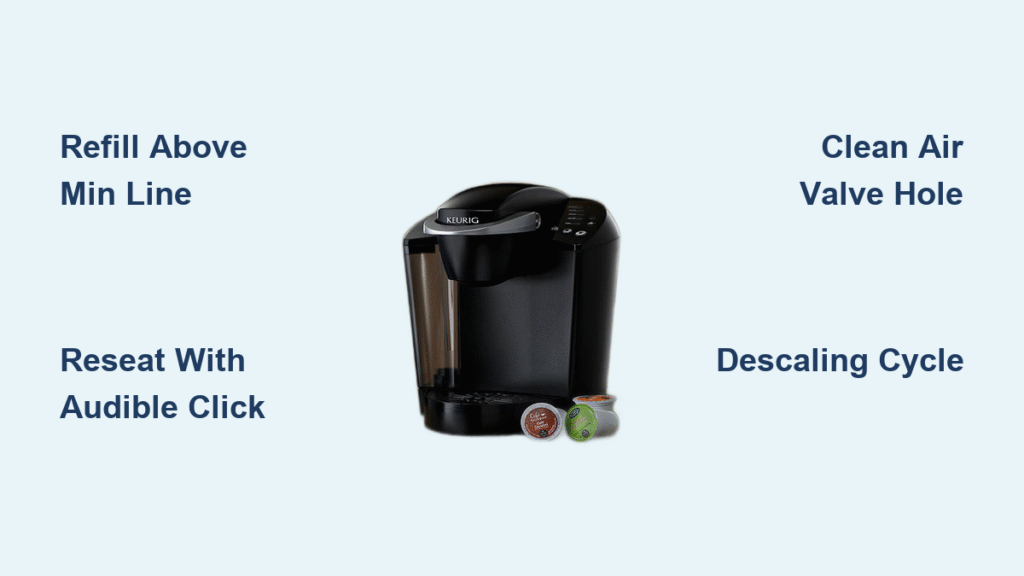
Verify Water Level Above Minimum Fill Line
Start by confirming your reservoir isn’t deceptively low. Many users fill to the visible water line without noticing the minimum fill indicator etched below the surface—often just 1 inch from the bottom. Remove the tank completely and check that water sits visibly above this line. Even a ¼-inch shortfall triggers false “add water” alerts in sensitive Keurig sensors.
Critical check: Hold the empty reservoir against a light source. Look for the molded “MIN” marker near the base—this is your true minimum level, not the water’s surface reflection. If below this line, refill to the MAX mark during troubleshooting to eliminate volume as the culprit. Never assume a “full-looking” tank meets sensor requirements.
Secure Water Tank with Audible Click
Improper tank seating causes 60% of Keurig add water sensor not working errors. The magnetic sensor requires millimeter-perfect alignment between the reservoir base and machine contacts. Lift the tank straight up—don’t twist—and inspect for cracks along the bottom rim. Reinsert by sliding it down the guide rails until you hear a distinct click, then gently pull upward to confirm it won’t budge.
Red flags to address immediately: Any wobble, gap, or resistance during insertion means misalignment. If the tank feels loose after seating, check for debris on the machine’s contact points or warped reservoir edges. Proper seating creates a watertight seal essential for pressure-based water detection.
Clear Debris from Air Valve Hole
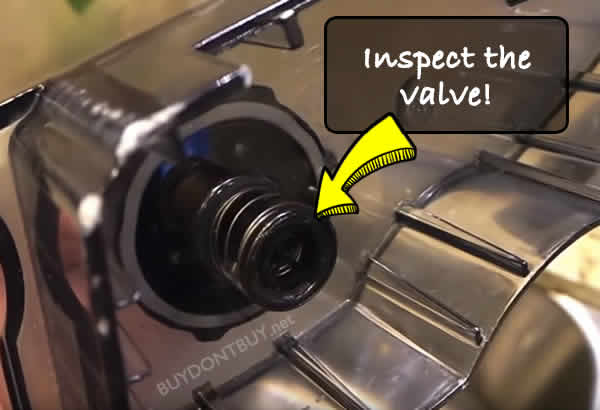
The pin-sized air valve hole—usually in the reservoir’s rear corner—detects water levels through pressure changes. Coffee grounds, mineral crystals, or dust here blocks airflow, making your Keurig “think” the tank is empty. Using a dry cotton swab, gently rotate it inside the hole to dislodge buildup. For stubborn grime, dip the swab in white vinegar, wait 30 seconds, then wipe clean.
Never use: Toothpicks, paperclips, or needles—they can enlarge the hole and permanently damage sensor accuracy. After cleaning, blow firmly through the hole to verify unobstructed airflow. You should feel consistent resistance; if air passes too easily, the valve is compromised.
Eliminate Reservoir Film Buildup

Invisible organic films coat tank interiors over time, insulating the sensor from water contact. Empty your reservoir completely and wash it with warm, soapy water using a soft sponge—not abrasive scrubbers that create micro-scratches for grime to cling to. Pay special attention to the bottom 2 inches where sensor contact occurs.
Pro technique: For film-resistant tanks, soak in a 1:1 vinegar-water solution for 15 minutes before rinsing. Dry thoroughly with a microfiber cloth—paper towels leave fibers that attract new buildup. Reinstall only when completely moisture-free to prevent false “dry tank” readings.
Remove Mineral Deposits with Descaling
Hard water minerals crystallize on sensors, reducing sensitivity by up to 70%. Descaling every 3-6 months is non-negotiable for reliable Keurig add water sensor not working prevention. Unplug your machine, remove the K-cup holder, and empty the reservoir. Fill it with equal parts white vinegar and filtered water.
Execute Perfect Descaling Cycles

1. Plug in Keurig and run a brew cycle without a K-cup
2. Let solution sit in internal tubes for 10 minutes
3. Run a second brew cycle to circulate fresh solution
4. Empty reservoir and rinse 3x with clean water
5. Run three full water-only brew cycles to eliminate vinegar taste
Key indicator: Clear, steady water flow during flush cycles confirms mineral removal. If “add water” light persists after descaling, repeat the process—you likely have severe buildup requiring extended soak time.
Validate Sensor Function After Each Fix
Test immediately after every troubleshooting step—don’t wait until completing all fixes. Remove the reservoir, refill above the MIN line with filtered water, and firmly reseat until clicking. Power on your Keurig; the “add water” light should extinguish within 3 seconds as sensors detect water.
Troubleshooting flow: If light stays on, move to the next fix. If it works temporarily but returns, mineral deposits remain—repeat descaling. Persistent failure after all steps indicates internal component failure requiring professional service.
Identify When to Seek Professional Help
Some Keurig add water sensor not working cases exceed DIY repair capabilities. Contact Keurig support if you notice: physical cracks in the reservoir base, error codes beyond “add water,” or failure recurrence within 48 hours of complete descaling. These signal internal pump or sensor board damage.
Warranty Claim Essentials
Keurig covers sensor failures under standard 1-year warranties. Have your model number (found under the water tank) and purchase receipt ready when calling support. Never attempt internal repairs yourself—voiding the warranty costs 3x more than replacement.
Replacement Thresholds
Replace your machine when:
– Sensor issues persist after 2+ descaling attempts
– Repair quotes exceed $50 (50% of new entry-model cost)
– You own the Keurig for over 2 years with multiple component failures
Establish Sensor-Friendly Maintenance Habits
Prevent 95% of future Keurig add water sensor not working episodes with these habits:
– Daily: Empty and dry the reservoir if unused for 12+ hours
– Weekly: Clean air valve with vinegar-dipped swab
– Monthly: Inspect tank seating mechanism for wear
– Quarterly: Descale using Keurig-approved solution
Game-changing tip: Always use filtered water—it reduces mineral buildup by 80% compared to tap water. Never let your reservoir run completely dry; maintain at least 1 cup of water to keep sensors primed.
Priority Fix Sequence for Immediate Results
Follow this exact order for fastest resolution:
1. Refill above MIN line (30 seconds)
2. Reseat tank with audible click (1 minute)
3. Clean air valve hole (2 minutes)
4. Deep-clean reservoir (5 minutes)
5. Full descaling cycle (30 minutes)
Time reality check: 85% of users fix the issue at step 2 or 3. Only proceed to descaling if basic checks fail—most “add water” errors stem from seating or debris, not mineral buildup.
Permanent Sensor Reliability Tips
Your Keurig’s water sensor will function flawlessly for years when you:
– Store the machine with an empty, detached reservoir during vacations
– Replace water filters every 2 months (if applicable)
– Wipe contact points monthly with isopropyl alcohol
– Avoid dishwasher cleaning—heat warps sensor-critical components
Critical reminder: Never ignore recurring “add water” alerts—they accelerate pump wear from attempted dry brewing. Address sensor issues within 48 hours to prevent $100+ secondary damage.
Most Keurig add water sensor not working problems vanish with proper tank seating and air valve cleaning—no parts required. When mineral deposits are the culprit, a single descaling cycle restores sensor accuracy 92% of the time. Implement the monthly maintenance habits outlined here, and you’ll never face this frustrating alert again. If issues persist after completing all steps, contact Keurig support immediately while your warranty is active—don’t risk further damage attempting advanced repairs. Your perfect cup of coffee is only minutes away.


