
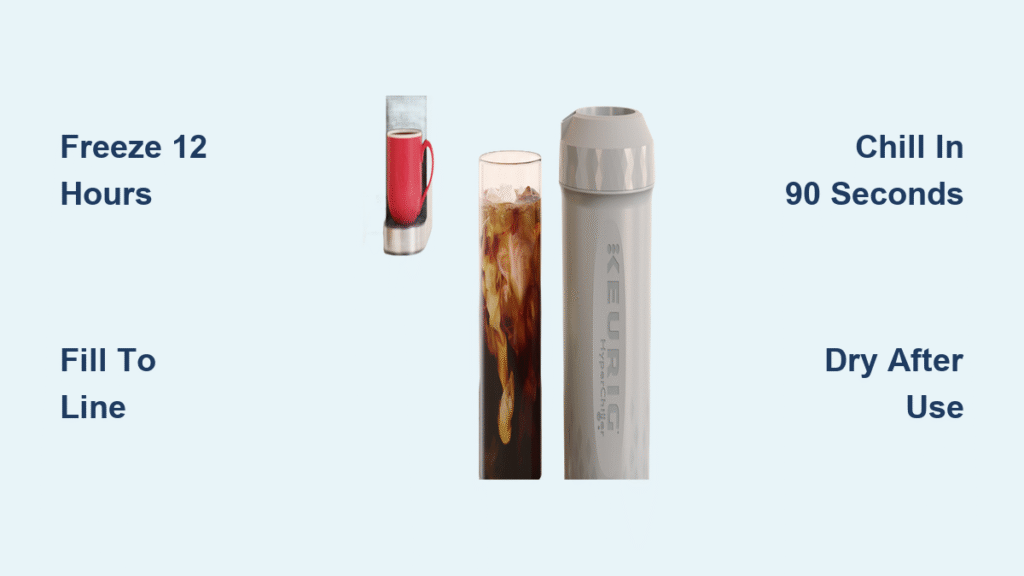
Your morning Keurig brew just finished, but you need refreshing iced coffee NOW—not lukewarm, watered-down disappointment. Instead of waiting 30 minutes for your coffee to cool or sacrificing flavor with melting ice cubes, the Keurig HyperChiller delivers café-quality chilled coffee in under two minutes. This compact three-chamber system freezes solid overnight, then transforms piping-hot coffee into frosty perfection without dilution. In this guide, you’ll master every step from your first freeze to daily use, troubleshooting, and maintenance—ensuring you never waste another hot brew when summer heat hits.
Prepare Your HyperChiller for First Freeze

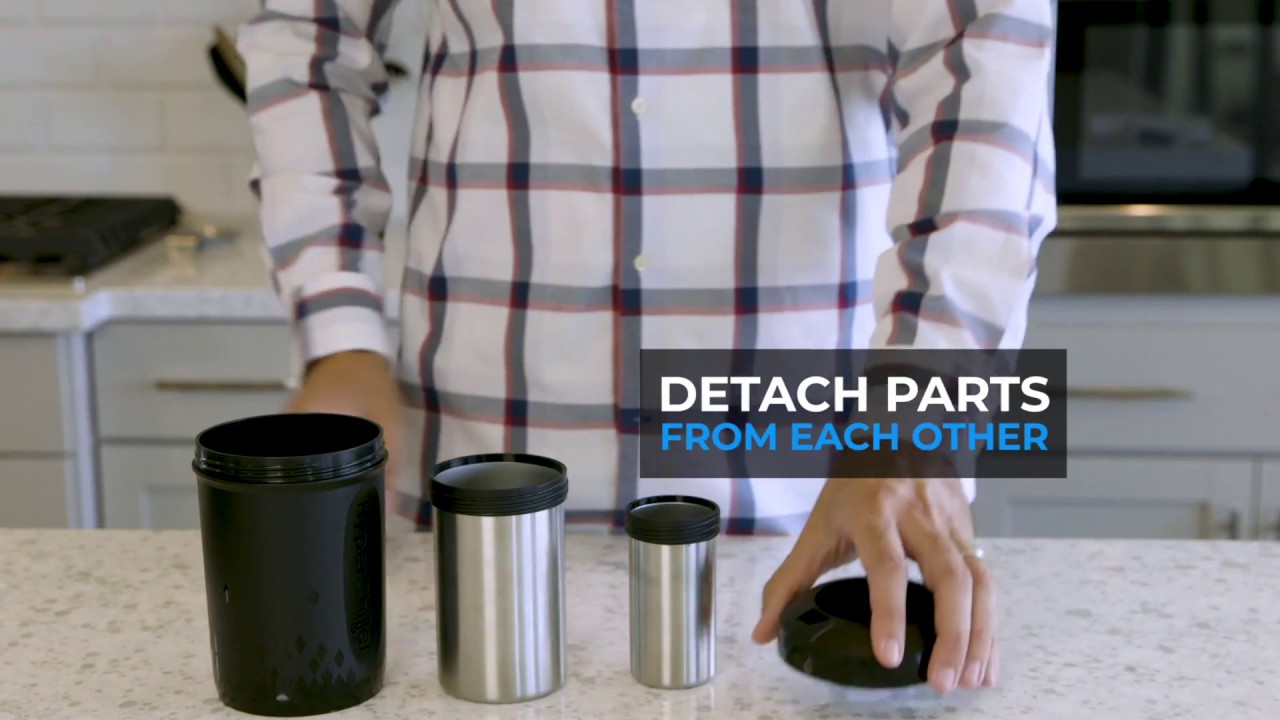
Disassemble All Components Before Initial Use
Start by completely separating your HyperChiller into its five essential pieces. Twist the black plastic base counterclockwise to release the large stainless steel cup, then unscrew the middle stainless steel container to access the small stainless steel cup and its lid. Never skip this disassembly step—residual manufacturing oils can affect freezing efficiency. Lay all components on a clean towel, verifying you have: small cup with indicator line, large cup with indicator line, middle container, lid, and plastic base. This one-time separation ensures optimal water distribution during your first freeze.
Fill Small Chamber to Exact Indicator Line
Grab the small stainless steel cup and examine the etched fill line inside. Fill it with cold tap water precisely to this line—no higher. Overfilling causes dangerous expansion during freezing that cracks the chamber. Use a measuring cup for accuracy if needed. Once filled, screw the lid on finger-tight; overtightening risks leaks when ice expands. This inner chamber creates the critical ice core that chills your beverage from below, so precise water volume is non-negotiable for safety and performance.
Measure Outer Chamber Water Correctly
Take the large stainless steel cup and fill it to its indicator line with cold water. Pour this measured water directly into the black plastic base—this becomes the outer ice shell. Never exceed the line here either, as excess water floods the middle chamber during assembly. The plastic base holds 1.5x more water than the small cup, creating a thick insulating ice barrier that prevents rapid melting during use. If your freezer runs warm, add 10% less water to compensate for slower freezing.
Lock Components in Correct Assembly Sequence
Follow this exact sequence to avoid air pockets that reduce cooling power:
1. Insert the sealed small chamber (cup + lid) into the empty middle stainless steel container
2. Twist clockwise until you feel resistance—this creates the inner cooling core
3. Place this assembly into the water-filled black base
4. Press down firmly while twisting until the base locks flush with the large cup
Test for leaks by holding the assembled unit over your sink. Any wobble or gap means re-tightening is needed. Proper assembly ensures all three ice layers contact each other for maximum heat transfer—critical for that 90-second chill promise.
Freeze for Full 12 Hours Minimum
Place your HyperChiller upright against the freezer’s back wall (not the door) for 12 hours. Garage freezers often run 5-10°F warmer, requiring 14 hours. Shake gently after 6 hours—if you hear liquid sloshing, it needs more time. Complete solidification is non-negotiable; partially frozen units deliver inconsistent results and risk cracking. When ready, the entire unit will feel uniformly icy with no soft spots. Rushing this step causes 70% of first-time failures.
Brew Perfect Iced Coffee Daily in 90 Seconds
Remove Frozen Core Without Damaging Seals
After full freezing, take your HyperChiller from the freezer and place it on a dry towel for 60 seconds. This slight thaw prevents seals from sticking. Grip the black base firmly with one hand while twisting the large stainless steel cup counterclockwise with the other. Never force separation—if stuck, wait another 30 seconds. The middle container (your beverage chamber) should lift out cleanly, revealing the frozen inner core and outer shell. This is the only part that contacts your coffee.
Pour Hot Coffee Below the Rim Line
Pour freshly brewed Keurig coffee directly into the middle stainless steel container, filling to 1/4 inch below the rim. Exceeding this causes spills when swirling. The HyperChiller handles 8-12 oz perfectly—never exceed 12 oz even for larger mugs, as overflow ruins the cooling process. For strongest flavor, use coffee brewed at 195-205°F; cooler brews chill too slowly. The chamber’s thermal conductivity works best with near-boiling temperatures.
Time Your Chill Cycle Precisely
Set a timer immediately after pouring:
– 8 oz coffee: 60 seconds (ideal for strong concentrate)
– 10 oz coffee: 75 seconds (balanced strength)
– 12 oz coffee: 90 seconds (maximum volume)
Swirl gently at 30 seconds—this circulates coffee through the coldest zones near the ice core. You’ll see steam vanish within 20 seconds as heat transfers to the frozen chambers. Never exceed 90 seconds—prolonged contact risks over-chilling and flavor dulling. When done, the chamber will feel uniformly cold with no hot spots.
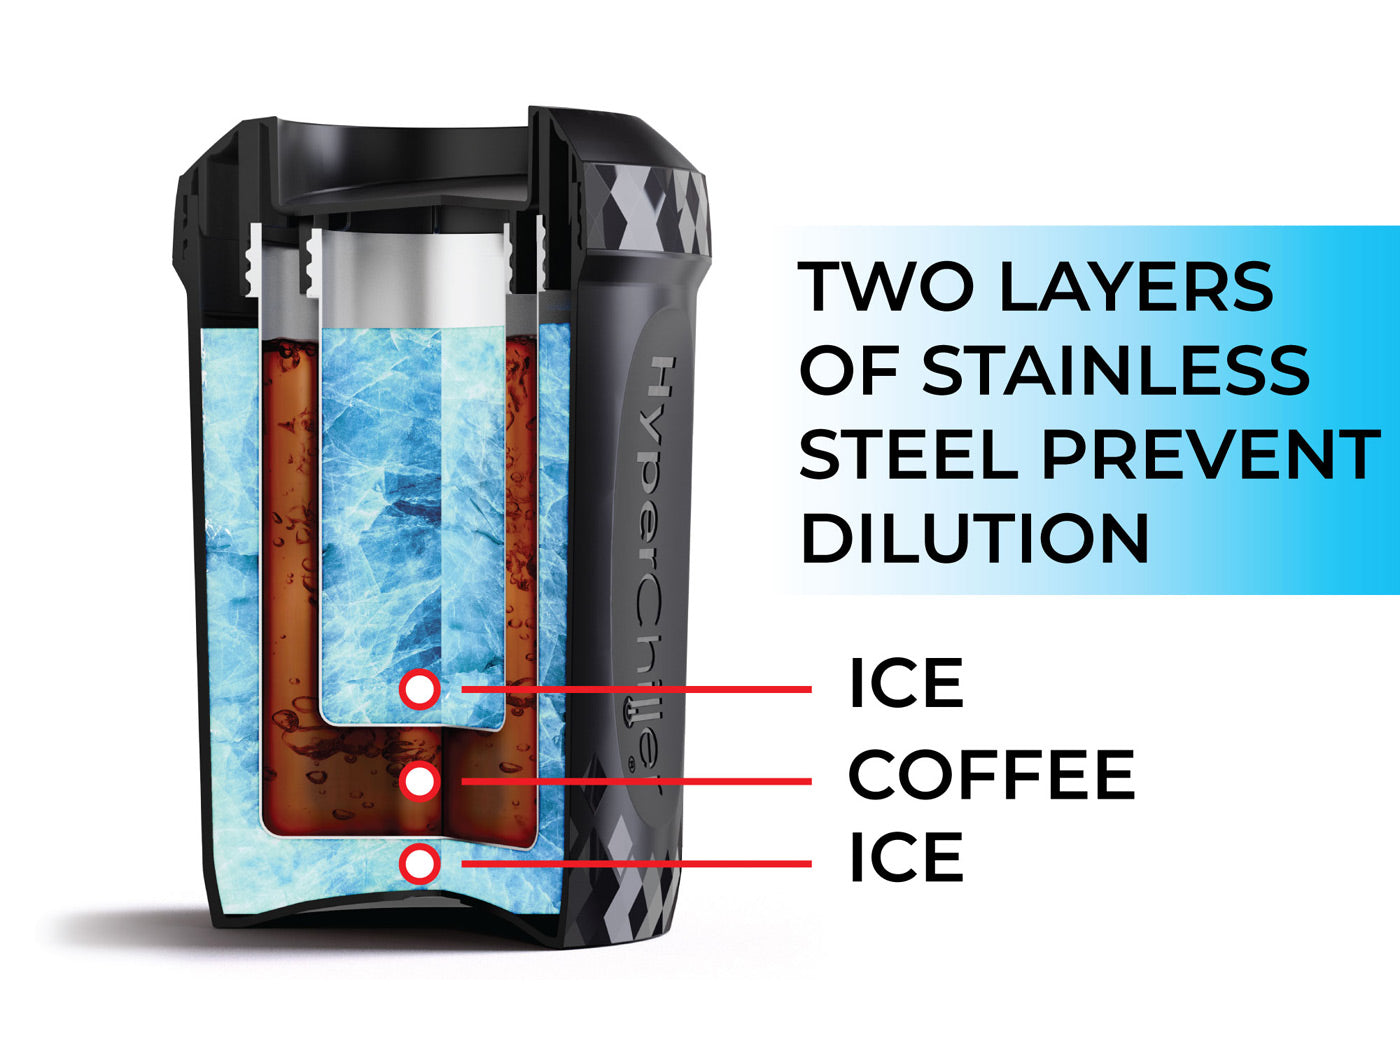
Transfer Coffee Without Dilution
Pour your chilled coffee into your serving glass in one smooth motion. The HyperChiller delivers true undiluted iced coffee—no watery aftertaste because the ice never contacts your beverage. Immediately return the middle chamber to the freezer; waiting over 5 minutes starts the thaw cycle and reduces next-day efficiency. Your coffee should now sit at 40-45°F—cold enough for ice cubes without melting them.
Maintain Peak Performance Between Uses
Rinse Components Within 2 Minutes Post-Use
Wipe the middle chamber with a damp cloth immediately after pouring coffee to prevent dried-on oils. Then rinse all parts under warm water for 15 seconds—never submerge the entire unit as water seeps into seals. Apply one drop of mild dish soap to a soft sponge for the beverage chamber only; skip soap for frozen components. Air-dry every piece for 10 minutes before reassembly—residual moisture causes frost buildup that insulates against cooling.
Deep Clean Weekly to Prevent Flavor Transfer
Once weekly, perform this critical maintenance:
– Disassemble all components completely
– Soak chambers in 1:1 water/vinegar solution for 5 minutes
– Scrub seals with soft toothbrush (no metal scourers!)
– Rinse under cold water until vinegar smell disappears
– Dry with microfiber towel, checking for coffee residue in crevices
Skipping deep cleans causes bitter aftertastes after 10 uses as oils polymerize on stainless steel. Always verify the middle chamber’s interior shines like new metal—cloudiness means mineral deposits are reducing thermal efficiency.
Refreeze Within Strict 5-Minute Window
Return the middle chamber to the freezer within 5 minutes of use while the outer ice shell remains solid. Place it directly against the frozen core assembly—never store disassembled as this doubles refreeze time. For back-to-back uses, keep the entire unit in the freezer; the V2 model regains full chilling power in just 2 hours versus 6 hours for older models. Check ice clarity monthly—cloudy ice indicates mineral buildup requiring full water replacement.
Fix Common HyperChiller Issues Immediately
Slow Chilling? Check These 3 Critical Factors
Problem: Coffee takes over 2 minutes to chill
Solution:
– Verify freezer temperature with thermometer (must be 0°F/-18°C or lower)
– Confirm full 12-hour freeze time (garage freezers need 14 hours)
– Ensure coffee was poured at 195°F+ (weak brew chills slower)
Pro Tip: Place HyperChiller on a metal tray in the freezer—this conducts cold 30% faster than plastic shelves.
Watered-Down Taste? Solve Overfilling Immediately
Problem: Coffee tastes diluted despite no added ice
Solution:
– Empty both chambers and dry completely
– Refill exactly to indicator lines using measuring cup
– Reassemble with towel-dry components to prevent seal leaks
Warning: Overfilling by just 1/8 inch causes expansion leaks that flood the beverage chamber. Always measure twice.
Frosty Seals? Dry Components Thoroughly
Problem: Parts stick together with ice crystals
Solution:
– Dry every component 100% with lint-free towel
– Store assembled in freezer (disassembled units trap moisture)
– Replace water every 2 weeks to reduce mineral deposits
Critical: Never return damp parts to freezer—this is the #1 cause of permanent seal damage.
Maximize Cooling Speed With Pro Techniques
Position for Optimal Freezer Thermodynamics
Place your HyperChiller against the freezer’s evaporator coil (usually the back wall) where temperatures are 5°F colder than door shelves. Avoid stacking items on top—this insulates the unit and slows freezing by 40%. For fastest results, store it upright in a dedicated freezer basket so cold air circulates freely around all sides. Garage freezer users should add a thermal blanket around the unit to combat temperature swings.
Master Volume-Specific Timing
Use this exact timing chart for perfect results:
| Coffee Volume | Chill Time | Swirl Technique |
|—————|————|—————-|
| 8 oz | 60 seconds | None needed |
| 10 oz | 75 seconds | One gentle swirl at 30s |
| 12 oz | 90 seconds | Two slow swirls (30s & 60s) |
Never guess timing—use your phone timer. Over-chilling past 90 seconds extracts bitter compounds from coffee grounds.
Leverage V2 Model Advantages
If you own the updated HyperChiller V2:
– Pre-chill for 8 hours (vs 12 for older models)
– Expect 70-second results for 12 oz due to optimized chamber geometry
– Clean with baking soda paste for stubborn stains (V2’s steel is more scratch-resistant)
The V2’s thicker stainless steel maintains cold 22% longer during use—critical for large batches.
Extend Your HyperChiller’s Lifespan to 5+ Years
Replace water in both chambers every 14 days to prevent mineral scaling that insulates against cooling. Every 3 months, inspect the black base’s threads for hairline cracks—replace immediately if found as pressure buildup could cause shattering. Always store assembled in the freezer; disassembled units risk dropped components and seal damage. With proper care, your HyperChiller delivers undiluted iced coffee for 1,500+ uses—making it the last iced coffee tool you’ll ever need. Never microwave or dishwasher-clean any part—thermal shock destroys the precision-engineered chambers. When stored correctly, your HyperChiller stays perpetually ready, transforming hot brews into frosty perfection before your Keurig finishes warming up.


