
Nothing beats the smooth, rich satisfaction of homemade cold brew coffee—especially when you’re using the affordable and efficient Crofton cold brew coffee system from IKEA. This sleek glass pitcher with its innovative built-in filter makes crafting professional-quality cold brew simpler than ever, eliminating the need for complicated equipment or messy paper filters. Whether you’re a coffee novice or a seasoned enthusiast, understanding how to properly use your Crofton system transforms your morning routine with minimal effort and maximum flavor. By following this guide, you’ll learn the precise techniques that yield consistently smooth, low-acidity cold brew concentrate ready to enjoy whenever you need that perfect caffeine boost.
The magic of cold brew lies in its slow extraction process, where coarse coffee grounds steep in cold water for an extended period, creating a naturally sweet concentrate without the bitterness of hot brewing. Your Crofton system streamlines this process with its integrated filtration design, but achieving optimal results requires attention to specific details—grind size, ratios, timing, and temperature. In the next few minutes, you’ll discover exactly how to unlock your system’s full potential, avoid common pitfalls, and serve café-quality cold brew that rivals what you’d pay $5 for at specialty coffee shops.
Assemble Your Crofton System Before First Use

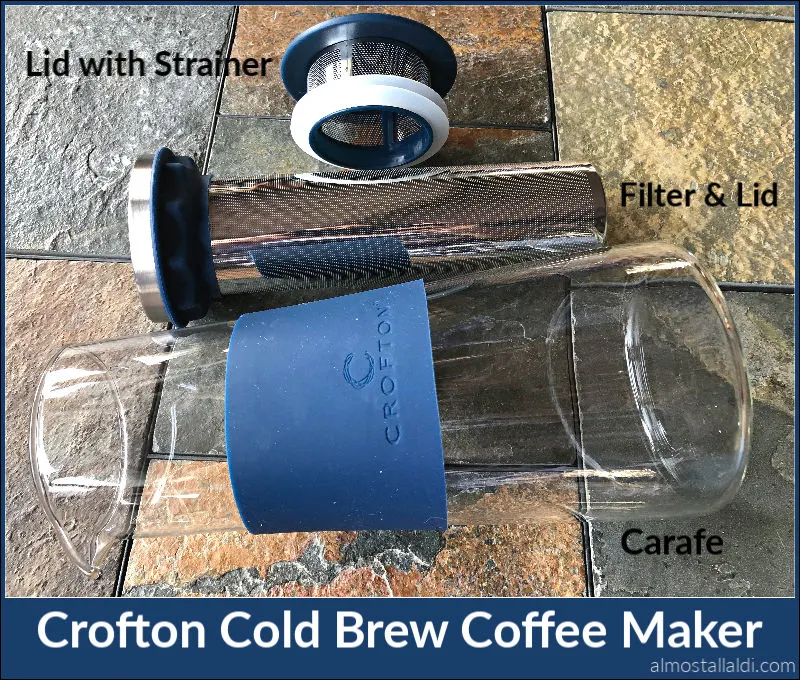
Before brewing your first batch, proper assembly ensures optimal performance from your Crofton cold brew coffee system. Remove all components from packaging and inspect the glass carafe for any cracks or imperfections—this system holds approximately 1 liter when filled to the indicated line. Wash all parts thoroughly with warm, soapy water to eliminate manufacturing residues that could affect your coffee’s flavor.
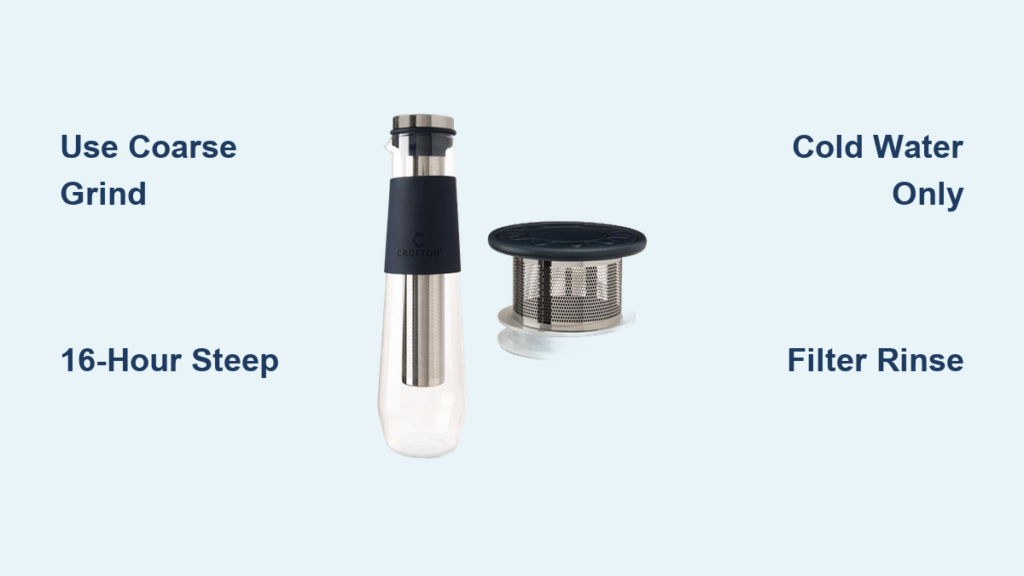
The key to successful brewing starts with correctly positioning the reusable stainless steel filter inside the lid assembly. Slide the filter into the designated slot until it clicks into place with minimal movement. Test the fit by placing the assembled lid on the carafe—when properly installed, it should sit flush without wobbling. Some users report better extraction when rinsing the filter with cold water before adding coffee grounds, as this helps the mesh expand for optimal contact with the coffee.
Store your fully assembled system in the refrigerator before use to maintain consistent cold temperatures throughout the brewing process. This pre-chilling step prevents temperature fluctuations that can lead to uneven extraction or off-flavors in your final concentrate.
Achieve Perfect Coffee-to-Water Ratios for Optimal Flavor

The foundation of exceptional cold brew rests on precise coffee-to-water ratios and proper grind size. For the Crofton system, use coarse ground coffee resembling sea salt crystals—too fine, and you’ll get sediment passing through the filter; too coarse, and your brew will lack body and depth. A standard starting ratio uses 100-120 grams of coffee for the full 1-liter capacity, creating a concentrate strong enough for dilution while maintaining balanced flavor.
Measure your coffee by weight for accuracy, as volume measurements vary significantly depending on bean density and grind consistency. If you don’t have a kitchen scale, use approximately 1½ cups of coarsely ground coffee for a full batch. Darker roasts generally require slightly less coffee (closer to 100g) to avoid overpowering bitterness, while lighter roasts can handle the higher end of the range (120g) to extract sufficient flavor compounds.
Pour your measured coffee directly into the built-in filter basket before adding water. This prevents displacement during the water-pouring process and ensures even saturation. For best results, use freshly ground coffee within 15 minutes of brewing—stale grounds lose volatile compounds that contribute to complex flavor development during the extended steeping process.
Execute Proper Brewing Technique for Smooth Results
With coffee in place, slowly pour cold, filtered water over the grounds in a circular motion, ensuring complete saturation without disturbing the coffee bed. The Crofton system’s lid design allows water to flow through while containing grounds, but gently swirling the carafe once after initial saturation eliminates dry pockets that could lead to uneven extraction.
Secure the lid firmly and immediately place the entire system in your refrigerator—consistency in cold temperature (ideally 35-40°F) is crucial for clean, smooth extraction. Room temperature brewing accelerates the process but introduces unwanted acidity and potential spoilage risks. Set a timer for 16 hours, which represents the sweet spot for most coffee varieties in the Crofton system, though darker roasts may reach optimal extraction in as little as 14 hours.
Resist the temptation to check on your brew during the steeping process—opening the refrigerator frequently causes temperature fluctuations that disrupt extraction. If you’re experimenting with different variables, label your batches with coffee type, ratio, and start time to track what works best for your personal taste preferences.
Remove Filter and Complete the Extraction Process
After the designated steeping time, carefully remove the Crofton system from your refrigerator and lift the entire lid assembly straight up—this integrated design allows you to separate spent grounds from finished concentrate in one motion. Do this over the sink as some liquid will drip from the filter basket.
Dispose of used grounds responsibly—coffee grounds make excellent compost or can be dried and used as natural deodorizers. Rinse the filter basket immediately with cold water to prevent coffee oils from drying and becoming difficult to clean. For an exceptionally clear final product, perform a secondary filtration by pouring the concentrate through a fine-mesh sieve lined with cheesecloth, removing any fine particles that passed through the primary filter.
Your finished concentrate should appear deep amber with minimal cloudiness—signs of proper extraction. If you notice significant sediment or murkiness, adjust your grind size slightly coarser for the next batch or ensure the filter is properly seated during assembly.
Store Concentrate Properly for Maximum Freshness
Transfer your strained concentrate to a clean, airtight container—many users simply return it to the cleaned Crofton carafe for storage. Properly stored in the refrigerator, cold brew concentrate maintains optimal flavor for 7-10 days, though quality noticeably declines after the fifth day. Mark your container with the brewing date to track freshness.
For convenient single servings, pour concentrate into ice cube trays and freeze. These cold brew cubes maintain quality for up to two months and allow you to create perfectly diluted drinks without watering down your coffee with regular ice. When entertaining, consider preparing a pre-diluted version (1:2 concentrate to water ratio) in a decorative pitcher with citrus slices or herbs for visual appeal.
Avoid storing concentrate in metal containers, which can react with coffee compounds and alter flavor. Glass or BPA-free plastic containers preserve the purest taste profile while preventing unwanted chemical interactions that affect your cold brew’s delicate balance.
Serve and Customize Your Cold Brew Masterpiece
Dilute your concentrate to taste using a starting ratio of 1 part concentrate to 2 parts water or milk, adjusting based on your preference. Fill a glass with ice, pour your diluted cold brew over it, and watch how the rich amber liquid cascades through the cubes—a visual indicator of proper extraction when it maintains clarity rather than clouding immediately.
Experiment with serving temperatures—while cold brew is traditionally served chilled, gently warming your diluted concentrate (never boiling) creates a uniquely smooth hot coffee experience without the bitterness of traditionally brewed hot coffee. Try different milk alternatives: oat milk enhances natural sweetness, almond milk adds nuttiness, and coconut milk creates a tropical twist perfect for summer.
Elevate your cold brew with minimal additions that complement rather than mask its natural flavors. A single drop of orange oil enhances citrus notes in lighter roasts, while a pinch of sea salt balances sweetness in darker profiles. For dessert-style treats, blend cold brew concentrate with banana and almond butter for an energizing smoothie that tastes like coffee ice cream.
Clean and Maintain Your System After Each Use
Disassemble all components immediately after use for easiest cleaning—dried coffee grounds become stubborn and can clog the filter mesh. Rinse the carafe and filter basket under cold water first to remove loose grounds before washing with warm, soapy water. Use a soft bottle brush to reach inside the carafe and around the filter basket’s crevices without scratching surfaces.
For deep cleaning, soak the filter basket in a solution of equal parts water and white vinegar for 30 minutes to dissolve built-up coffee oils, then scrub gently with a soft brush. The glass carafe can be cleaned with a mixture of ice cubes, coarse salt, and lemon juice—swirl vigorously to remove stains without damaging the glass.
Inspect your filter regularly for signs of wear. Replace it when you notice stretched mesh, holes, or persistent cloudiness in your finished brew despite proper technique. Proper maintenance ensures your Crofton system delivers consistently excellent cold brew for years rather than months.
Troubleshoot Common Brewing Problems Effectively
If your cold brew tastes weak despite proper steeping time, increase your coffee-to-water ratio by 15-20% or grind slightly finer while maintaining coarse texture. Weak brew often results from insufficient coffee contact time with water, which can happen if grounds float above the water line during steeping—ensure your filter basket is completely submerged.
Bitter cold brew typically indicates over-extraction from extended steeping times or water that’s too warm during initial mixing. Reduce your steeping time by 2-4 hours and verify your refrigerator maintains consistent cold temperatures throughout the brewing cycle. Some coffee varieties naturally produce more bitter compounds, so consider switching beans if the problem persists despite technique adjustments.
Cloudy cold brew usually means fine particles passed through your filter—check that the filter is properly seated and consider a secondary filtration step. Very fresh beans (roasted within the past two weeks) release more carbon dioxide during brewing, which can push fines through the filter, so allow beans to rest 7-10 days post-roast for optimal cold brew results.


