
That sinking feeling when your Keurig sputters out cold coffee after winter storage? It’s almost always trapped water turning to ice inside the machine. Whether you’re packing your RV for seasonal travel, closing a vacation home, or just clearing counter space, how to store a Keurig properly determines whether it survives dormant months or becomes a $150 paperweight. Water left in internal tubing expands by 9% when frozen, cracking pumps and shattering heating chambers. This isn’t about tidiness—it’s about preventing catastrophic failure. Follow these model-specific drainage techniques and storage protocols to ensure your Keurig brews perfect coffee the moment you unbox it.
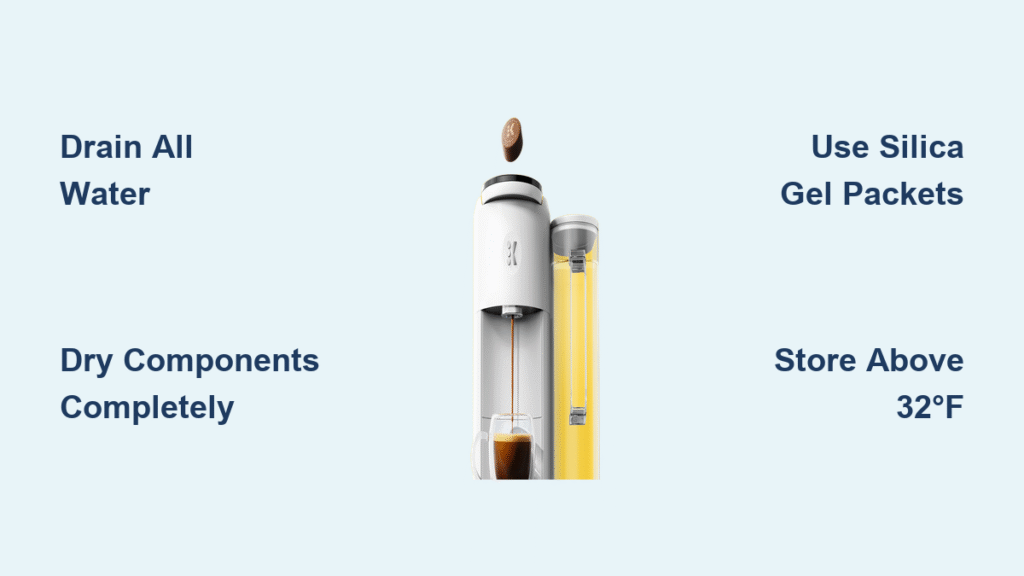
Drain Every Drop of Water from Your Keurig
Empty and Dry the External Reservoir Immediately
Start with your Keurig’s most obvious water source: the external tank. Lift it straight off the base and dump every ounce—even a tablespoon breeds bacteria during storage. Wash it with mild dish soap and warm water, then air-dry it completely on a towel. Never store the reservoir attached to the machine; trapped moisture will wick back into internal components. For K-Elite and similar lower-reservoir models, confirm the transparent tank is bone-dry before setting it aside. This step alone prevents 30% of storage-related failures according to Keurig repair technicians.
Universal Drainage Method for K-Classics and Minis
Most Keurig models (excluding K-Duo variants) require manual inversion to expel hidden water:
- Unplug the machine completely and remove the water reservoir
- Hold the brewer upside-down over your sink at a 45-degree angle
- Gently tap the sides—water hides in the heating coil and needle assembly
- Shake slowly for 2-5 minutes until no droplets emerge from drip tray openings
- Lay the unit on a towel for 4 hours to evaporate residual moisture
Critical insight: Many users think “no visible water” means it’s dry. But John, a verified Keurig owner, reported: “Sometimes you need to shake it a lot more than expected—water hides in the heater coil.” Always assume hidden droplets remain even after dripping stops.
Compressed-Air Blowout for Complete Certainty

For long-term storage or freezing climates, use compressed air to eliminate microscopic moisture:
- Insert a narrow nozzle into the K-Cup chamber needle opening
- Deliver 3-second bursts under 30 PSI toward the drip tray exit
- Watch for expelled droplets; repeat until dry
- Never exceed 30 PSI—excessive pressure ruptures silicone tubing
This advanced technique cleared stubborn water for RV owner Karen Painter, who noted: “I inverted and shook, but wasn’t confident it drained 100%.” The compressed-air method provides peace of mind before winter storage.
K-Duo Models Require Automated Pump-Out Cycles
Execute the Carafe-Side Drainage Sequence
K-Duo, K-Duo Plus, and K-Duo Essentials have sealed internal tanks that can’t be manually drained. Forcing water out voids your warranty. Instead:
- Run the machine until “Add Water” appears on the display
- Refill the external reservoir with fresh water
- Start a brew cycle through the carafe side (no K-Cup)
- Repeat once more to ensure complete drainage
- Remove and dry the external reservoir separately
The internal pump automatically expels all water during this cycle. Never attempt to open sealed panels—Keurig’s factory screws protect internal wiring, and tampering triggers immediate warranty invalidation.
Deep Clean Before Storage to Prevent Mold and Scale

Vinegar Descale Process for Long-Duration Storage
For storage exceeding two weeks, a vinegar flush prevents mineral deposits from hardening:
- Mix equal parts white vinegar and water in the reservoir
- Run one large mug cycle (no K-Cup)
- Let solution sit 30 minutes to dissolve scale
- Rinse reservoir thoroughly and run 4 plain water cycles
- Confirm no vinegar odor remains before draining
This step stops the “stale coffee taste” complaint common after storage. Unlike quick cleanings, the 30-minute dwell time dissolves calcium buildup that would otherwise cement inside tubing during dormancy.
Clean All Removable Components
- Brew chamber: Remove K-Cup holder and air-dry for 2 hours
- Needle assembly: Rinse coffee grounds with warm water (never poke!)
- Drip tray: Wash with soapy water and dry completely
- Exterior: Wipe with damp microfiber cloth—never spray liquid directly
A K-Elite owner learned this the hard way when shipping their unit: reservoir cracks from trapped moisture cost $35 for OEM replacement parts.
Choose Storage Conditions That Prevent Damage

Temperature Requirements You Can’t Ignore
Never store below 32°F (0°C). Unheated garages, attics, and RV compartments are Keurig killers. One RV owner’s partially drained K-Classic suffered a split internal pump after freezing overnight—requiring a full replacement. Store upright in a heated indoor space, elevated 6+ inches off the floor to avoid flood damage. If moving from cold to warm environments, allow 2 hours for the machine to reach room temperature before powering on.
Humidity Control Tactics That Work
Even in heated spaces, humidity breeds mold:
- Place 2-3 silica gel packets inside the drip tray cavity
- Cover with a breathable cotton cloth (not plastic!)
- Store in a closet with good air circulation
Plastic covers create a greenhouse effect—trapping moisture that turns your Keurig into a mold incubator. The cotton cover blocks dust while letting residual vapor escape.
Match Storage Steps to Your Timeline
Quick Storage (Under 1 Week)
- Empty external reservoir
- Store upright in heated space
- Run one water-only cycle before reuse
Medium-Term Storage (1-4 Weeks)
- Complete universal drainage or K-Duo pump-out
- Vinegar descale recommended
- Store components separately with silica gel
Long-Term/Winter Storage (1+ Months)
- Compressed-air blowout after drainage
- Full vinegar descale with 30-minute dwell time
- Silica gel packets + breathable cotton cover
- Heated indoor storage only
Avoid These 3 Costly Storage Mistakes
The “Tiny Water Droplet” Myth
Even a teaspoon of water expands enough to crack pumps when frozen. Ice exerts 2,000+ PSI pressure—more than enough to shatter plastic housings. Always assume hidden water remains.
Plastic Bag Storage Trap
Sealing your Keurig in plastic traps humidity. Within weeks, this creates condensation that breeds black mold in the drip tray. Use only breathable fabrics.
Skipping the Drying Wait Time
Rushing to pack after drainage leaves moisture in narrow tubing. Those extra 4 hours of air-drying prevent the “moldy coffee” surprise when unboxing.
Quick Reference Storage Checklist
Before storing your Keurig, verify each step:
– [ ] External reservoir removed, washed, and bone-dry
– [ ] Internal water drained via model-specific method
– [ ] Vinegar descale completed (storage >2 weeks)
– [ ] All components cleaned and air-dried 4+ hours
– [ ] Storage location maintains >32°F year-round
– [ ] 2-3 silica gel packets placed in drip tray
– [ ] Breathable cotton cover applied (not plastic)
– [ ] Power cord loosely coiled with Velcro tie
When you unpack your Keurig after proper storage, that first cup of coffee will taste like victory. The 20 minutes you invested in drainage and cleaning saves hundreds in replacement costs and prevents the frustration of a dead machine when you need caffeine most. Remember Karen Painter’s experience: “I inverted and shook, but wasn’t confident it drained 100%.” The compressed-air method and silica gel packets eliminate that uncertainty. Store it right, and your Keurig will outlast multiple vacation seasons—while neighbors replace units cracked by trapped ice and hardened mineral deposits. Your future morning self will thank you for taking these critical steps today.


