
Nothing ruins the excitement of a new coffee maker faster than realizing it’s not brewing properly right out of the box. When you invest in a Bunn coffee maker—the gold standard for fast, consistent brewing—you deserve perfect coffee from day one. The secret? Proper setup. Most people skip critical preparation steps, leading to off-flavors, inconsistent brewing, and premature wear on their expensive machine. This guide reveals exactly how to set up a Bunn coffee maker for optimal performance, whether you’ve purchased the Velocity, Commercial, or Velocity HB model for your home or office.
Unlike standard drip coffee makers that take 10-15 minutes to brew, Bunn’s commercial-grade technology delivers a full pot in just three minutes. But this speed requires precise setup to function correctly. Follow these steps carefully to avoid common pitfalls and enjoy café-quality coffee that maintains perfect temperature from first cup to last.
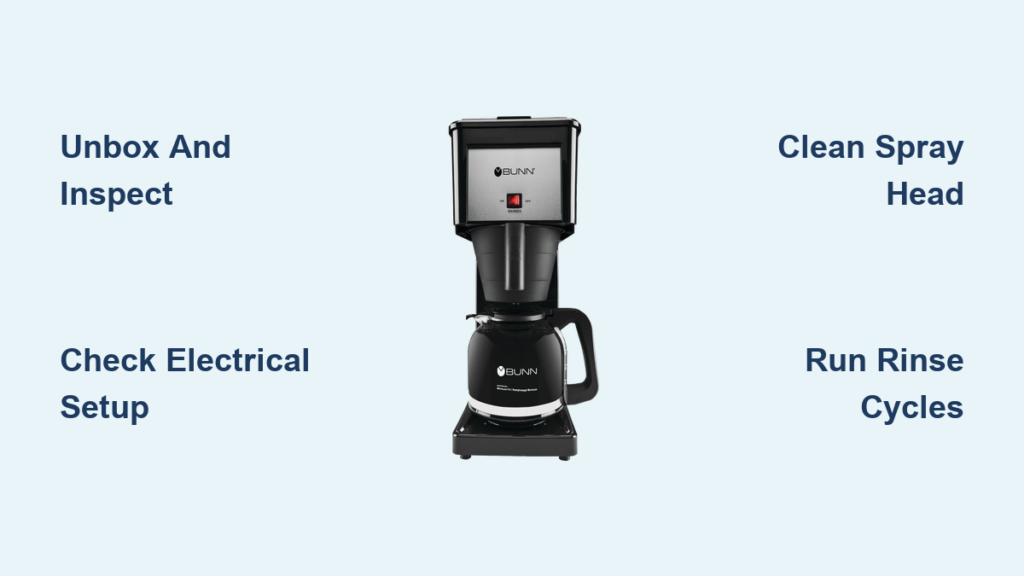
Unbox and Inspect Your Bunn Coffee Maker Thoroughly
Remove all protective packaging and examine your Bunn coffee maker for shipping damage before connecting power. Check the glass carafe for chips along the rim and handle—these weaken structural integrity and can cause breakage during use. Inspect the stainless steel brew basket for dents that might affect water distribution and the spray head for any obstructions from manufacturing debris.
Verify you have all components: carafe, brew basket, lid, and water filter (if included with your model). Commercial Bunn models typically include a water filtration system that’s essential for preventing mineral buildup. If anything is missing or damaged, contact the retailer immediately with photos of the issue—most manufacturers require documentation within 48 hours of delivery for replacement claims.
Position Your Brewer for Optimal Performance and Safety
Place your Bunn coffee maker on a heat-resistant, level surface that can support 20-40 pounds of weight when fully loaded with water. Countertop edges create tipping hazards, so position the unit at least 4 inches from the counter’s edge. Maintain four inches of clearance on all sides for proper ventilation—Bunn’s powerful heating elements generate significant heat during operation.
Ensure the location provides easy access to a properly grounded electrical outlet that matches your model’s voltage requirements (120V for residential units, 208-240V for commercial models). Never use extension cords with Bunn coffee makers—they draw 12-15 amps during heating cycles, creating fire hazards with inadequate wiring. If your outlet doesn’t reach, have an electrician install a dedicated circuit rather than risking safety with makeshift solutions.
Verify Electrical Requirements Before Powering On
Your Bunn coffee maker’s performance depends entirely on receiving the correct electrical current. Check the manufacturer’s label on the unit’s back for voltage and amperage specifications—most home models require 120V/60Hz with a 15-amp circuit, while commercial units often need 208-240V power.
Test your outlet with a circuit tester to confirm proper grounding and voltage stability. Bunn machines contain sensitive heating elements that fail prematurely when exposed to voltage fluctuations. If the tester shows reversed polarity or open ground, consult an electrician before proceeding—this simple step prevents costly repairs down the line.
Why Dedicated Circuits Matter for Bunn Coffee Makers
Bunn’s rapid-brew technology draws maximum power during heating cycles, causing voltage drops when sharing circuits with other appliances. This results in inconsistent brewing temperatures that extract bitter compounds from coffee grounds. A dedicated circuit maintains stable voltage, ensuring water reaches the ideal 200°F brewing temperature consistently. The National Electrical Code recommends dedicated circuits for all appliances drawing more than 50% of a circuit’s capacity—Bunn coffee makers qualify.
Clean All Components Before First Use
New Bunn coffee makers contain manufacturing residues that affect coffee flavor. Wash the glass carafe, stainless steel brew basket, and lid with warm water and mild dish soap using a non-abrasive sponge. Rinse thoroughly to remove all soap residue, which can create off-flavors in your first brews.
Critical Spray Head Cleaning Step Most Owners Miss

The spray head (located above the brew basket) often contains fine metal shavings from manufacturing. Remove it according to your model’s instructions—usually by twisting counterclockwise—and soak in warm water for 5 minutes. Use a soft-bristled toothbrush to gently clean the spray holes, then rinse under running water until clear. Properly cleaned spray heads ensure even water distribution over coffee grounds for balanced extraction.
Prepare Water for Optimal Brewing Results
Water quality directly impacts both coffee taste and machine longevity. Bunn recommends using filtered water with 50-150 ppm mineral content—hard water causes scale buildup that insulates heating elements, reducing efficiency by up to 30% over time. Fill the reservoir with cold tap water (never hot) to the MAX line indicated inside the tank.
Why Distilled Water Damages Bunn Coffee Makers
While seemingly pure, distilled water lacks essential minerals that help regulate electrical conductivity in heating elements. Prolonged use causes premature heating element failure. If your tap water is extremely hard (over 180 ppm), mix 70% filtered water with 30% spring water for the ideal mineral balance that protects your machine while enhancing coffee flavor.
Execute the Mandatory Initial Rinse Cycle
Before brewing coffee, run three complete water cycles through your Bunn coffee maker to flush manufacturing residues and prime the heating system. Fill the reservoir to the MAX line, place the empty carafe on the warming plate, and initiate a brew cycle.
During the first cycle, observe the spray pattern—water should distribute evenly across the entire brew basket area. Uneven spray indicates a partially clogged spray head requiring additional cleaning. Complete two more rinse cycles, discarding the water each time. This process also heats the thermal carafe (if included), preparing it to maintain proper coffee temperature.
Brew Your First Perfect Pot of Coffee
After completing rinse cycles, allow the brewer to reach full operating temperature—indicated by the “Ready” light (typically 15-20 minutes). Use medium-coarse ground coffee (similar to sea salt texture) for optimal extraction—too fine causes over-extraction and bitterness, while too coarse yields weak coffee.
For a standard 12-cup Bunn pot, use ¾ to 1 cup of coffee grounds (adjust to taste). Place a paper filter in the brew basket (if required by your model), add grounds without tamping, and fill the reservoir with fresh cold water. Start the brew cycle and resist lifting the lid—this releases heat and disrupts the precise temperature control Bunn is known for.
Daily Maintenance That Extends Your Brewer’s Lifespan
After each use, empty coffee grounds immediately and rinse the brew basket under warm water to prevent coffee oils from hardening. Coffee oils become rancid within hours, transferring bitter flavors to subsequent brews. For permanent filters, remove and clean with a soft brush daily.
Descale monthly using Bunn’s official descaling solution or a 50/50 white vinegar-water mixture. Run the solution through a complete brew cycle, followed by three rinse cycles with fresh water until vinegar odor disappears. This removes mineral deposits that reduce heating efficiency by as much as 50% when neglected.
Troubleshoot Common Setup Problems Immediately
If your Bunn coffee maker produces weak coffee during initial use, check for these issues:
- Uneven water distribution: Remove and clean the spray head with a soft brush
- Insufficient heating: Verify the unit has completed its 15-minute warm-up cycle
- Overflowing brew basket: Reduce coffee grounds quantity or use coarser grind
Water leaking from the base usually indicates improper carafe placement—most Bunn models have a safety switch that activates only when the carafe is correctly positioned on the warming plate. Ensure the carafe handle faces forward and the unit clicks into place.
Prevent Costly Repairs With Proactive Care
Replace the water filter cartridge every 2-3 months (or after 75-100 brews) to prevent scale buildup in internal components. A clogged filter reduces water flow by up to 40%, causing incomplete brewing cycles and inconsistent extraction.
Inspect the heating element annually for visible scale deposits—thick white crust indicates severe mineral accumulation requiring professional descaling. Most Bunn models have user-replaceable heating elements that cost $30-50, versus $150+ for professional service if neglected until complete failure.
Final Note: Proper setup transforms your Bunn coffee maker from a simple appliance into a precision brewing instrument. By following these specific setup steps, you’ll enjoy consistently excellent coffee while extending your machine’s lifespan to 5-7 years with regular maintenance. Remember that water quality and daily cleaning routines impact performance more than any other factors—invest in a quality water filter and never skip the post-brew cleaning routine for best results. For model-specific guidance, always consult your Bunn coffee maker’s user manual as features vary between Velocity, Commercial, and other series models.


