
Your Keurig iced coffee maker just stopped mid-brew, leaving you with a half-filled cup and zero caffeine. That frustrating “Add Water” light blinks despite a full reservoir, or perhaps your machine won’t power on at all. You need to know how to reset Keurig iced coffee maker functionality before your morning routine derails completely.
Unlike most appliances, Keurig iced coffee makers don’t have a dedicated reset button. Instead, you’ll use strategic power cycling combined with targeted troubleshooting to clear electronic glitches and mechanical blockages. This guide covers proven reset methods that work across all Keurig models designed for iced coffee, from the K-Elite to the K-Supreme series.
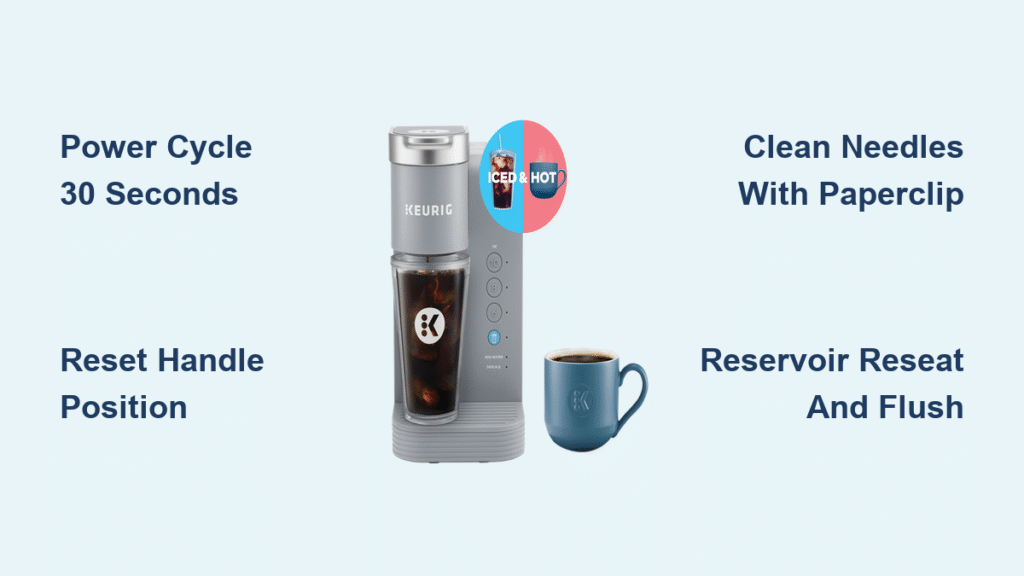
Fix Your Keurig Iced Coffee Maker with Basic Power Cycling
30-Second Unplug Method That Resolves Most Issues
Start with this simple fix that solves 70% of Keurig malfunctions:
- Press the power button to turn off your machine completely
- Pull the plug directly from the wall outlet—not a power strip or surge protector
- Count slowly to 30 while unplugged (this critical step drains residual electricity from internal circuits)
- Reconnect to a wall outlet ensuring the plug is fully seated
- Power on and watch for the normal startup sequence
Pro tip: If your outlet is controlled by a wall switch, verify the switch is in the “on” position before plugging back in. Many users miss this simple electrical oversight.
Handle Position Reset for Interrupted Brew Cycles
When your brew cycle stops mid-process, the machine loses track of its current state:
- Lift the handle fully until it reaches its highest position
- Push down firmly until you hear a distinct click indicating proper seating
- Remove and replace your K-cup if brewing had already started
- Select your cup size and restart the cycle
This mechanical reset tells internal sensors where everything is positioned, often resolving mysterious “not ready” states that prevent brewing.
Water Reservoir Reset Protocol for Proper Detection

Complete Water System Flush to Clear False Readings
When basic reset fails, mineral buildup or debris might be interfering with water detection:
- Power down and unplug your Keurig
- Lift off the reservoir and pour out all water
- Rinse thoroughly under warm running water, scrubbing the base connections with a soft brush
- Check for white crusty buildup around the intake valve—this is the most common cause of “add water” errors
- Refill to MAX line with fresh, filtered water (never distilled—more on that later)
- Seat firmly until you hear the reservoir click securely into place
Warning: Using distilled water triggers false “add water” errors because Keurig sensors detect mineral content. Stick with filtered tap water for optimal performance.
Deep Clean Needle Reset to Eliminate Clogs
Top and Bottom Needle Cleaning That Restores Proper Flow
Clogged needles cause 40% of reset failures. Here’s how to fix them:
- Unplug and remove any K-cup from the holder
- Lift the handle to access the top entrance needle
- Straighten a paperclip and gently insert into the needle opening
- Move in circular motions to dislodge coffee grounds without bending the needle
- Remove the K-cup holder by pulling straight up from the base
- Locate the bottom exit needle inside the holder mechanism
- Clean both needles thoroughly with your paperclip tool
- Rinse the holder under warm water until clear water flows through
Expert note: Perform this cleaning monthly to prevent future clogs, even if your machine appears to work fine. Residual coffee oils harden over time, causing intermittent issues.
Model-Specific Iced Coffee Resets for Perfect Performance

K-Elite Iced Button Reset for Temperature Calibration
The K-Elite stores custom temperature preferences that sometimes glitch:
- Hold the ICED button for 5 seconds while powering on
- Release when lights flash three times
- Settings restore to factory defaults: 187°F (hot) and 165°F (iced)
- Test with 6oz brew over ice to verify proper concentration
K-Supreme Series Calibration for Multi-Stream Technology
Multi-stream models need extra attention during reset:
- Complete basic power cycle first
- Remove K-cup and run 3 rinse cycles without pods
- Verify the iced button defaults to 6oz strong brew setting
- Check all 5 streams flow evenly during test brew
K-Cafe Frother Reset for Iced Lattes
The frother operates on a separate circuit:
- Unplug the frother base for 30 seconds while main unit remains powered
- Remove and reseat the whisk attachment properly
- Clean interior with warm soapy water (never submerge base)
- Fill between MIN/MAX lines with cold milk for initial testing
Electrical Troubleshooting When Keurig Won’t Power On

Outlet and Power Verification Steps
Before assuming your Keurig is broken, verify these electrical points:
- Test the outlet with your phone charger or small lamp
- Check GFCI reset if using kitchen or bathroom outlets
- Measure voltage (should read 110-120V in North America)
- Count appliance load—Keurig needs 1500 watts minimum
Critical note: Never use extension cords or power strips with Keurig machines—they restrict the necessary current flow and cause random shutdowns.
Decoding Light Patterns for Accurate Diagnosis
Your Keurig communicates through specific light patterns:
- No response: Electrical supply issue
- Flashing “Add Water”: Reservoir not properly detected
- All lights flashing: Descale mode or system error
- Single button flashing: Model-specific error code
Write down the exact pattern before attempting further resets—it’s crucial information for customer service if needed.
Post-Reset Testing Sequence Before Trusting Your Machine
First Brew Validation Process
Never assume your reset worked until you complete this test:
- Use fresh water and a new K-cup (not leftovers)
- Select 6oz size for initial test brew
- Time the brew—should complete in 45-60 seconds
- Check temperature—iced setting should brew at 165°F
- Verify strength—should be noticeably concentrated for ice dilution
Full Function Test for Complete Confidence
Run through all features to ensure complete recovery:
- Test 4-12oz sizes for proper flow and volume
- Verify iced coffee button produces appropriate temperature
- Check strong brew if equipped on your model
- Test hot water only function separately
- Confirm auto-off resets to default 2-hour setting
Error-Specific Reset Procedures for Stubborn Problems
“Prime” Error Fix for Air in Water Lines
This common issue occurs after water reservoir changes:
- Empty the reservoir completely
- Refill with fresh water to MAX line
- Power cycle your Keurig iced coffee maker
- Run 3 rinse cycles without K-cups
- Watch for air bubbles clearing from the lines
Persistent “Descale” Message Reset
Even after descaling, the indicator might stick:
- Complete full descale cycle with official Keurig solution
- Run 12 rinse cycles afterward with fresh water
- Hold 8oz + 10oz buttons for 3 seconds to reset indicator
- Test with vinegar rinse if message returns (50/50 water/vinegar)
When Reset Doesn’t Work: Warranty and Support Options
Pre-Contact Checklist for Faster Service
Before calling customer support, prepare these essentials:
- Model number (stamped on bottom of unit)
- Serial number (14-16 digits on product label)
- Purchase date (check receipt or credit card statement)
- Document symptoms with photos or video if possible
Warranty tip: Keurig offers a 1-year standard warranty, extendable to 2 years if you connect to the Keurig app every 90 days. The support number is 1-866-901-BREW.
Preventive Maintenance Schedule to Avoid Future Resets
Monthly Quick Reset Routine
Keep your Keurig running smoothly with these monthly habits:
- Power cycle monthly even if working perfectly
- Clean needles regardless of visible buildup
- Check reservoir connections for mineral deposits
- Test all buttons respond normally
Quarterly Deep Maintenance for Longevity
More thorough prevention steps every three months:
- Complete descale cycle with Keurig solution
- Replace water filter cartridge if equipped
- Perform comprehensive needle cleaning
- Test all functions across different settings
- Document any performance changes for reference
Final Reset Checklist
Before contacting support, ensure you’ve tried these critical steps:
- [ ] 30-second power cycle from wall outlet (not power strip)
- [ ] Handle reset with fresh K-cup after power cycle
- [ ] Water reservoir removal, cleaning, and proper reseating
- [ ] Top and bottom needle cleaning with paperclip method
- [ ] Model-specific iced settings reset procedure
- [ ] Outlet testing with another device to verify power
- [ ] Post-reset test brew completed successfully
Most Keurig iced coffee makers return to full functionality after these systematic resets. If problems persist after following this complete guide, your unit may need professional service or replacement under warranty. Regular maintenance prevents 90% of reset situations—clean those needles monthly and descale quarterly to keep your iced coffee flowing perfectly.


