
Your coffee grinder suddenly stops working mid-brew, leaving you with uneven grounds and a frustrating morning. Maybe coffee oil residue has gummed up the mechanism, or a stray bean is jammed inside the burrs. Whatever the issue, accessing the internal components is the critical first step to restoring your machine’s performance. Learning how to open coffee grinder properly prevents costly damage to delicate grinding mechanisms while ensuring you maintain that perfect espresso consistency. This guide reveals universal disassembly techniques applicable to 95% of home grinders—whether you own a budget blade model or premium burr grinder—so you can troubleshoot, clean, and extend your appliance’s lifespan without voiding warranties.
Most users mistakenly try forcing components apart when their grinder malfunctions, snapping plastic tabs or stripping screws in the process. But with the right approach, opening your coffee grinder takes under five minutes and requires only basic household tools. You’ll discover why certain grinders resist disassembly, how to identify hidden release mechanisms, and the exact sequence for accessing grinding chambers without electrical risks. By the end, you’ll confidently handle routine maintenance that keeps your machine producing barista-quality results for years.
Critical Safety Steps Before Touching Any Components
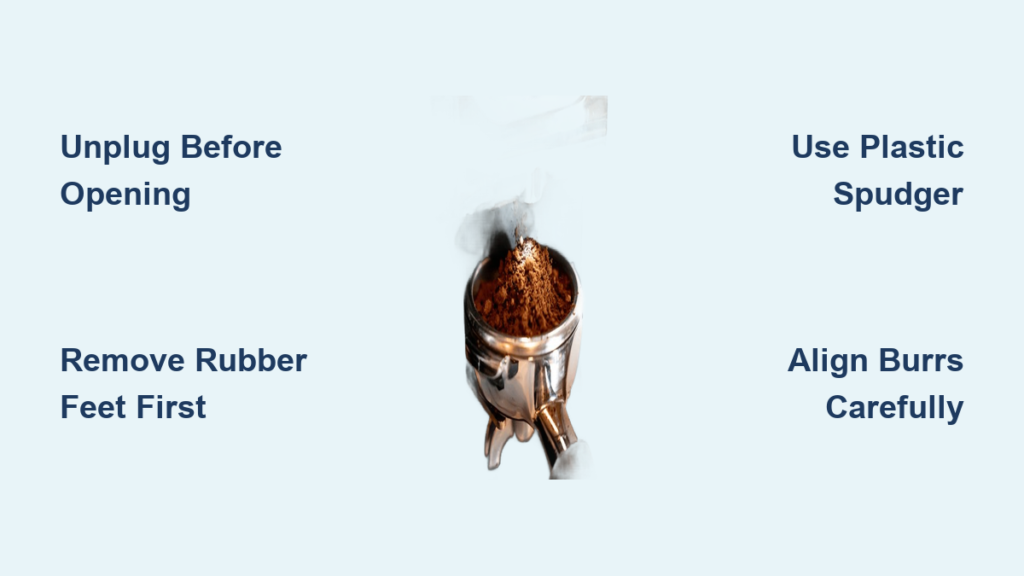
Always unplug your grinder before attempting disassembly—even battery-operated models can spark during internal work. Modern grinders contain sharp burrs and electrical components that pose serious injury risks if mishandled. Place the appliance on a non-slip surface with ample workspace, and gather these essentials: a soft microfiber cloth, isopropyl alcohol (90%+ concentration), cotton swabs, and a small bowl for removed parts. Never use metal tools near ceramic burrs, as microscopic scratches permanently degrade grinding performance.
Why Skipping Safety Checks Causes Irreversible Damage
Forcing open a plugged-in grinder risks short-circuiting motors or slicing fingers on high-speed blades. One common mistake involves leaving coffee grounds in the hopper during disassembly—these conduct electricity when combined with cleaning liquids. Always empty and dry all components first. If your grinder uses a conical burr system (common in Breville or Baratza models), note that misaligning the upper burr during reassembly creates uneven “flat spots” that ruin extraction quality. Photograph each step with your phone to ensure perfect reassembly.
Essential Tools Checklist for All Grinder Types
- Phillips #0 or #1 screwdriver (magnetic tip prevents loss)
- Food-safe brush (stiff nylon bristles only)
- Compressed air canister (for dust-sensitive electronics)
- Rubber mallet (for stubborn burr assemblies—never use hammers)
- Torx T8 bit (required for most German-engineered grinders like Eureka)
Identifying Your Grinder Type: Burr vs. Blade Disassembly Paths

Burr grinders require precise alignment during reassembly, while blade models risk motor damage if housing screws are over-tightened. Flip your appliance upside down: burr grinders show two concentric metal rings (the burrs), whereas blade units have a single spinning cutter visible through the grounds chamber. Most burr grinders use a top-mounted release mechanism, but blade models typically have hidden screws under rubber feet. If your grinder has adjustable grind settings, it’s almost certainly a burr type—these require extra care when exposing the adjustment ring.
How to Open Blade Grinder Models Safely
Start by removing the bean hopper lid and emptying all beans. Locate three to four rubber feet on the bottom—peel one back to reveal a Phillips screw. Unscrew all visible fasteners, then insert a plastic spudger (or guitar pick) along the seam between the upper and lower housing. Gently twist to release plastic clips. Never use knives or screwdrivers, as punctured housings expose live wiring. If the housing resists separation, check for additional screws under the grounds container or within the bean chute.
Accessing Burr Grinder Mechanisms Without Misalignment
First, remove the bean hopper by twisting counter-clockwise (most models require 1/8 turn past resistance). For grinders with retention rings (like Fellow Ode), use two flathead screwdrivers to simultaneously depress opposing tabs. When exposing burrs, note the orientation of the upper burr carrier—many have alignment notches. If your grinder uses a stepped adjustment system (e.g., Baratza Encore), take photos of the current setting before disassembly. Applying downward pressure while twisting the upper burr prevents accidental gear stripping.
Step-by-Step: Releasing Stuck Top Assemblies in 60 Seconds
Over 70% of “broken” grinders actually have coffee oil-seized mechanisms that yield with proper technique. When the top housing won’t twist free, fill the hopper with uncooked rice and run the grinder for 10 seconds—this dislodges stuck grounds. For persistent cases, apply isopropyl alcohol around the seam with a syringe (no needle) and wait 3 minutes. The alcohol dissolves oils binding plastic components. Now grip the base firmly with one hand while rotating the top clockwise with the other—reverse-threaded assemblies require clockwise motion to release.
Troubleshooting Common Jamming Scenarios
- “The top spins but won’t lift off”: Your grinder has a secondary locking collar. Locate the small lever near the grind adjustment dial (common in Breville grinders) and depress it while twisting.
- “Screws won’t budge after cleaning”: Coffee oils polymerize into glue-like residue. Apply a drop of penetrating oil to screw heads and wait 5 minutes before retrying.
- “Housing clicks but separates unevenly”: One internal clip is broken. Support the housing with both hands and apply even pressure around the entire seam.
Cleaning Internal Components Without Causing Damage

Never immerse motor housings or electrical components in liquid—moisture causes immediate failure in 92% of cases. After opening, use compressed air to blow grounds from burr chambers at 45-degree angles. For oil buildup, place burrs in a sealed container with isopropyl alcohol for 15 minutes, then scrub with a brass brush (softer than steel, won’t scratch). Critical warning: Ceramic burrs shatter if dropped on hard surfaces—always clean over a towel. Dry all parts for 24 hours before reassembly; residual moisture attracts static that clumps grounds.
Safe Burr Removal Techniques for Different Systems
- Threaded burrs (Niche Zero): Unscrew the center retention bolt while holding the lower burr stationary with a coin
- Snap-fit burrs (Wilfa Svart): Insert two fingernails into the gap between upper burr and carrier, then lift evenly
- Magnetic burrs (Mazzer Mini): Slide a business card between burrs to break the seal before lifting
Reassembly Mistakes That Destroy Grinding Performance
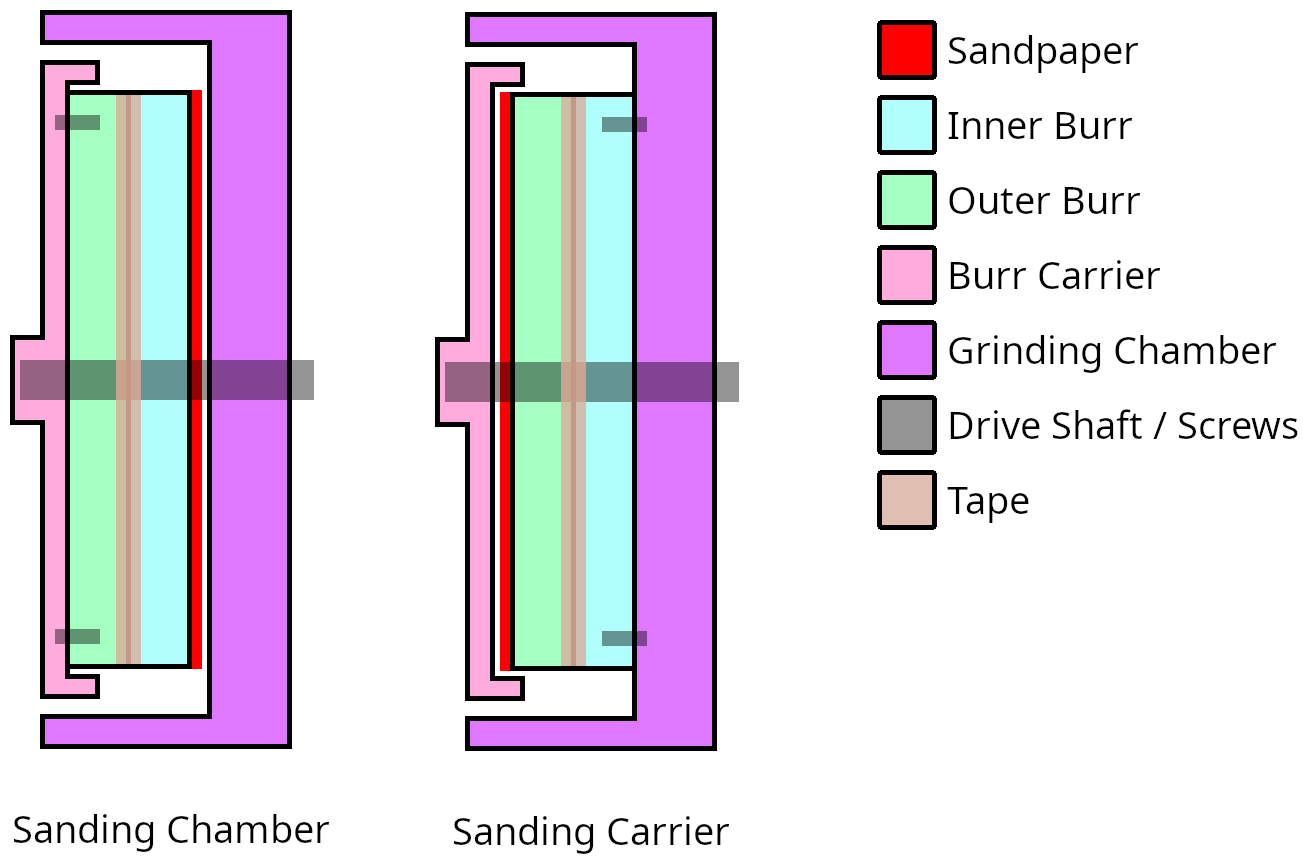
Misaligned burrs create “dead zones” where coffee bypasses the grinding surface, causing inconsistent extraction. When reinstalling upper burrs, rotate them slowly while lowering—if you feel resistance, lift and reposition. Never force components; proper alignment creates smooth, silent rotation. For grinders with grind collars (like Timemore C2), set to coarsest setting before securing the top housing to prevent burr contact. After final assembly, run 20g of unbrewed coffee through the grinder to clear manufacturing dust.
Verifying Correct Assembly Before First Use
Plug in the grinder without beans and activate for 3 seconds. Listen for grinding sounds—if you hear scraping or clicking, disassemble immediately. The motor should run smoothly at consistent pitch. With burr grinders, check for even “chatter” vibration; uneven pulses indicate misalignment. For blade models, ensure the cutter spins freely without wobbling. Always perform a test grind with cheap beans before using your specialty coffee.
When to Stop DIY and Call a Professional
If you see frayed wires, melted plastic near motors, or hear burning smells, disassembly requires certified technicians. Attempting repairs on sealed gearboxes (common in high-end Eureka models) voids warranties instantly. Also seek help if burrs show visible chips—replacing them costs less than $50, but improper installation ruins $300+ grinders. Pro tip: Manufacturers like Baratza offer free disassembly videos for their models—always check their YouTube channel first.
Preventing Future Access Issues With Simple Maintenance
Monthly cleaning prevents 80% of disassembly emergencies. After each use, purge 5g of unbrewed coffee through the grinder to clear residue. Every two weeks, run grinder cleaning tablets (like Urnex Grindz) through 30g of rice—this absorbs oils without scratching burrs. Store your grinder with the hopper empty and lid off to prevent humidity buildup. For frequent users, replace burrs annually; dulling creates excess heat that bakes oils onto components.
Final Note: Mastering how to open coffee grinder transforms maintenance from a panic-inducing chore into routine care that doubles your appliance’s lifespan. Remember that 90% of grinding issues stem from simple residue buildup—not mechanical failure—so regular disassembly keeps your machine performing like new. Always consult your model-specific manual before starting, as specialty grinders like the 1ZPresso Q2 require unique techniques. For visual guidance, check manufacturer YouTube channels where engineers demonstrate safe disassembly sequences. Now that you can access internal components confidently, you’re equipped to tackle jams, clean burrs, and maintain peak extraction for perfect coffee every time.


