
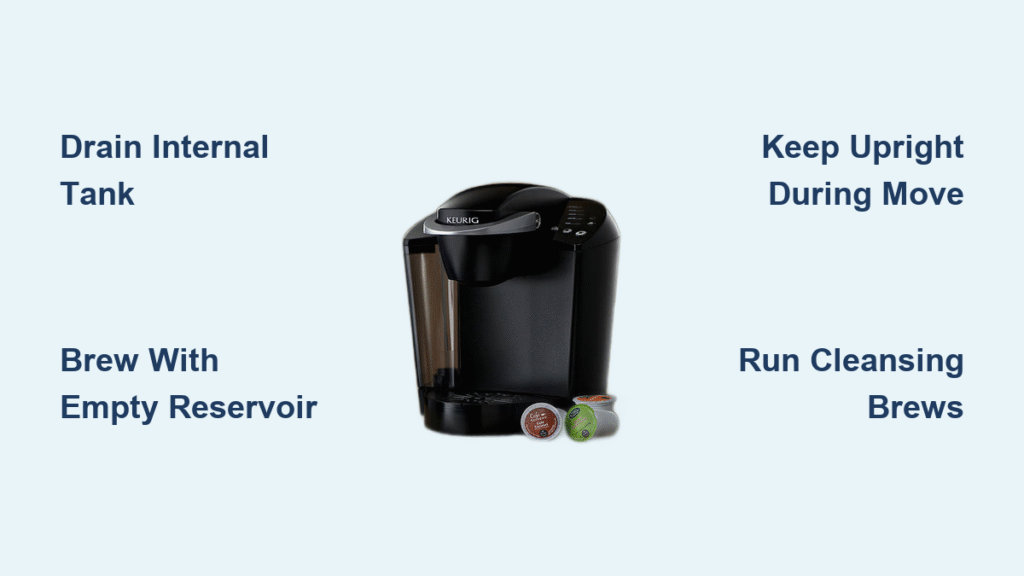
That half-full water reservoir in your Keurig might seem harmless, but during your move, it becomes a ticking time bomb. Water sloshing through internal tubing can short-circuit electronics, breed mold in hidden tanks, or leak into your packed boxes—turning your favorite coffee maker into a costly disaster. How to empty a Keurig for moving isn’t just about dumping the visible water; it requires draining the hidden internal reservoir specific to your model. Skip this critical step, and you’ll face mineral buildup, electrical damage, or ruined belongings. In this guide, you’ll learn the exact model-specific procedures to fully drain your machine in under 10 minutes, ensuring it arrives at your new home ready for that first perfect cup.
Most people assume removing the water tank is enough—but Keurig’s internal reservoir holds 2-4 ounces of water your eyes can’t see. This hidden water causes 90% of post-move failures. Whether you’re relocating across town or storing your brewer for months, follow these proven steps to protect your investment. I’ll walk you through identifying your model and executing the precise drainage sequence that leaves zero moisture behind.
Identify Your Keurig Model Before Draining
Your model number dictates the entire how to empty a Keurig for moving process—using the wrong method risks permanent damage. Find the label on the bottom, side panel, or original box immediately. Models like K-Duo, K-15, K-Mini Plus, Classic, and Keurig 2.0 have fundamentally different internal drainage systems.
Spot Key Models in 30 Seconds
- K-Duo: Dual brewing options (single-serve + carafe) with a large water reservoir
- K-15/K-Mini Plus: Compact single-serve units with minimal buttons and no display screen
- Keurig 2.0/Classic: Digital displays, multiple cup size options, and larger footprints
Never guess your model—K-Duo’s drainage sequence could crack a K-Mini Plus’ internal pump. If labels are missing, check your purchase receipt or Google “Keurig [your color] [cup size options]” for visual matches.
Empty K-Duo Series Without Internal Damage
K-Duo models hide 3+ ounces of water in an internal tank that won’t drain by just removing the reservoir. Skipping this step causes leaks during transit as pressure shifts force water into electrical components.
Internal Tank Drainage Sequence
- Brew until “Add Water” appears on the display—this signals the tank is nearly empty
- Place a partially filled container (1/4 full) back in the reservoir slot
- Run one complete brew cycle—the machine pulls this water through internal tubing and expels it through the coffee output
- Discard all expelled water and repeat if “Add Water” reappears
This cycle uses minimal water to flush remaining moisture from hidden chambers. Never tilt the machine during this process—water forced into sensors can trigger error codes.
External Reservoir Protocol
Remove the reservoir completely and pour out water over a sink. Wipe the tank’s interior with a microfiber cloth to eliminate standing droplets. For moves exceeding 7 days, run three cleansing brews (no pod) after setup at your new location to prevent stale-tasting coffee.
K-15 and K-Mini Plus Full Drainage Method
These compact models trap water near the heating element, making them prone to electrical shorts if moved wet. Their small size fools owners into thinking they hold little water—but internal tanks retain up to 2 ounces.
Complete Water Removal Process
- Keep the unit plugged in but powered off (critical for pump activation)
- Position a large mug on the drip tray
- Lift and lower the K-Cup handle as if inserting a pod
- Press and hold the brew button continuously—water will stream into the mug
- Hold for 45-60 seconds until flow stops completely
- If water remains, repeat immediately
This technique activates the pump without heating elements, safely expelling water. Never unplug during drainage—K-Mini Plus units lose pump functionality when disconnected. If water sputters after 2 cycles, check the drip tray for blockages before retrying.
Keurig 2.0 and Classic Series Internal Purge
Classic and 2.0 series machines have complex internal reservoirs that retain water even after reservoir removal. Forcing these models upright during transit with residual water causes leaks through the K-Cup puncture needles—a common post-move failure point.
Internal Reservoir Purge Technique
- Place a cup under the dispenser and remove the water reservoir
- Power on the machine (keep it plugged in)
- Select the largest cup size (e.g., 12 oz)
- Immediately remove the empty reservoir compartment after selection
- Watch water sputter into the cup—this is internal tank drainage
- Repeat 3-5 times until no more water emerges
- Close the K-Cup chamber to reset internal sensors
This exploits the machine’s “water-seeking” behavior—it draws from internal reserves when the reservoir is missing. If water stops mid-cycle, wait 30 seconds before retrying to avoid overheating the pump.
Critical Safety Steps During Drainage
Power and Positioning Hazards
Never tilt or invert your Keurig during drainage—water forced into control boards causes $50+ repairs. Always:
– Keep the unit plugged in until drainage completes (unplug only after final water expulsion)
– Maintain strictly upright positioning on a stable surface
– Allow 45 minutes of drying time before packing (not 30 as commonly believed)
Component Drying Checklist
- Reservoir: Wipe interior with lint-free cloth, air-dry upside down for 20 minutes
- Drip tray: Remove, wash, and dry completely—hidden corners trap moisture
- K-Cup chamber: Leave open for 1 hour to evaporate condensation
- Base vents: Use compressed air only on cool, unplugged units (1-second bursts max)
Storage Position for Safe Transportation
Upright Transportation Rule
All Keurigs must travel upright—even with “empty” tanks. Residual moisture in tubing will leak into electronics when tilted. Secure the unit:
– In original packaging with foam inserts
– Or wrap in bubble wrap, placing it vertically in a small box
– Never stack boxes on top of the Keurig during transit
Long-Term Storage Prep
For storage exceeding one week:
– Place 2 silica gel packets in the reservoir compartment
– Wrap the entire unit in breathable cotton fabric (never plastic)
– Store in climate-controlled environments—avoid garages or attics
Post-Move Setup Protocol
First Use After Storage
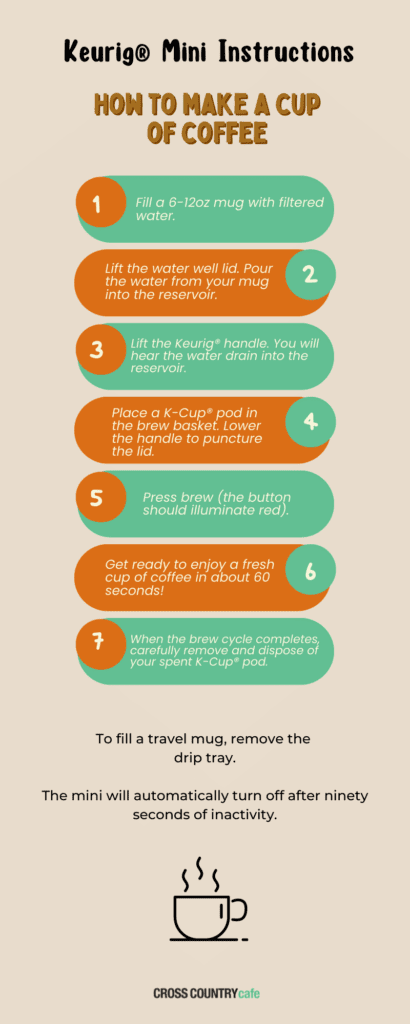
Before brewing coffee:
1. Run three cleansing brews (no pod) with fresh water
2. Check for leaks at the reservoir connection point
3. Test all cup sizes to ensure consistent flow
This flushes sediment from stagnant water and reactivates internal seals. If water pools under the unit during testing, stop immediately—residual moisture remains.
Water Quality Reset
Municipal water differences between locations cause mineral shock. For the first week:
– Use bottled spring water (not distilled)
– Brew only 8 oz cups to gradually recondition the system
– Discard the first brew of each day
Common Emptying Mistakes That Ruin Keurigs
These shortcuts cause irreversible damage:
– ❌ “Just removing the reservoir”—ignores 2+ ounces in internal tanks
– ❌ “Shaking out water”—forces moisture into electrical compartments
– ❌ “Using hair dryers”—melts internal plastic components
– ❌ “Skipping post-move cleanses”—leads to moldy-tasting coffee
If your machine hisses or emits steam after 5 drainage cycles, contact Keurig support—never force repeated cycles.
Maintenance After Emptying
Preventive Care Benefits
Draining before moving extends your Keurig’s lifespan by 2+ years by:
– Preventing limescale buildup in hidden tubing
– Eliminating stagnant water that corrodes pumps
– Avoiding mold growth in warm internal chambers
This 10-minute process saves $100+ in potential repairs. For frequent movers, keep a printed checklist in your Keurig’s storage box.
Quick Reference Card
Tape this inside your moving box:
Model: _________

Internal drainage cycles: ___

Reservoir dried: ✓

Drip tray emptied: ✓

Transported upright: ✓

Storage duration: ___ days
Your Keurig is now move-ready—no leaks, no mold, no surprises. By following these model-specific how to empty a Keurig for moving steps, you’ve protected your machine from transit hazards and ensured it’ll brew flawlessly on day one in your new home. Remember: the real cost isn’t the 10 minutes you invest now—it’s the ruined coffee maker waiting in your unpacked boxes if you skip this critical step. Run those cleansing brews after setup, and savor that first perfect cup in your new kitchen.


