
Your Keurig coffee maker has started displaying that frustrating “DESCALE” message, pouring out weaker coffee, or taking longer to brew than usual. Mineral buildup from hard water is likely clogging the internal system, affecting both performance and taste. This common issue impacts millions of Keurig owners annually, but the good news is you can fix it yourself in about 30 minutes with basic supplies. In this guide, you’ll learn exactly how to properly descale your Keurig coffee maker to restore optimal brewing performance and extend your machine’s lifespan. Follow these proven steps to eliminate mineral deposits and enjoy consistently great-tasting coffee again.
Why Regular Descaling Prevents Costly Repairs
Ignoring your Keurig’s descaling warning leads to serious consequences beyond just slow brewing. Mineral deposits accumulate in the heating element and narrow water pathways, forcing the machine to work harder while producing lukewarm coffee. Most Keurig models develop permanent damage within 3-6 months of ignoring descaling alerts, voiding your warranty in the process. Proper maintenance every 3-6 months prevents these issues and keeps your coffee tasting fresh by eliminating the metallic aftertaste caused by mineral buildup. The descaling process removes calcium and lime deposits that reduce water flow by up to 40% in neglected machines.
How Often Should You Descale Based on Water Hardness
Your local water hardness determines how frequently you need to descale. In areas with soft water (0-3 grains per gallon), descale every 6 months. Moderate hardness (4-7 grains) requires quarterly maintenance, while hard water regions (8+ grains) need monthly descaling. Check your water report or use a $10 test strip from hardware stores to determine your exact hardness level. Keurig’s automatic reminder system typically triggers after 200 brew cycles, but this may not match your specific water conditions.
Recognizing When Your Keurig Needs Immediate Descaling
Watch for these clear warning signs that demand immediate attention: the “DESCALE” message illuminated on newer models, significantly reduced water flow during brewing, coffee taking more than 90 seconds to brew a small cup, or visible white particles in your coffee. Older Keurig models without digital displays show blinking lights in specific patterns when mineral buildup reaches critical levels. Don’t confuse these symptoms with clogged exit needles—mineral deposits affect the entire water pathway from reservoir to brew head.
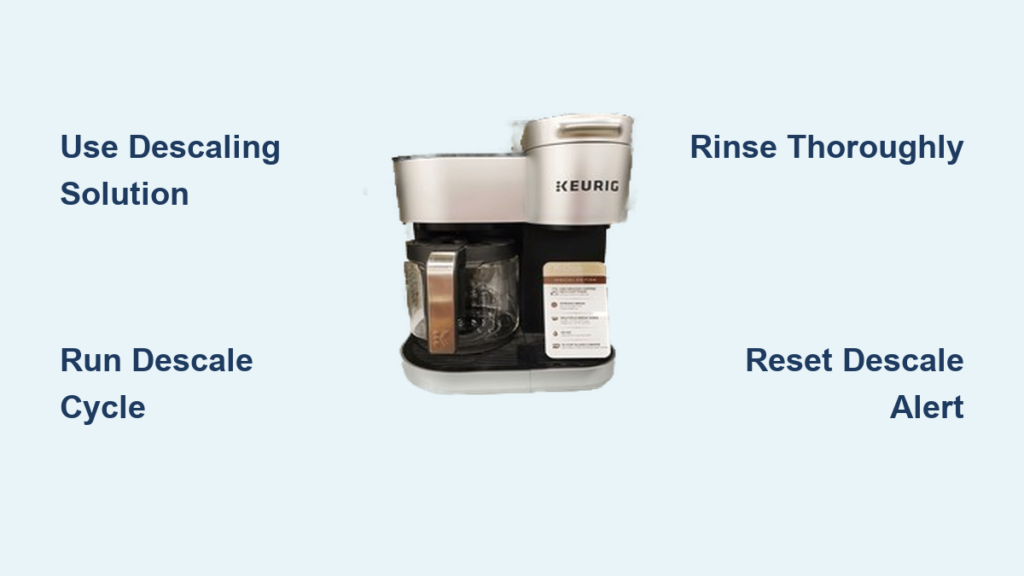
Required Supplies for Effective Keurig Descaling
Gather these essential items before starting: one 28-ounce bottle of Keurig Descaling Solution or white vinegar, 4-6 fresh water reservoirs (approximately 2 gallons), clean microfiber cloth, and optionally a small bowl for catching drips. Never use lemon juice, CLR, or other household cleaners as they can damage internal components and leave dangerous residues. Keurig’s official solution works faster than vinegar (30 minutes vs. 2 hours) and doesn’t leave lingering odors, but vinegar remains a cost-effective alternative at about one-fifth the price.
Why Vinegar Works (And Its Limitations)
White vinegar’s 5% acetic acid content effectively dissolves mineral deposits through a chemical reaction that breaks down calcium carbonate. While generally safe for Keurig systems, vinegar requires more thorough rinsing cycles to eliminate taste transfer. Hard water areas may need multiple vinegar treatments to achieve results that Keurig solution accomplishes in one session. The strong odor during the process can temporarily affect coffee taste if not properly flushed, so always complete the full rinse cycle regardless of which solution you choose.
Step-by-Step Descaling Process for All Keurig Models
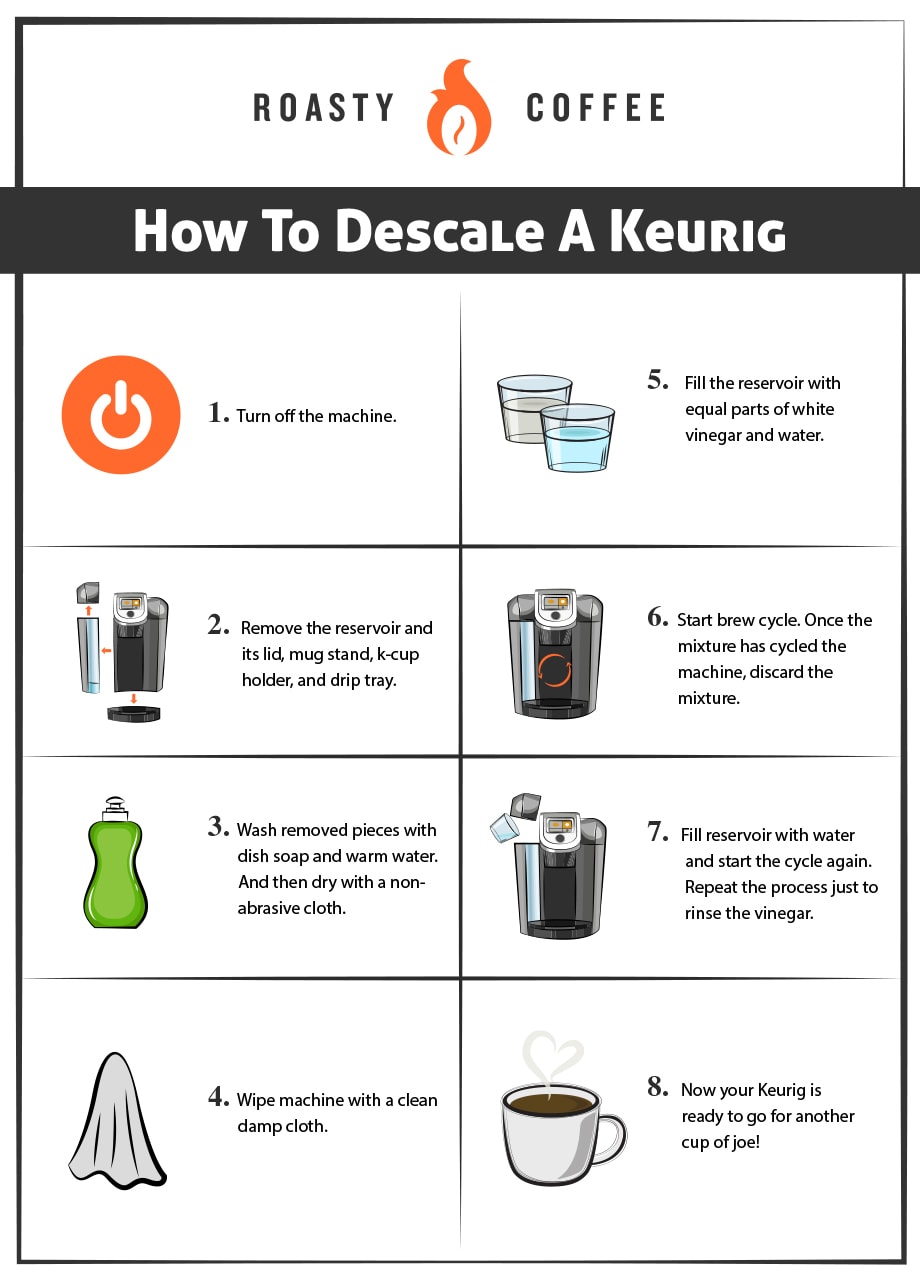
Begin by removing the water reservoir and emptying any remaining water. Pour the entire 28-ounce bottle of descaling solution directly into the empty reservoir, then fill to the MAX line with fresh water. Place the reservoir back into your machine and position a large mug on the drip tray. On most models, press and hold the 8oz and 12oz buttons simultaneously for 3 seconds until the “DESCALE” message starts flashing. Newer touchscreen models require navigating to Settings > Maintenance > Descaling Mode.
Running the Descaling Solution Through Your Machine
Start the descaling cycle by lifting and lowering the brew handle. Allow the solution to run through the system without interruption—this takes about 15-20 minutes as the machine pauses periodically. Never open the brew head or remove the K-cup during this process, as it will reset the cycle. The machine automatically dispenses solution in intervals, with pauses allowing the solution to work on stubborn deposits. Watch for the solution level to drop significantly in the reservoir, indicating proper flow through the system.
Completing the Critical Rinse Cycle
After the descaling solution finishes running, empty and rinse the reservoir thoroughly. Fill with fresh cold water to the MAX line and replace in the machine. Run multiple plain water brew cycles (without a K-cup) until the “ADD WATER” message appears—this typically takes 12-15 cycles. Continue the rinse process until the water runs completely clear with no vinegar smell. Newer Keurig models automatically prompt you through rinse cycles; older models require manual operation until clean water flows consistently.
Troubleshooting Common Descaling Problems

When your Keurig displays “DESCALE” but won’t enter descaling mode, unplug the machine for 5 minutes to reset the internal computer. Many users overlook this simple fix, especially after multiple failed attempts. If solution isn’t flowing properly, check for airlocks by removing and firmly reseating the water reservoir. Hard water areas often require repeating the entire descaling process if initial attempts don’t clear stubborn buildup.
Fixing Persistent “DESCALE” Messages After Cleaning
If the warning persists after completing all steps, perform a factory reset: unplug for 30 minutes, then press and hold the 5/6oz and 8/10oz buttons while plugging back in. Release after 5 seconds. This resets the descaling counter without affecting other settings. Some Keurig models require specific button combinations—consult your manual if standard reset fails. Persistent messages after proper descaling usually indicate sensor issues needing professional service.
Handling Solution Leaks During the Process
Minor leaks around the reservoir base are common during descaling due to increased pressure. Place a towel underneath and ensure the reservoir clicks securely into position. Significant leaks from the machine base indicate worn seals requiring replacement. Never continue descaling if liquid pools beneath the unit—unplug immediately and dry all components before proceeding. Most leaks stem from overfilling the reservoir beyond the MAX line during the process.
Post-Descaling Maintenance for Long-Term Performance

After successful descaling, establish a regular maintenance schedule based on your water hardness. Use filtered water to reduce mineral content by up to 90%, dramatically extending time between descaling sessions. Clean the exit needle monthly with the provided tool to prevent clogs unrelated to mineral buildup. Wipe the K-cup holder and drip tray daily to prevent mold and coffee residue accumulation that affects taste.
Pro Tips for Maximizing Your Keurig’s Lifespan
Store your Keurig with an empty water reservoir when not in use for extended periods to prevent stagnant water issues. Replace the water filter every two months for models equipped with filtration systems. Never use distilled water exclusively as it can damage internal sensors designed for mineral content. Run a cleansing brew with just water before your first morning coffee to ensure optimal temperature and taste.
When to Seek Professional Service Instead
Contact Keurig support if you’ve completed two full descaling cycles with no improvement in performance, notice electrical burning smells during operation, or experience persistent leaks from the machine base. Most issues resolvable through proper descaling don’t require professional service—your persistence with the correct process will typically restore full functionality. Remember that Keurig’s warranty covers manufacturing defects but not damage from improper maintenance or using unauthorized cleaning products.
By following this comprehensive guide, you’ve restored your Keurig to peak performance without costly service calls. Establish a regular descaling schedule based on your water conditions to maintain optimal brewing for years to come. Your coffee will taste noticeably better with improved temperature and flow rate, while extending your machine’s service life significantly. For specific model variations or additional maintenance tips, consult Keurig’s official support resources to ensure continued trouble-free operation.


