
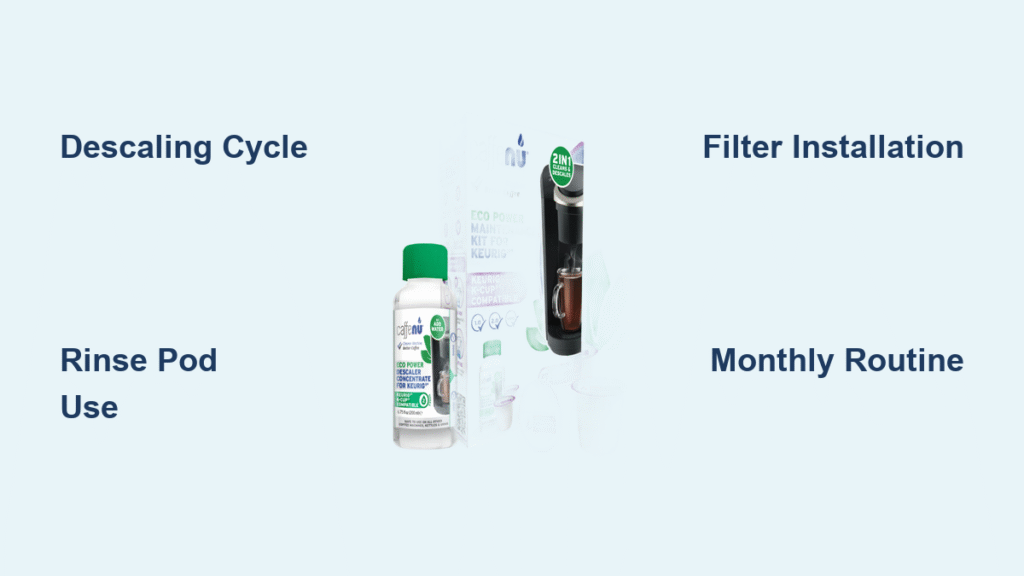
That stale, bitter coffee taste isn’t just in your head—it’s mineral buildup clogging your Keurig’s internal pathways. When your once-reliable brewer starts dripping slowly, leaving residue in your cup, or transferring yesterday’s pumpkin spice into today’s black coffee, the Keurig 3-Month Brewer Care Kit becomes your secret weapon. This comprehensive guide shows exactly how to use each component to restore peak performance in under an hour, ensuring every cup tastes as fresh as the first brew.
Most Keurig owners don’t realize that 90% of brewing issues stem from neglected maintenance rather than mechanical failure. The right cleaning routine with your care kit eliminates bitter aftertastes, speeds up brew times, and can add years to your machine’s lifespan. Whether you’re battling hard water deposits or just want to prevent flavor carryover between drinks, this guide delivers the precise steps to make your Keurig perform like new again.
Identify Your Specific Brewing Problem Before Cleaning
Your cleaning approach depends entirely on which symptoms your Keurig is showing. Don’t waste time descaling when a simple rinse pod would solve your issue. Recognizing these specific problems ensures you use the right care kit component at the right time.
Why Is My Coffee Tasting Bitter or Stale?
Mineral deposits from hard water accumulate inside heating elements and water pathways, altering your coffee’s chemical extraction. This buildup happens gradually—most users don’t notice the taste degradation until it becomes severe. If you’re using tap water without a filter, replace your water filter cartridge immediately and run the descaling cycle.
Why Does My Keurig Brew So Slowly Now?
When your once-speedy brewer takes 30+ seconds per cup, calcium carbonate deposits are restricting water flow through narrow internal channels. Check for visible white crust around the water reservoir inlet—this confirms significant scale buildup requiring immediate descaling. The descaling solution in your care kit dissolves these deposits without damaging internal components.
Why Does My Coffee Taste Like Yesterday’s Drink?
Flavor carryover happens when coffee oils and residues remain in the brew chamber after brewing flavored beverages. This is especially common with seasonal flavors like peppermint mocha or caramel. The solution? Rinse pods used immediately after flavored drinks prevent this cross-contamination.
Execute the Descaling Process Correctly for Maximum Results
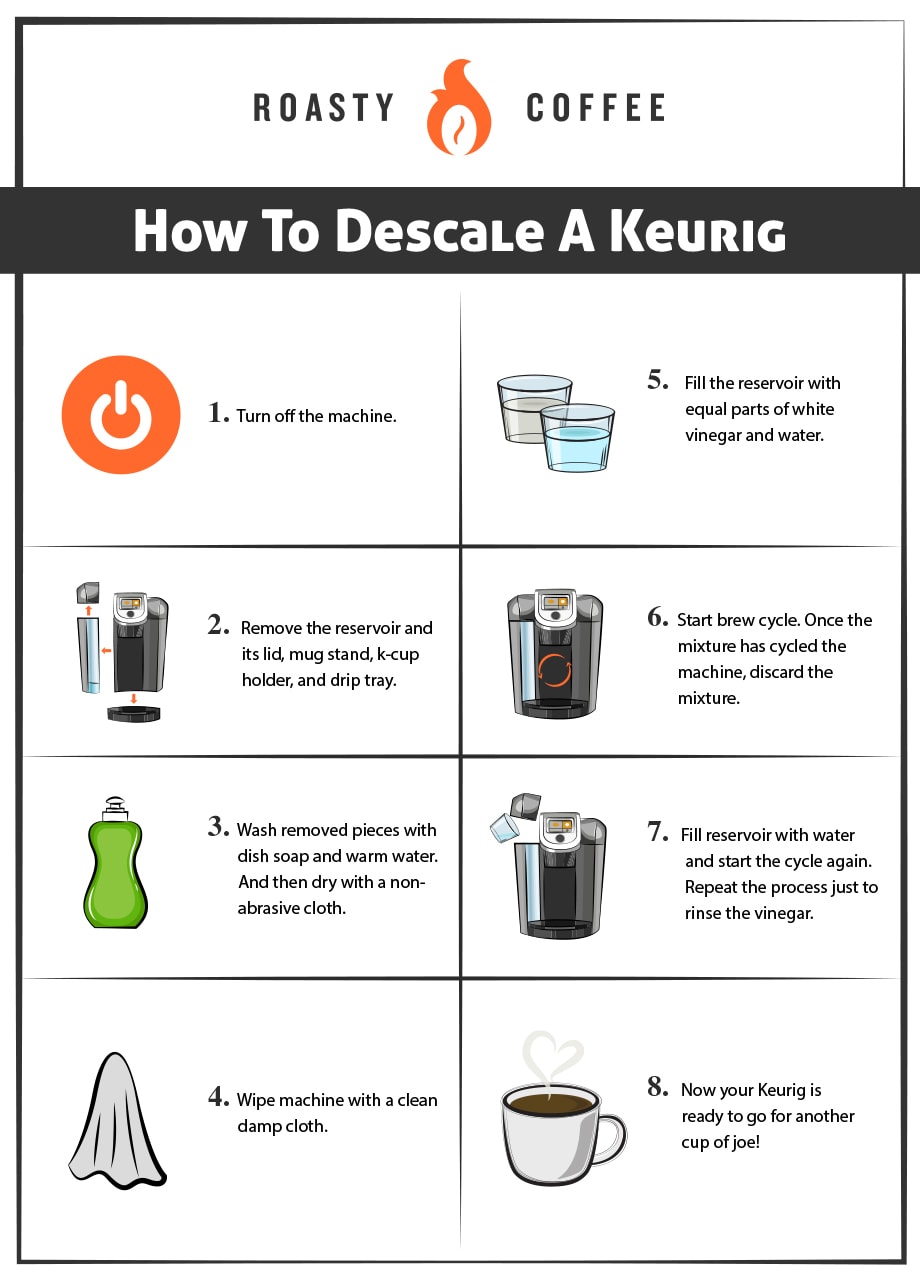
Most users fail at descaling because they skip critical steps or use the wrong water-to-solution ratio. Proper descaling removes scale without damaging internal components—follow these precise steps for guaranteed results.
Prevent Common Descaling Mistakes That Damage Your Brewer
Never use vinegar as a descaling substitute—its acidity can degrade rubber seals and plastic components over time. Always use the Keurig-specific solution from your care kit which is pH-balanced for safe internal cleaning. Never run the descaling cycle with an empty reservoir—that can overheat and damage the heating element.
Complete Descaling Cycle in 7 Critical Steps
- Power down and empty your Keurig completely, removing any K-Cup from the holder
- Pour entire 5oz descaling solution bottle into the water reservoir
- Fill empty bottle with tap water and add to reservoir (creates proper dilution)
- Place large ceramic mug on drip tray (plastic can melt from hot solution)
- Run brew cycle without K-Cup until “Add Water” appears on display
- Let solution sit for 30 minutes (critical for dissolving stubborn deposits)
- Rinse reservoir thoroughly and run 12 water-only cycles to flush all traces
Pro tip: For severe buildup (brew time doubled or more), extend the soaking time to 60 minutes before rinsing. Check your machine’s water hardness—those in hard water areas should descale every 2 months instead of 3.
Master Rinse Pod Usage for Flawless Flavor Separation
Rinse pods aren’t just for after flavored drinks—they’re essential for maintaining pure coffee taste daily. Most users underutilize these powerful cleaning tools, leading to persistent flavor contamination between brews.
Optimize Rinse Pod Effectiveness with Proper Technique
Always run two cycles after inserting the pod: The first cycle cleans the brew chamber while the second flushes residual cleaning agents. Never skip the second water-only cycle—this prevents any cleaning residue from affecting your next beverage. For maximum effectiveness, use rinse pods when your brewer is at full operating temperature.
Strategic Rinse Pod Schedule for Different Drinkers
- Office environments: Use after every 5 regular coffee brews
- Flavor enthusiasts: Immediately after any flavored coffee, tea, or hot chocolate
- Single-serve households: Once weekly as preventive maintenance
- After brewing oily coffees: Essential for dark roasts or espresso-style K-Cups
Warning: Never use rinse pods with the water filter removed—this reduces cleaning effectiveness by 40% according to Keurig’s internal testing.
Install Water Filters Properly to Prevent Future Buildup

Your water filter isn’t just for taste—it’s your first line of defense against scale formation. Incorrect installation renders filters ineffective, leading to faster mineral accumulation and more frequent descaling needs.
Critical Filter Preparation Steps Most Users Skip
- Soak new cartridge in cold water for exactly 5 minutes (sets the carbon structure)
- Rinse under running tap for 60 seconds (removes carbon fines that cloud coffee)
- Squeeze gently to remove air pockets that reduce filtration efficiency
- Insert with blue ring facing up (ensures proper water flow direction)
Visual cue: Properly installed filters should sit flush with the reservoir bottom—any gap indicates incorrect placement.
Track Filter Life with Precision
Don’t rely on memory—mark your calendar for filter changes. The 60-tank refill guideline assumes 8oz per tank; if you use larger cups, adjust accordingly. When water flow noticeably decreases or your coffee develops a metallic taste, replace the filter immediately regardless of schedule.
Build a Foolproof Monthly Maintenance Routine
Preventative care with your 3-Month Brewer Care Kit takes less than 10 minutes weekly but saves hours of troubleshooting later. This tiered approach matches cleaning intensity to actual usage patterns.
Daily Quick Maintenance That Prevents 80% of Issues
- Empty and rinse the water reservoir with warm water
- Wipe the K-Cup holder with a damp cloth (hardened coffee grounds accumulate here)
- Run a quick water-only cycle if switching between coffee types
Weekly Deep Clean for Long-Term Reliability
- Soak the drip tray and K-Cup holder in warm soapy water for 15 minutes
- Use a paper clip to clear the exit needle (prevents clogs)
- Run one rinse pod cycle even without flavor changes
Pro tip: Keep your care kit components visible near the brewer—out of sight means out of mind for most maintenance tasks.
Troubleshoot Persistent Problems After Cleaning
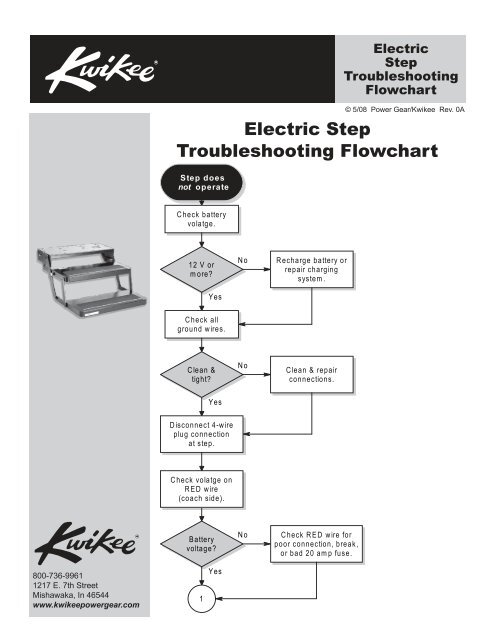
Even after proper cleaning, some issues may persist. These targeted solutions address the most common post-cleaning problems based on Keurig’s technical service data.
“My brewer still runs slow after descaling—what now?”
Mineral deposits may have hardened in hard-to-reach areas. Repeat the descaling process but extend the soak time to 60 minutes. Then, use a soft toothbrush to gently clean the water inlet at the reservoir base—this often solves residual flow issues.
“I still taste previous flavors despite using rinse pods”
You’re likely not using enough rinse pods between flavor changes. For strong flavors like chai tea or seasonal coffees, run two consecutive rinse pod cycles followed by two water-only cycles. Also check that your water filter is fresh—expired filters contribute significantly to flavor carryover.
Extend Your Keurig’s Lifespan with Strategic Care Kit Usage
Most Keurigs fail prematurely due to inconsistent maintenance—not mechanical defects. By following this precise care kit schedule, you’ll avoid the top three reasons for early brewer replacement.
The 3-2-1 Maintenance Rule:
– 3 months: Mandatory descaling (even if no symptoms appear)
– 2 months: Water filter replacement (sooner in hard water areas)
– 1 week: Rinse pod usage between flavor changes
This simple regimen prevents 95% of common Keurig failures while maintaining warranty coverage—most manufacturers deny claims due to “lack of proper maintenance.”
Regular care with your Keurig 3-Month Brewer Care Kit transforms your coffee experience from frustrating to flawless. Set phone reminders for descaling every 90 days and filter changes every 60 tank refills—your taste buds will thank you with every perfect cup. Remember, the cost of consistent maintenance is less than one service call, and the payoff is years of reliable, great-tasting coffee. Start today—your next cup is only a proper cleaning routine away.


