

Ever notice your morning coffee tasting slightly off, maybe a bit stale or with unexpected flavors? The culprit might be hiding in plain sight – your electric coffee grinder. Coffee oils build up over time, turning your grinder into a rancid oil reservoir that ruins even the freshest beans. Regular cleaning isn’t just recommended; it’s essential for preserving flavor integrity and extending your grinder’s lifespan. In this guide, you’ll discover exactly how to clean any electric coffee grinder properly—whether you own a budget-friendly blade model or a high-end burr grinder—without causing damage. We’ll cover frequency guidelines, step-by-step cleaning methods, and professional tricks to keep your grinder performing like new.
Why Rancid Coffee Oils Destroy Your Morning Brew
Coffee beans release natural oils during grinding that quickly turn rancid when exposed to air. These stale oils coat every surface inside your grinder, contaminating each subsequent batch. Unlike what many believe, simply grinding rice isn’t enough to remove these stubborn residues. The problem worsens in humid environments where moisture accelerates oil degradation. When left uncleaned, your grinder can add unpleasant cardboard-like or rubbery notes to your coffee—completely masking the delicate flavor notes you paid premium prices for. Professional baristas know that a dirty grinder is the silent killer of specialty coffee, which is why they implement strict cleaning schedules regardless of usage frequency.
How Often Should You Clean Based on Usage
Your cleaning frequency depends entirely on how much you grind:
– Daily users: Deep clean weekly with brush and dry method; quick brush-out after every 3-4 uses
– Weekend warriors: Clean thoroughly every 2-3 weeks
– Occasional users: Don’t be fooled by infrequent use—oils still degrade, so clean monthly
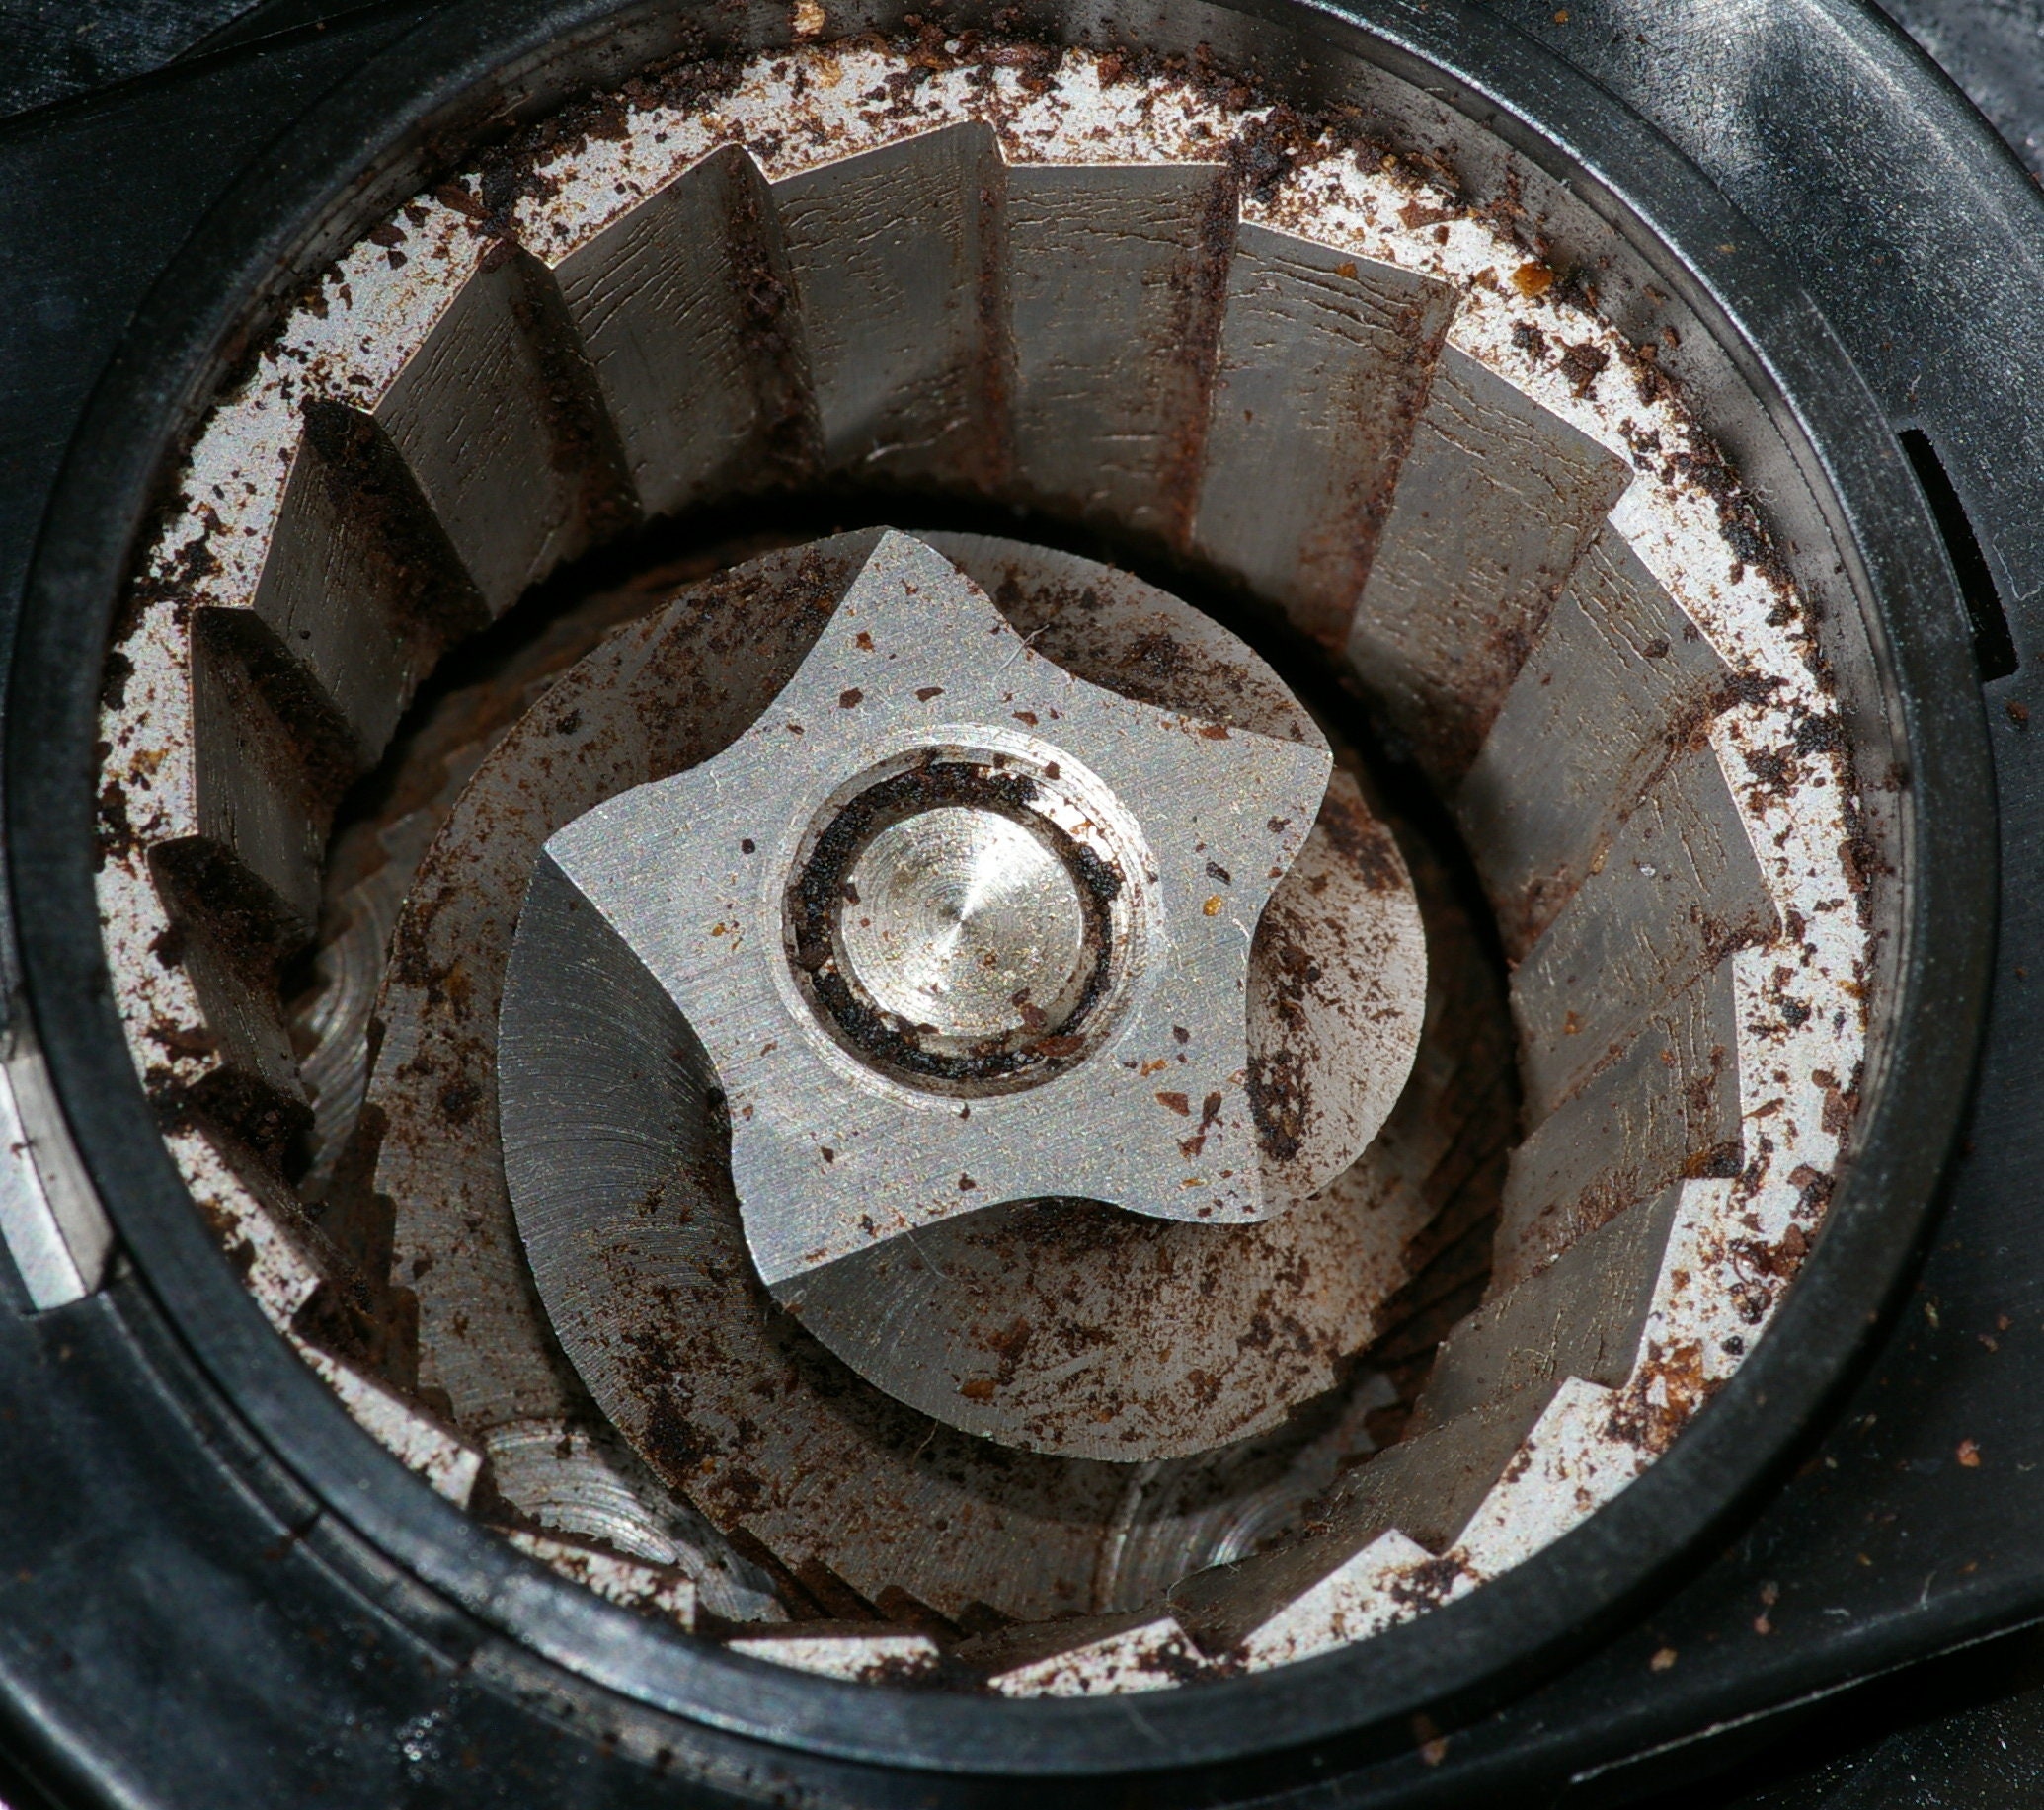
The real test? Remove your bean hopper and sniff the grinding chamber. If you detect anything beyond fresh coffee aroma—especially musty, sour, or chemical-like smells—it’s past time for cleaning. High-oil beans like Sumatran or dark roasts accelerate buildup, requiring more frequent maintenance than lighter roasts.
Essential Tools for Proper Electric Grinder Cleaning
What You Need Before Starting
Gather these items before disassembling your grinder:
– Soft-bristle brush (never use metal on burrs)
– Compressed air can (optional but highly effective)
– Dry rice or specialized grinder cleaning pellets (for certain methods)
– Microfiber cloth
– Small vacuum with brush attachment
– Cotton swabs (for tight spaces)
– Replacement burrs if yours show visible wear
Critical warning: Never use water or liquid cleaners inside electric components. Moisture causes immediate damage to motors and creates mold risks in hidden crevices. Even damp cloths can introduce problematic moisture if not followed by thorough drying.
Why Your Standard Kitchen Brush Won’t Cut It
Most users make the mistake of using stiff dish brushes that damage precision burrs. Coffee-specific cleaning brushes feature ultra-soft bristles designed to dislodge particles without scratching metal surfaces. If you don’t have one, a clean makeup brush works surprisingly well for reaching between burr teeth. For blade grinders, regular soft brushes suffice since there’s no precision grinding surface to protect.
Step-by-Step Cleaning Process for Burr Grinders

Removing Coffee Residue Without Disassembly
Start with this quick method between deep cleanings:
1. Unplug your grinder and empty remaining beans
2. Grind 2 tablespoons of dry, uncooked rice to capture loose particles
3. Use a soft brush to dislodge visible grounds from the bean hopper
4. Hold the grinder upside down over trash and gently tap sides
5. Brush all accessible surfaces with upward motions to lift debris
This 5-minute routine prevents major buildup but doesn’t replace thorough cleaning. Never grind rice in conical burr grinders as grains can become trapped in the narrow space between burrs.
Complete Burr Grinder Deep Cleaning Procedure
For full maintenance when flavors turn stale:
1. Unplug and disassemble removable parts following manufacturer instructions
2. Remove bean hopper and grounds container completely
3. Use compressed air to blast particles from burr chamber (hold 6+ inches away)
4. Brush burrs thoroughly using circular motions between teeth
5. Wipe exterior surfaces with dry microfiber cloth
6. Clean grounds container with dry brush—never wash with water
7. Reassemble and run blank cycle to ensure no debris remains
Time required: 15-20 minutes. Difficulty: Moderate. Pro tip: Place a paper towel under the grinder during cleaning to catch escaping grounds.
Blade Grinder Cleaning: Special Considerations
Why Blade Grinders Need Different Treatment
Blade grinders create more static electricity that bonds oils to plastic chambers. Their exposed blades also pose greater safety risks during cleaning. Never insert fingers or tools while the unit is assembled—the blades remain sharp and can activate unexpectedly.
Safe Blade Grinder Maintenance Process
- Unplug and remove lid completely
- Use vacuum with brush attachment to remove visible grounds
- Insert stiff paper folded into a cone to scrape chamber walls
- Apply grinder cleaning pellets according to package instructions
- Wipe all surfaces with dry cloth—never tilt unit while cleaning
- Reassemble and run empty cycle before next use
Blade grinders require more frequent cleaning than burr models due to their inefficient grinding action that creates excessive fines and oil buildup.
Common Cleaning Mistakes That Damage Your Grinder
The Water Myth: Why Moisture Is Your Grinder’s Worst Enemy
Many online tutorials incorrectly recommend wiping with damp cloths. Even minimal moisture causes immediate damage to internal components and creates perfect conditions for mold growth in hidden crevices. The only exception is certain commercial grinders with stainless steel components explicitly rated for wet cleaning—but these are rare in home models.
Rice Cleaning Risks You Should Know
While popular, rice cleaning carries hidden dangers:
– Creates excessive dust that clogs filters
– Can leave starchy residue that attracts pests
– Risks damaging burrs if grains become trapped
– Generates static that worsens future buildup
Specialized cleaning pellets designed for coffee grinders work better and pose fewer risks than household rice.
Troubleshooting Common Post-Cleaning Issues
Why Your Grinder Sounds Different After Cleaning
New grinding noises usually indicate improper reassembly. Double-check that:
– Burrs are perfectly aligned (no visible gaps)
– All locking mechanisms are fully engaged
– No cleaning tools were accidentally left inside
– Grounds container is properly seated
If unusual sounds persist, stop using immediately—forced operation can destroy expensive burr sets.
Fixing Persistent Oily Residue After Cleaning
For stubborn oil buildup:
1. Grind specialized cleaning pellets twice
2. Wait 10 minutes for pellets to absorb oils
3. Vacuum thoroughly before reassembly
4. Run two cycles of cheap beans as “flush” grinds
This process may need repeating for severely neglected grinders. Never use solvents—they damage plastics and leave toxic residues.
Extending Time Between Cleanings With Smart Practices

Daily Habits That Reduce Buildup
- Store beans in airtight container away from grinder
- Wipe bean hopper with dry cloth after each use
- Grind same roast profile consecutively (light to dark)
- Keep grinder covered when not in use
- Avoid oily beans like Sumatran for daily brewing
When to Replace Worn Burrs Instead of Cleaning
Even perfect cleaning can’t compensate for worn components. Replace burrs when:
– Coffee takes noticeably longer to grind
– Increased static causes grounds to stick to container
– Temperature rises significantly during grinding
– Visible pitting appears on burr surfaces
Most home grinders need burr replacement after 500-750 pounds of coffee—about 2-3 years of daily use.
Final Cleaning Checklist Before Your Next Brew
Before reassembling, verify:
– Zero visible grounds in chamber and crevices
– All parts click securely into place
– No tools left inside the mechanism
– Exterior surfaces completely dry
– First post-cleaning batch discarded
Maintaining your electric coffee grinder properly ensures each cup delivers the pure, unadulterated flavor your beans deserve. By following these precise cleaning methods, you’ll extend your grinder’s life while protecting your coffee investment. Remember that consistent light maintenance beats occasional deep cleaning—just two minutes of brushing after every few uses prevents the need for intensive sessions. Your taste buds will thank you with brighter acidity, clearer flavor notes, and that perfect fresh-ground aroma in every cup. For best results, schedule cleaning sessions like you would coffee deliveries—making maintenance part of your regular coffee ritual rather than a reactive chore.


