
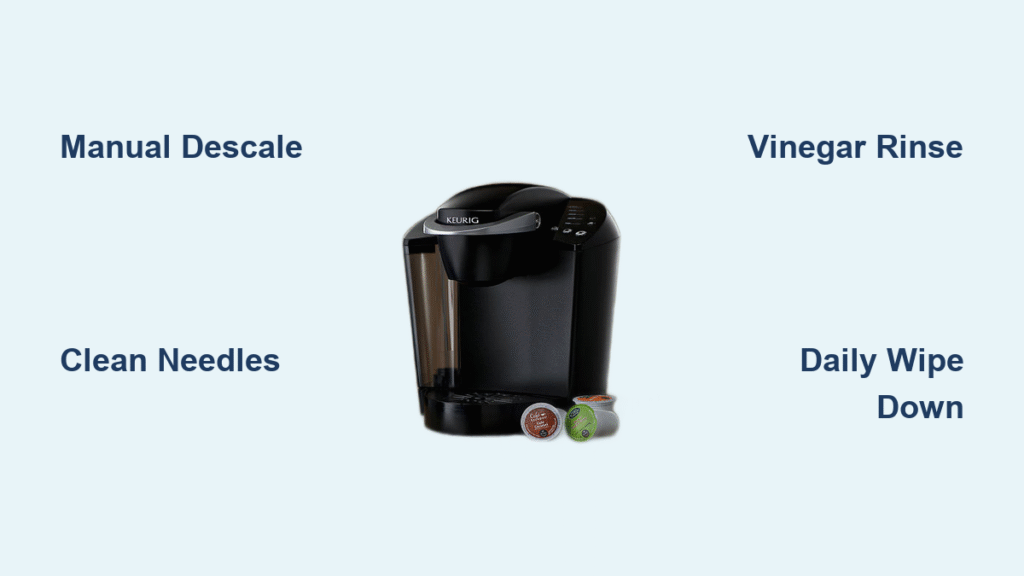
Your coffee tastes bitter, the brew cycle takes forever, and that familiar glug-glug has turned into a pathetic drip. If your Keurig lacks a dedicated descaling button but shows these warning signs, mineral buildup is strangling your machine. Most Keurig models—from the classic K-Classic to the compact K-Mini—require manual descaling to restore peak performance. This guide reveals the exact vinegar method and hidden cleaning steps that remove stubborn limescale without automated cycles. You’ll revive your machine using only household items in under an hour, avoiding costly replacements.
Stop Before You Start: Critical Safety Steps for Manual Cleaning
Unplug Immediately—No Exceptions
Your Keurig must be completely disconnected from power before any cleaning begins. Water and electricity create lethal hazards inside the machine’s heating system. Never attempt descaling while plugged in, even if the machine appears “off.” Wait 10 minutes after unplugging to let internal components cool.
Handle Needles Like Broken Glass
Both the entrance needle (piercing K-Cup foil) and exit needle (releasing brewed coffee) are razor-sharp. Never probe these areas with fingers—use only straightened paper clips. One slip can cause serious cuts. If you see blood after cleaning, your technique was unsafe.
Banish Bleach and Harsh Chemicals
Bleach permanently damages Keurig’s internal seals and leaves toxic residues in your coffee. Vinegar or official Keurig descaling solution are the only safe options. Even lemon juice risks corroding metal components over time.
Your Keurig Cleaning Kit: Exactly What You Need for Manual Descaling
Non-Negotiable Supplies
– White vinegar (distilled, 5% acidity)
– Fresh paper clips (straightened completely)
– Dedicated soft-bristle toothbrush (never used for teeth)
– Microfiber cloths (lint-free)
– Largest mug you own (12+ oz capacity)
Skip These Common Mistakes
Never use undiluted vinegar—it leaves a harsh aftertaste and can warp plastic parts. Avoid dish soap near internal needles; suds cause clogs. Skip scrubbing pads on the water reservoir—they scratch surfaces where mold hides.
Daily Surface Cleaning That Prevents Major Clogs
60-Second Post-Brew Wipe Down
After every coffee run:
1. Dampen a microfiber cloth with warm water
2. Wipe the drip tray, pod holder rim, and control panel
3. Dry immediately to prevent mineral rings on stainless steel
Why this matters: Coffee oils harden within hours, creating crusty buildup that affects taste.
Weekly Hidden Zone Attack
Once weekly, focus on disaster zones:
– Remove the drip tray and scrub underneath with soapy water
– Clean the K-Cup holder’s funnel with a toothbrush
– Wipe the reservoir lid’s underside (where mold breeds)
Pro tip: Place a cotton swab in the reservoir’s air vent hole—it collects hidden sludge.
Force Descaling Cycles Without a Dedicated Button

Vinegar Solution Setup
Mix equal parts white vinegar and water in the reservoir—never full-strength vinegar. Fill to the MAX line. Undiluted vinegar risks damaging the heating element.
Manual Descaling Steps
1. Remove all K-Cups and the water filter
2. Place your largest mug under the spout
3. Select the 8-10 oz brew size (largest setting)
4. Press brew without inserting a K-Cup
5. Discard vinegar water after each cycle
6. Repeat until reservoir empties
7. Let solution sit for exactly 30 minutes (set a timer!)
Critical: Never exceed 45 minutes—vinegar can etch metal parts.
The Rinse Test Most People Fail
After descaling:
1. Wash reservoir thoroughly with soap
2. Run 12 full brew cycles with fresh water only
3. Taste the 10th, 11th, and 12th cups
Stop rinsing only when water tastes completely neutral. Skipping cycles leaves vinegar residue that ruins coffee flavor for days.
Unclog Both Needles in 5 Minutes (Without Injury)
Upper Needle Emergency Fix
When coffee barely drips:
1. Lift the K-Cup handle to expose the chamber
2. Locate the two tiny holes in the dome-shaped needle
3. Insert a straightened paper clip gently into each hole
4. Rotate the clip in small circles to dislodge grounds
Warning: Forcing the clip bends the needle—use zero pressure.
Exit Needle Deep Clean
If coffee pools in the pod holder:
1. Push up from under the K-Cup holder to remove it
2. Separate the funnel from the holder base
3. Insert the paper clip upward through the bottom tube
4. Flush with hot water until flow is smooth
Visual cue: Clear water should shoot straight through both needles when tested.
Kill Mold Before It Ruins Your Coffee
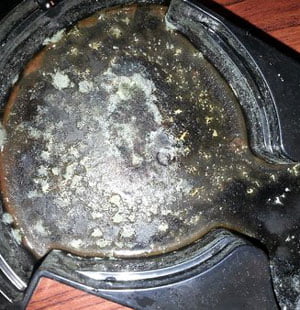
Spot the First Warning Signs
Check weekly for:
– Black or green specks in the water reservoir
– Slimy film on the drip tray underside
– Musty odor when opening the pod chamber
Mold thrives in Keurigs because damp reservoirs create perfect breeding grounds.
Emergency Mold Protocol
1. Discard all water immediately
2. Scrub reservoir with hot, soapy water using a dedicated sponge
3. Rinse 5 times until water runs crystal clear
4. Air-dry all parts completely (2+ hours)
Never reuse the sponge—it harbors spores. Toss it after mold removal.
When Your Keurig Still Acts Up After Cleaning
Diagnose Persistent Issues
If problems continue after manual descaling:
– Sputtering brew? Re-clean both needles—the exit needle is likely clogged.
– Weak coffee flavor? Run 3 extra rinse cycles; vinegar residue remains.
– Water leaks? Reassemble the K-Cup holder slowly—funnel misalignment causes spills.
– No water flow? Check the reservoir’s air vent hole (tiny hole in lid)—clear with a toothpick.
Post-Cleaning Verification Test
Before brewing your next cup:
1. Run three plain water cycles
2. Check for consistent drip speed (should take 30-45 seconds per cup)
3. Smell the water—must be odorless
4. Taste the final cup—zero metallic or sour notes
If any test fails, repeat the rinse cycle.
Maintenance Schedule That Prevents Future Clogs

Daily (30 seconds):
– Wipe exterior with damp cloth
– Replace reservoir water (stale water breeds bacteria)
Weekly (10 minutes):
– Hand-wash all removable parts in soapy water
– Clean drip tray and pod holder with toothbrush
Monthly (5 minutes):
– Clear both needles with paper clip
– Inspect reservoir for early mold signs
Quarterly (45 minutes):
– Full vinegar descaling (equal parts vinegar/water)
– Replace water filter cartridge
Pro Prevention Tip: Always use bottled spring water—not distilled or softened water. Tap water minerals cause 90% of descaling issues. Keep spare filters and paper clips in your coffee drawer for instant access.
Your Keurig works harder than you realize—pumping scalding water through microscopic channels daily. Manual descaling isn’t just convenient; it’s critical for machines without automated buttons. By forcing those vinegar cycles and attacking clogged needles, you’ll extend your brewer’s life by years while reclaiming that fresh, clean coffee taste. The next time your Keurig sputters, skip the panic—grab that vinegar bottle and run the 12 rinse cycles. Your perfect cup is three steps away.


