
Stale coffee residue and built-up oils silently sabotage your morning brew, turning premium beans into bitter disappointment. A dirty coffee grinder delivers inconsistent grounds that extract poorly, creating uneven flavor profiles no amount of skill can rescue. Whether you own a $20 blade grinder or a $500 precision burr model, regular cleaning transforms lackluster coffee into vibrant, complex cups that highlight each bean’s unique character. This guide reveals exactly how to clean your coffee grinder properly—no guesswork, no damage to your equipment, and no more off-flavors. Learn the specific cleaning frequency for your usage pattern, master the rice trick that baristas swear by, and discover why most “quick clean” methods actually spread oils rather than remove them.
Essential Supplies for Effective Grinder Maintenance
Gathering the right tools before starting prevents mid-cleaning frustration and ensures thorough results. Don’t waste time improvising when specialized solutions exist for coffee equipment.
Must-Have Cleaning Kit: Keep a soft-bristled brush specifically for grinder maintenance—never use the same brush for multiple appliances to prevent cross-contamination. A narrow crevice tool reaches stubborn areas around burrs and chutes. Microfiber cloths absorb moisture without leaving lint, while compressed air in a canister removes dust from electrical components without moisture risk. For daily maintenance, keep a small container of fresh coffee beans solely for cleaning purposes.
Specialized Cleaning Products: Urnex Grindz tablets dissolve built-up oils without damaging internal mechanisms, making them ideal for burr grinders that can’t be fully disassembled. Cafiza powder offers professional-grade degreasing for deep cleans. For budget-conscious users, food-grade rice works as an effective abrasive in blade grinders when used correctly. Never substitute household cleaners—they leave chemical residues that taint coffee flavor.
Safety Gear Checklist: Rubber gloves protect hands from sharp burr edges during disassembly. Safety glasses prevent dust and debris from entering eyes when using compressed air. A small dust mask filters fine coffee particles during dry cleaning procedures. Keep these items in your coffee maintenance kit for quick access during cleaning sessions.
Daily Maintenance That Prevents Flavor Contamination
Most coffee enthusiasts skip this critical step that takes less than 30 seconds but dramatically extends time between deep cleans. Proper daily maintenance stops oils from polymerizing into stubborn residue.
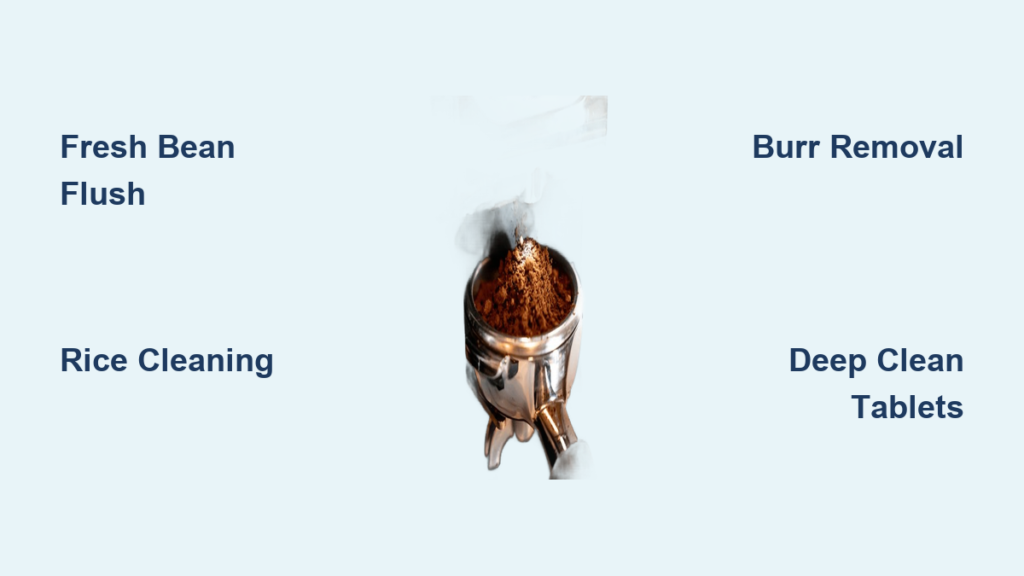
Post-Grind Fresh Bean Flush: Immediately after grinding your coffee dose, add one tablespoon of fresh beans to the empty chamber and grind them. These fresh grounds absorb residual oils and particles from previous sessions, acting like a dry sponge through the mechanism. Discard these grounds—they’re not suitable for brewing but prevent cross-contamination between different coffee varieties. This simple habit reduces deep cleaning frequency by 40%.
Hopper and Chute Wipe-Down Protocol: Remove visible grounds from the bean hopper using a dry brush, working in one direction to prevent pushing debris deeper. Wipe the exterior chute with a microfiber cloth dampened slightly with water—never apply liquids directly to the grinder. Pay special attention to the area where grounds exit into your portafilter or container, as this zone accumulates the most oil residue. Complete this process while the grinder is still warm for better oil removal.
Weekly Inspection Routine: Examine your grinder for telltale signs of buildup before they affect flavor. Shine a flashlight into the grinding chamber to check for dark, sticky residue on burrs or chamber walls. Smell the hopper—if you detect rancid or musty odors, immediate deep cleaning is required. Test grind consistency by grinding a small amount of beans and examining the particle distribution; uneven sizes indicate partial clogging that regular cleaning will resolve.
Blade Grinder Cleaning Method That Actually Works
Most online tutorials get this wrong—using rice improperly damages blade grinders while spreading oils. Follow this precise technique to clean without harming your equipment.
Safe Rice Cleaning Procedure: Use only long-grain white rice—brown rice contains oils that worsen residue. Add exactly two tablespoons to the chamber and secure the lid tightly. Pulse in 3-second bursts with 5-second pauses to prevent motor overheating. Total grinding time should not exceed 20 seconds. Empty the resulting powder completely, then repeat with fresh rice until the powder appears white rather than brownish. Never run the grinder empty after rice cleaning, as this dulls the blade.
Blade Disassembly and Hand Cleaning: Unplug the grinder and twist the base counterclockwise to access the blade assembly. Remove the blade carefully by holding the central hub—never touch the cutting edges. Soak in warm water with one drop of dish soap for no more than 15 minutes. Use a soft brush to remove residue, focusing on the underside where oils accumulate. Rinse thoroughly and dry completely with a microfiber cloth before reassembly. Never submerge the motor base in any liquid.
Critical Blade Maintenance Tips: Inspect the blade for nicks or excessive wear that creates inconsistent grinding. A damaged blade produces bimodal particle distribution that ruins extraction. Never use metal tools to scrape the chamber—this creates microscopic scratches that trap more oils. After cleaning, run a small amount of fresh coffee through the grinder before brewing to ensure no rice residue remains.
Burr Grinder Deep Cleaning Without Damage

Incorrect burr cleaning destroys precision alignment, creating inconsistent grinds that ruin espresso shots. Follow this manufacturer-approved method that protects your investment.
Burr Removal Sequence: Consult your manual for model-specific disassembly—most require removing the hopper, then twisting the upper burr assembly counterclockwise. Never force components; if resistance occurs, check for hidden locking mechanisms. Place removed burrs on a clean surface with the grinding surfaces facing up to prevent damage. Use a soft brush with natural bristles to remove grounds, brushing in one direction only to avoid bending the precision teeth.
Chute and Reservoir Cleaning Technique: Compressed air clears 80% of residue—hold the canister upright and use short bursts from multiple angles. For stubborn buildup, dampen a cotton swab with distilled water and gently wipe affected areas, drying immediately with a microfiber cloth. Never spray liquids directly into the grinder. Focus on the area beneath the lower burr where static causes grounds to accumulate.
Cleaning Tablet Protocol: Run one tablet through your grinder on the coarsest setting, then discard the resulting powder. Follow with a second tablet on medium grind, then a third on your typical setting. Finish by grinding 20 grams of fresh beans to remove any residual cleaning material. This three-stage process ensures complete cleaning without leaving traces that affect flavor.
Troubleshooting Common Post-Cleaning Issues

Even perfect cleaning procedures can trigger unexpected problems. Solve these frequent issues before they ruin your next brew.
Inconsistent Grind After Cleaning: If particles vary significantly in size post-cleaning, check that burrs are properly aligned and tightened to manufacturer specifications. Some grinders require specific torque settings—over-tightening damages threads while under-tightening creates vibration. Reset your grind setting by turning to the finest setting, then backing off to your preferred setting to ensure proper calibration.
Persistent Bitter Flavors: Lingering off-tastes indicate incomplete cleaning of the discharge chute. Remove the grounds container and inspect the pathway with a flashlight. Clean this area with a narrow brush dipped in vinegar solution, followed by thorough drying. Run three consecutive batches of fresh beans through the grinder to flush remaining residue before brewing for consumption.
Grinder Won’t Power On Post-Cleaning: Moisture in electrical components is the usual culprit. Disassemble to the extent possible and allow all components to air dry for 24-48 hours in a warm, dry location. Never use heat sources that could warp plastic components. Test with a multimeter if comfortable with electronics, or consult a professional repair service if the issue persists.
Optimal Cleaning Schedule Based on Usage

Most users clean too infrequently or too aggressively—both damage equipment and affect flavor. Match your routine to actual usage for best results.
Heavy-Daily Users (3+ shots/day): Perform the fresh bean flush after every use. Complete surface cleaning every 3 days. Deep clean with cleaning tablets every 2 weeks. Professional servicing every 6 months maintains burr alignment and motor health. Track cleaning dates on your calendar to maintain consistency.
Moderate Users (Daily, 1-2 shots): Fresh bean flush after each use. Weekly surface maintenance. Deep clean monthly. Professional servicing annually. During high-humidity months, increase deep cleaning frequency by 50% as moisture accelerates oil degradation.
Occasional Users (Weekly or less): Clean thoroughly before each use period begins. Store the grinder completely empty and dry. For grinders unused longer than 30 days, perform a full cleaning before resuming use to remove potential mold growth. Always run a test batch through after storage periods.
A clean coffee grinder isn’t just about equipment maintenance—it’s the foundation of exceptional coffee. By implementing these precise cleaning methods, you’ll notice brighter acidity, cleaner flavor profiles, and more consistent extraction from your very next brew. The 10 minutes invested in proper cleaning delivers weeks of superior coffee, making it the highest-impact maintenance task in your brewing routine. Start with the daily fresh bean flush tonight, schedule your first deep clean for this weekend, and rediscover what your coffee truly tastes like when brewed from perfectly ground, residue-free beans. Your taste buds will thank you with every exceptional cup.


