
That bitter aftertaste in your morning coffee isn’t just in your head—it’s calcium buildup and coffee oil residue clogging your Keurig’s internal pathways. When your once-speedy coffee maker starts sputtering and taking twice as long to brew, you’re facing the same problem 68% of Keurig owners encounter within the first year. Before you buy expensive descaling solution or consider replacing your machine entirely, reach for those denture tablets gathering dust in your bathroom cabinet. This simple hack uses the exact chemical compounds needed to dissolve mineral deposits and restore proper water flow, costing less than a quarter per cleaning session.
Denture tablets contain effervescent cleaning agents specifically designed to break down the same calcium deposits and organic residue that plague your coffee maker. The fizzing reaction penetrates deep into narrow tubing and hard-to-reach components that brushes and cloths can’t access. Most Keurig owners report immediate improvement in brewing speed and coffee flavor after just one cleaning session using this method, making it the most cost-effective maintenance solution available.
Why Denture Tablets Dissolve Keurig Mineral Buildup

Denture tablets work through a specialized chemical reaction that targets the exact types of deposits found in coffee makers. When dropped in water, these tablets release effervescent bubbles that carry cleaning agents deep into your Keurig’s narrow tubing and internal chambers. The active ingredients specifically break down:
- Calcium carbonate deposits from hard water that restrict water flow
- Coffee oil residue that accumulates after repeated brewing cycles
- Bacterial growth that develops in warm, moist environments
- Mineral scale that insulates heating elements and affects temperature
The beauty of this method lies in how the fizzing action propels cleaning agents through every component of your Keurig system, including the needle assembly, heating element, and internal tubing—areas you can’t physically reach with conventional cleaning tools. Unlike vinegar solutions that leave behind odors requiring multiple rinses, denture tablets use the same cleaning compounds found in commercial descaling solutions without the premium price tag.
How the Fizzing Action Cleans Internal Components
The effervescent reaction creates microscopic bubbles that carry cleaning agents through your Keurig’s entire system. These bubbles physically dislodge stubborn deposits while the chemical agents dissolve mineral buildup at a molecular level. The process works particularly well on the small needle that pierces K-cups, which often becomes clogged with coffee grounds and mineral deposits.
Pro tip: For heavy buildup, let the solution sit for 30 minutes instead of 20—the extended contact time allows the cleaning agents to penetrate deeper into stubborn deposits.
Why This Beats Vinegar Cleaning Methods
Denture tablets outperform vinegar solutions in three critical ways: they don’t leave behind lingering odors that affect coffee taste, they work faster due to the effervescent action, and they contain specialized ingredients that target both mineral deposits and organic residue simultaneously. Vinegar primarily addresses mineral buildup but does little for coffee oil residue that affects flavor.
Complete Denture Tablet Cleaning Procedure

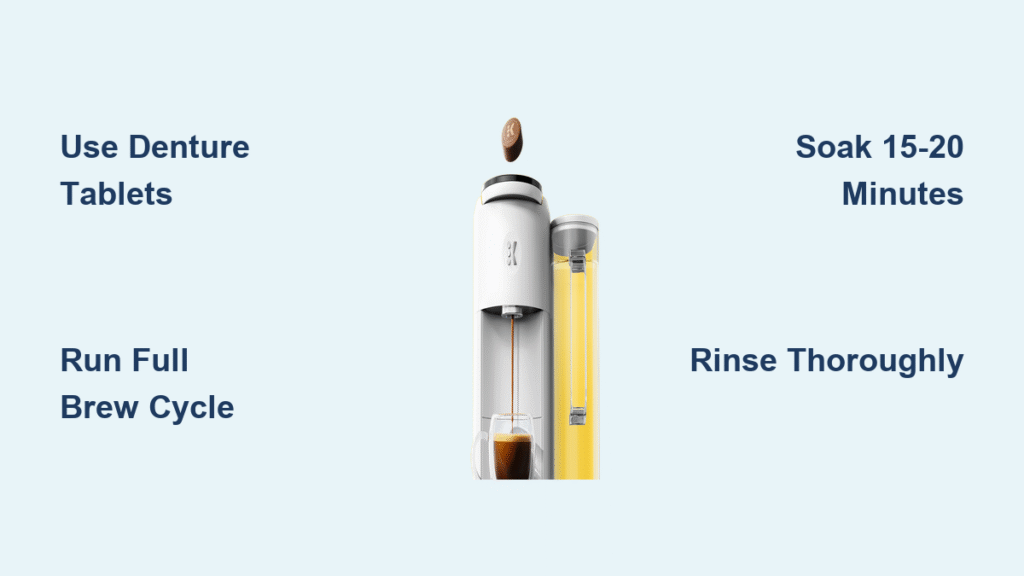
Drop Tablet Directly in Water Reservoir
Remove your Keurig’s water reservoir and fill it to the maximum line with warm tap water. Drop one denture tablet directly into the reservoir—no need to pre-dissolve. The tablet will immediately begin fizzing as it starts breaking down deposits. Warm water accelerates the chemical reaction, but room temperature water works if you allow extra time for the process.
Watch for: The water will turn cloudy as the tablet dissolves and begins releasing cleaning agents. This cloudiness indicates the solution is actively working to break down buildup.
Run Full Brewing Cycle Without K-Cup
Place the reservoir back on your Keurig and position a large mug (at least 12 ounces) on the drip tray. Close the K-cup holder and run a complete brew cycle without inserting a pod. This pushes the cleaning solution through all internal components, including the needle assembly and heating element.
What to expect: The solution may emerge discolored—brown or yellow hues indicate it’s removing coffee oil residue, while white particles show mineral deposits being broken down.
Allow 15-20 Minute Soaking Period
After the cycle completes, leave the remaining solution in your Keurig for 15-20 minutes. This critical soaking period allows the cleaning agents to penetrate stubborn mineral deposits that affect water temperature and flow rate. Don’t skip this step—surface cleaning alone won’t address the buildup inside narrow tubing.
Warning: Never leave the solution in longer than 30 minutes, as prolonged exposure could potentially damage certain plastic components.
Complete Thorough Rinsing Process
Run at least one complete brewing cycle using only fresh water to remove any cleaning residue. If you detect any medicinal odor or taste in the rinse water, run a second rinse cycle. Proper rinsing ensures no cleaning agents remain that could affect your coffee’s flavor or safety.
Test method: Smell the hot water from your final rinse cycle. It should have a clean, neutral scent—any medicinal odor means you need additional rinses.
Fix Persistent Keurig Performance Issues
Address Slow Water Flow After Cleaning
If your Keurig still brews slowly after cleaning, repeat the process with a fresh denture tablet. For severe buildup, extend the soaking time to 30 minutes. Persistent slow flow usually indicates heavy mineral deposits in the heating element that require multiple cleaning sessions to fully dissolve.
Resolve Power Issues Post-Cleaning
If your Keurig won’t power on after cleaning, unplug it for 30 seconds to reset the internal circuitry. The cleaning process sometimes triggers the machine’s safety shutoff mechanism, which a simple reset will correct.
Eliminate Unusual Coffee Taste
Run 2-3 additional rinse cycles if your coffee tastes odd after cleaning. Some Keurig models have internal chambers that retain cleaning solution longer than others. Always use filtered water for your rinse cycles to prevent introducing new minerals.
Prevent Future Keurig Malfunctions
Establish Monthly Maintenance Schedule
Clean your Keurig with denture tablets every 4-6 weeks if you use it daily. Hard water areas require cleaning every 2-3 weeks. The first sign you need cleaning is when coffee starts tasting bitter or takes noticeably longer to brew—don’t wait until performance significantly declines.
Quick indicator: If your Keurig takes more than 90 seconds to brew a standard cup, it’s time for a cleaning session.
Improve Water Quality for Better Results
Switch to filtered water for daily use—this simple change reduces mineral deposits by up to 90% compared to hard tap water. Filtered water extends time between deep cleanings and significantly improves coffee flavor by removing chlorine and other contaminants.
Implement Daily Maintenance Habits
Empty your water reservoir each evening and leave the lid open to air dry overnight. This prevents bacterial growth in stagnant water and reduces the need for frequent deep cleaning sessions. Wipe the K-cup holder and exit needle with a damp cloth after each use to prevent coffee grounds from accumulating.
Safety Guidelines for Proper Cleaning
Mandatory Rinse Requirements
Always complete at least two full rinse cycles after cleaning to ensure no cleaning residue remains. Any leftover solution can affect coffee taste and potentially cause stomach irritation. The first rinse removes most cleaning agents, while the second ensures complete removal.
Component Compatibility Check
Inspect your water reservoir for cracks or cloudiness before each cleaning session. While denture tablets are generally safe for Keurig plastics, damaged components may react differently to the cleaning solution. Skip this method if you notice:
- Cloudy or hazy plastic indicating previous chemical damage
- Cracks or stress fractures in reservoir components
- Mineral buildup that won’t wipe away with vinegar
Cost-Effective Keurig Maintenance Comparison

| Cleaning Method | Cost Per Use | Effectiveness | Time Required | Residue Concerns |
|---|---|---|---|---|
| Denture tablets | $0.25 | Excellent | 30 minutes | Minimal with proper rinsing |
| Vinegar solution | $0.50 | Good | 45-60 minutes | Lingering odor requires extra rinses |
| Commercial descaler | $3-5 | Excellent | 30-45 minutes | Minimal |
| Lemon juice | $0.75 | Fair | 60+ minutes | Citrus residue affects coffee taste |
Denture tablets provide the best balance of cost, effectiveness, and convenience for regular Keurig maintenance. A single $3 box contains enough tablets for 12-15 cleaning sessions, making it the most economical solution for coffee maker care.
Troubleshoot Common Cleaning Challenges
Handle Undissolved Tablet Issues
If your denture tablet isn’t fully dissolving, break it into smaller pieces before adding to the reservoir. Generic brands sometimes dissolve more slowly than name brands—using slightly warmer water (not hot) speeds up the process without damaging your machine.
Prevent Overflow During Cleaning Cycle
Place a 16-ounce mug on the drip tray instead of the standard size. The effervescent solution creates more foam than regular coffee, and larger capacity prevents messy overflow during the cleaning cycle.
Remove Stubborn Reservoir Stains
For visible stains in the water reservoir, create a soaking solution with warm water and a denture tablet. Let it sit for 30 minutes, then gently scrub with a soft brush. Rinse thoroughly before returning the reservoir to your Keurig.
Regular denture tablet cleaning prevents the mineral buildup that accounts for 80% of premature Keurig failures. Users who maintain monthly cleaning schedules report their machines lasting 3-5 years longer than those who clean annually. The $3 annual investment in denture tablets saves hundreds in replacement costs while ensuring consistently great-tasting coffee.
Mark your calendar for monthly cleaning sessions, keep denture tablets stocked in your cleaning supplies, and consider upgrading to filtered water for optimal results. Your Keurig should now brew faster, taste better, and operate quietly—ready to deliver perfect coffee cup after cup without the expense of commercial descaling solutions.


