Your morning coffee ritual grinds to a halt when your Keurig starts sputtering out half a cup or stops brewing entirely. When cleaning a clogged Keurig becomes your urgent priority, you need fast, reliable solutions that actually work. Most clogs stem from mineral buildup, coffee grounds, or filter issues that you can fix at home without special tools.
This guide delivers proven methods to diagnose and eliminate Keurig clogs in under 15 minutes. You’ll learn exactly which components to target, how to safely descale your machine, and critical maintenance habits that prevent future blockages. Whether you own a K-Classic, K-Compact, or newer model, these techniques restore full brewing power quickly.
Spot Clog Symptoms Before They Worsen
Slow brewing cycles are your first red flag. What should take 27 seconds for a medium cup suddenly drags on for 60+ seconds. Incomplete cup fills leave you with half-empty mugs despite selecting full size, while inconsistent output means sometimes you get coffee, sometimes you don’t. These early warning signs indicate developing blockages that require immediate attention.
Complete water stoppage signals advanced clogs needing urgent intervention. If your machine runs but produces nothing, or shuts off mid-cycle, you’re dealing with a serious obstruction. K-cup deformation—pods that “bow up” during brewing with water pooling on top—confirms severe flow restrictions that will only worsen without action.
How to Test Your Keurig’s Brewing Speed
Run three consecutive medium cup cycles with fresh water only (no K-cup). Time each brew:
– Healthy machine: 25-30 seconds per cup
– Mild clog: 40-55 seconds per cup
– Severe clog: 60+ seconds or incomplete fills
This simple test isolates whether the problem stems from your Keurig or specific K-cup brands. If water-only cycles run slowly, you’ve confirmed an internal clog requiring cleaning.
Root Causes Behind Every Keurig Clog
Mineral scale buildup from hard water creates the most stubborn blockages. Calcium and magnesium deposits accumulate inside tubes and valves, eventually breaking loose as chunks that completely obstruct water flow. Well water users with softeners face unique challenges as salt-ion reactions gum up K-cups and internal components.
Coffee ground accumulation happens when puncture needles get packed with microscopic particles from over-filled pods or damaged K-cups. These grounds build up over weeks, gradually restricting flow until brewing stops entirely. First-generation Keurig models are especially prone to this issue due to needle design.
Why Some K-cups Cause More Clogs
Green Mountain (Keurig’s parent company) K-cups generally cause fewer clogs than third-party brands. Problematic varieties include Donut House blends with finer grounds that escape through puncture holes. Test multiple brands to identify if your clog stems from specific K-cups rather than machine issues.
Essential Safety Steps Before Cleaning
Power down and unplug your Keurig completely before starting any cleaning procedure. The puncture needles are razor-sharp—handle the K-cup holder with extreme care to avoid deep cuts. Never breathe steam from descaling solutions, especially vinegar fumes which can irritate your lungs. Work in a well-ventilated area with windows open.
Critical Warning: Avoid These Common Mistakes
- Never submerge your Keurig in water or run dishwasher cycles on non-removable parts
- Avoid abrasive cleaners that scratch internal components
- Don’t use undiluted vinegar which can damage seals and gaskets
- Never force disassembly beyond user-serviceable parts
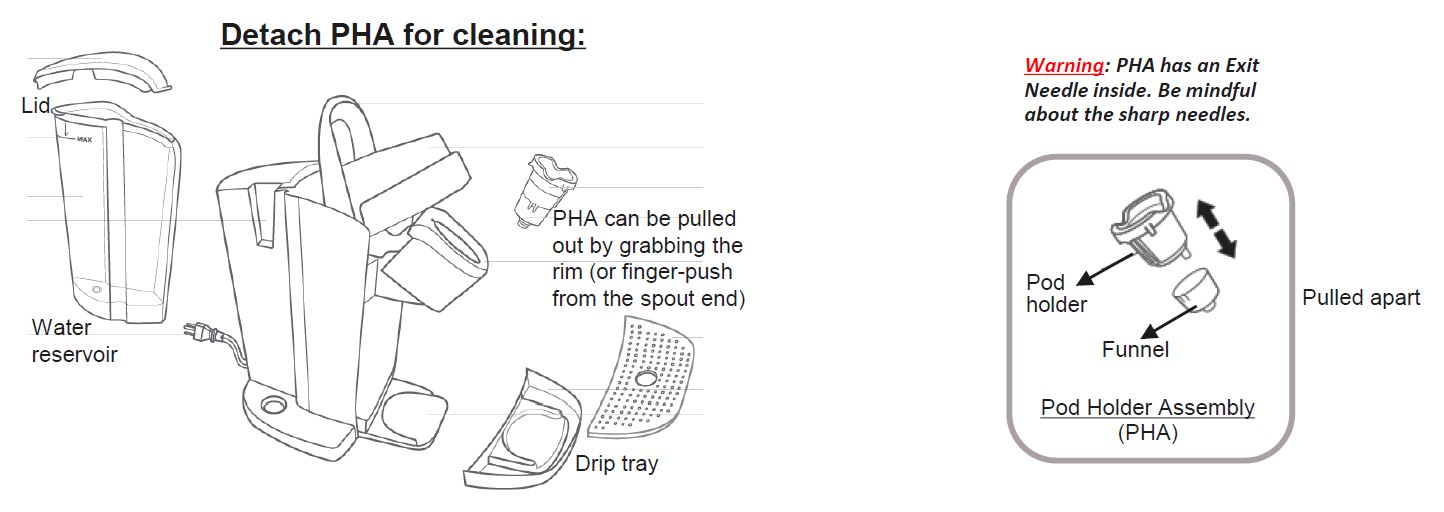
Clean Needles and Components in 10 Minutes
Tools needed: Paperclip or Keurig cleaning tool, warm soapy water, soft cloth, small brush
Step-by-Step Needle Cleaning Process
- Remove reservoir, drip tray, and K-cup holder
- Separate holder into funnel and housing pieces
- Straighten paperclip, insert into needle holes at funnel base
- Clean both entrance needle (in lid) and exit needle (in holder)
- Wash all removable parts in warm, soapy water
- Rinse thoroughly, dry completely
- Reassemble and test with water-only cycle
This basic cleaning fixes 70% of slow brewing issues within 15 minutes. Pay special attention to the exit needle where coffee grounds accumulate most frequently. For K-Classic models, verify both upper and lower needles are clear before reassembling.
How to Identify Clogged Needles
Hold the funnel component up to light after cleaning. You should see clear visibility through both needle holes. Any visible coffee grounds or discoloration indicates incomplete cleaning requiring additional passes with your paperclip tool.
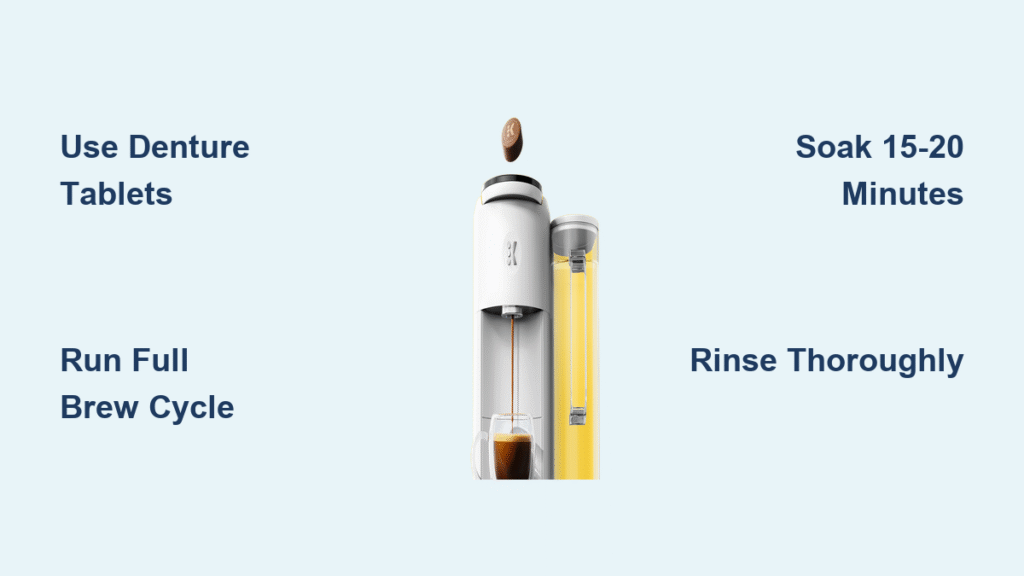
Descale With Vinegar Solution Effectively

Prepare the solution: Mix equal parts white vinegar and water (50/50 ratio) for standard descaling. This breaks down mineral deposits throughout the system without damaging internal components.
Standard Descaling Procedure
- Fill reservoir with vinegar solution
- Run 12-ounce brew cycles without K-cup until empty
- Let machine sit 30-60 minutes with power on
- Refill with fresh water
- Run 3-5 full reservoirs of clean water until vinegar smell disappears
For stubborn scale buildup in hard water areas, try the enhanced overnight method: Run 2 cups vinegar solution, then leave overnight. Next morning, flush with full reservoir of water. This extended soak dissolves deposits that shorter cycles miss.
Deep Clean Reservoir Filters Completely
Reservoir filters and bottom screens trap debris that causes mysterious clogs. Many users overlook these critical components during routine cleaning.
Reservoir Filter Maintenance
Remove filter from housing (no need to disassemble), rinse under tap for 1-2 minutes focusing on mineral buildup removal. For K-Compact K-35 models, verify correct reservoir installation as misalignment causes water intake issues that mimic clogs.
Bottom Screen Cleaning Technique
Locate the screen at reservoir base, scrub with bottle brush under running water until water flows freely through mesh. Hold your Keurig upside down (after emptying water) and use a turkey baster to blow air through the water tube targeting the bottom tank opening.
Prevent Future Clogs With Smart Maintenance
Daily habits that stop clogs before they start:
– Empty drip tray after each use
– Remove used K-cups immediately
– Wipe down exterior surfaces
Monthly deep cleaning schedule:
– Hard water areas: Descale every 2-3 months
– Softened well water: Test monthly with bottled water
– Filtered water users: Extend descaling to every 6 months
Water Quality Testing Shortcut
Brew with bottled water to instantly determine if well water or softener issues cause your clogs. If bottled water resolves the problem, install an external water filter to protect your machine long-term.
When to Replace Your Keurig Instead of Repairing
Replacement indicators that signal end-of-life:
– Motor struggling sounds after thorough descaling
– Persistent clogs across multiple K-cup brands
– Water pooling despite complete needle cleaning
– Power cycling issues within warranty period
Keurig typically covers defects for 1 year. Using non-recommended cleaning methods may void coverage. Contact customer support for persistent issues—retailers like Costco often provide exchange options even after standard warranty periods.
Model-Specific Quick Fixes for Popular Units

K-Classic models: Prone to needle clogging—check both upper and lower needles thoroughly, ensure proper K-cup placement. Many users report success by running the same K-cup through two medium passes as a temporary workaround.
K-Compact K-35: Water intake issues usually reservoir-related—verify correct installation, check for air bubbles in water line. This model’s compact design traps air more easily than larger units.
First-generation units: Increased pump wear—consider more frequent maintenance or upgrade if multiple components show failure signs. These older models lack modern anti-clog features.
Final System Check after cleaning: Run water-only cycle to ensure steady stream without sputtering, verify medium cup brews in 25-30 seconds, and check for proper cup volume. Your Keurig should now operate like new. If problems persist after thorough cleaning, contact Keurig support—especially if under warranty. Consistent maintenance prevents 90% of clogs, so mark your calendar for monthly descaling to protect your investment and keep your morning coffee ritual running smoothly.