
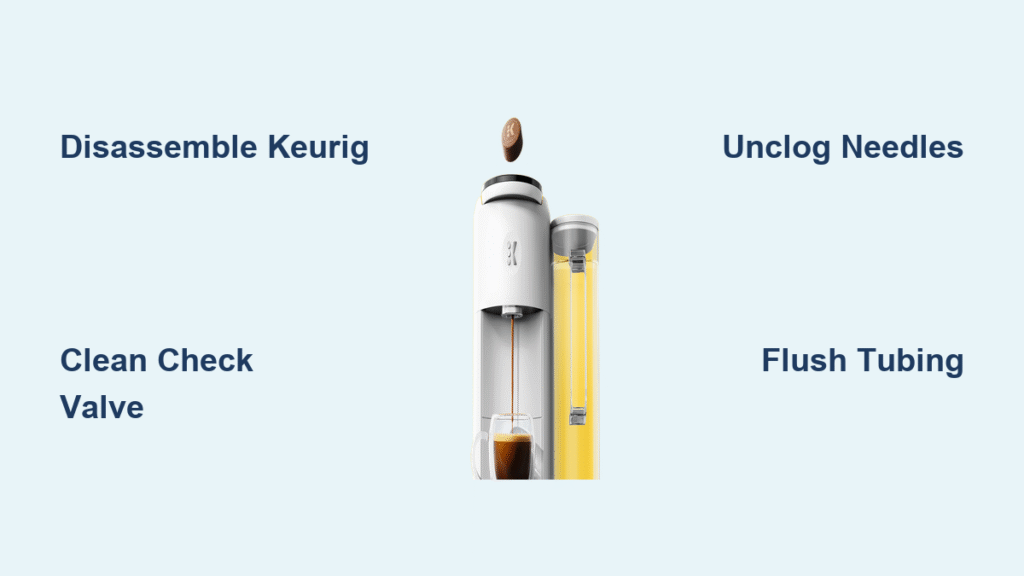
That frustrating moment when your Keurig spits out a sad 4-ounce coffee instead of the full 12-ounce cup you selected hits every coffee lover. When your machine sounds like a freight train instead of a quiet brewer or takes three times longer to finish, scale buildup is almost always the culprit. Learning how to disassemble a Keurig properly can rescue your $150 machine from the landfill and restore your morning ritual—no technician needed. This guide delivers the exact steps to access clogged check valves and blocked needles, saving you replacement costs and brewing disappointment.
Most users don’t realize that 90% of “broken” Keurigs just need deep cleaning of three critical internal components. By taking apart your machine, you’ll target the hidden pathways where mineral deposits and coffee grounds strangle water flow. You’ll gain confidence in handling model-specific quirks—from household B70s to office K155s—with clear visual cues for every step. Let’s transform you from frustrated user to coffee machine whisperer in under an hour.
Why Your Keurig Suddenly Brews Weak 4-Ounce Cups
Scale buildup inside your Keurig’s water pathways is the silent killer of proper brewing volume. When minerals from tap water accumulate around the check valve or clog the brewing needles, water pressure drops dramatically. This forces your machine to stop dispensing early—delivering weak, half-brewed cups that taste like disappointment. You’ll notice this problem worsening over weeks: first with slightly weaker brews, then alarming noises, and finally that dreaded “Add Water” light flashing prematurely.
Critical warning: Never ignore grinding or screeching sounds during brewing. These indicate scale has hardened enough to strain the pump motor. Continuing to use it risks permanent damage requiring full replacement. The good news? Disassembling your Keurig to clean these components takes less time than your weekly grocery run and costs nothing but elbow grease.
How Scale Sabotages Your Coffee Flow
- Check valve blockage: Mineral deposits jam this spring-loaded gate, preventing full water release
- Upper needle clogs: Coffee grounds pack into the puncture needle above the K-cup
- Pod holder tube obstructions: Grounds accumulate in the funnel’s exit tube, restricting flow
Required Tools for Keurig Disassembly

Grab these five items before touching a single screw—skipping any tool risks damaging your machine or losing critical parts. Your Phillips #2 screwdriver is non-negotiable; smaller sizes strip Keurig’s delicate plastic screws. Keep a small bowl nearby to organize screws by location—mixing up the 6mm and 8mm screws during reassembly causes leaks. The straightened paper clip (bend one end into a tiny hook) replaces expensive cleaning tools for reaching tight spots.
Pro Tip: Place a soft microfiber cloth under your workspace. Keurig screws roll like marbles, and plastic components scratch easily on hard surfaces. If you lack a paper clip, a toothpick works for needle cleaning—but never use metal objects that could damage plastic valves.
Remove External Components Before Internal Access
Skipping this step risks water damage during disassembly. Lift the water reservoir straight up—no twisting—then empty any remaining liquid. This reservoir often hides mineral buildup that feeds into internal clogs. Next, slide the drip tray forward while keeping it level; residual coffee spills will stain your counter if tilted. Clean both parts separately with warm water (no soap) before setting them aside.
Pod Holder Assembly Removal
Lift the handle fully to expose the pod holder. Grip both sides firmly and pull straight up—yanking at an angle cracks the plastic tabs. Now separate the funnel by twisting it counterclockwise while applying gentle upward pressure. Inspect the funnel’s underside for coffee ground buildup (common in reusable K-cup users). If grounds are packed in, clean it immediately with your paper clip over the sink.
Access Internal Components Safely

Flip your unplugged Keurig upside down on the soft cloth—this exposes the base plate screws. Remove all 6-8 visible screws using your Phillips #2 driver; note that K155 models have longer screws at the corners. As you lift the base plate, watch for connected tubing that might snag. The brewing unit—resembling a white plastic block with attached hoses—sits directly beneath. Remove 3-4 screws securing this unit, being mindful that some screws are shorter than others.
Brewing Unit Extraction Protocol
Gently lift the brewing unit while supporting connected tubes. If hoses resist, do not force it—locate hidden clips with your fingernail. The check valve (a small cylindrical component with a spring) sits near the unit’s water inlet. This is your primary target for scale removal. For K155 commercial models: remove rear panel screw caps first, then access the top cover screws after opening the front loader. The K155’s front panel pops off once handle screws are removed—apply even pressure to avoid cracking plastic clips.
Clean Critical Internal Parts That Cause Weak Brewing
Insert your paper clip into the check valve opening and gently probe for gritty deposits. Scale buildup here prevents the valve from opening fully, choking water flow. Test functionality by blowing air through from the boiler side—the valve should open with light breath pressure. Flush with hot tap water while shaking vigorously to dislodge stubborn sediment. If water flows freely through both ends, the valve is clear.
Needle Cleaning Process That Restores Full Water Pressure
Clean the pod holder tube by inserting your paper clip and working it in circular motions. Coffee grounds love to pack into this narrow exit path—expect black debris to fall out. Access the upper needle inside the machine’s roof cavity where K-cups sit. Insert the paper clip into the center hole and wiggle it to clear obstructions. You’ll feel resistance when hitting a clog; keep working until the clip slides smoothly.
Pro Tip: After cleaning both needles, run water from a squeeze bottle through them to verify full clearance. Water should spray in a steady stream—not a drip.
Reassembly Process That Prevents Leaks and Errors

Reverse every disassembly step in exact order, but double-check three critical points. Ensure all electrical connectors click securely into place—loose connections cause “Heating” light errors. Verify tubing is fully seated on both ends of the brewing unit; partial connections leak during brewing. Replace screws in their original holes—using a short screw where a long one belongs creates gaps for water seepage.
Post-Reassembly Testing Protocol
Run two water-only cycles using the largest cup setting immediately after reassembly. Discard water between cycles to flush dislodged debris. Listen for abnormal sounds—a quiet hum means success, while gurgling indicates trapped air. If weak brewing persists, the check valve likely needs another cleaning pass. Never brew coffee until you confirm no leaks during these test cycles.
Prevent Future Disassembly Needs With Smart Maintenance
Descale every 3 months using 14 ounces of white vinegar mixed with 14 ounces of water—no commercial solutions needed. Run this mixture through continuous brew cycles, then flush with 12 full water cycles. Clean removable parts weekly with warm water (never soap in internal components). Replace water filters every 60 tank refills to reduce scale formation at the source.
Monthly Check Valve Inspection Shortcut
Lift your pod holder assembly and blow through the funnel’s exit tube. If air doesn’t pass easily, the check valve is partially blocked. Insert your paper clip for 60 seconds of cleaning—this 2-minute habit prevents 90% of major disassembly needs. For hard water areas, increase descaling to monthly and use filtered water exclusively.
Mastering how to disassemble a Keurig transforms coffee emergencies into 30-minute maintenance sessions. Your machine should now brew full, hot cups with its original quiet operation—proving that most “broken” Keurigs just needed a deep clean. Keep this guide bookmarked for your next scale emergency, and remember: regular 10-minute cleanings prevent 90% of disassembly scenarios. When brewing issues return (and they will), you’ll already have the confidence to fix it before breakfast.


