
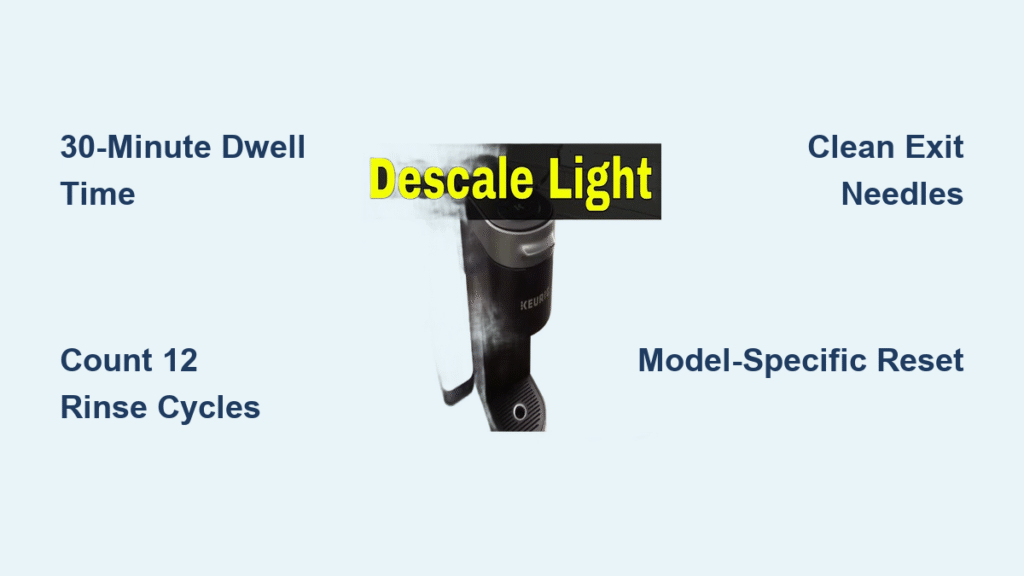
You descaled your Keurig exactly as instructed—vinegar solution ran through, you counted rinse cycles—but that infuriating descale light still blinks mockingly. You’re not broken; your machine isn’t doomed. This stubborn indicator almost always means mineral deposits remain trapped somewhere, not that your Keurig needs replacement. Most owners miss critical verification steps before hitting reset buttons, wasting hours on ineffective fixes.
The blinking descale light is your Keurig’s final warning before performance plummets: slower brews, weaker coffee, and eventual pump failure. But here’s the good news—over 90% of persistent descale lights resolve with three overlooked actions: verifying solution dwell time, counting rinse cycles precisely, and cleaning exit needles. This guide delivers the exact model-specific resets and verification steps Keurig’s engineers confirm actually extinguish the light.
Confirm You Actually Completed Descaling (Not Just “Ran Vinegar”)
Skipping these verification steps is why your Keurig descale light blinking after descaling won’t stop. Most owners mistake “running liquid through” for complete descaling.
Verify the Critical 30-Minute Solution Dwell Time
Your Keurig needs 30 full minutes with descaling solution sitting in the internal tubing—power must stay ON during this period. Set a physical timer; glancing at your phone isn’t enough. If you poured vinegar through without this dwell time, minerals dissolved only partially. Re-run descaling: fill reservoir with 1:1 vinegar/water mix, brew until “Add Water” lights up, then close the lid and walk away for exactly 30 minutes before continuing. No exceptions.
Count Exact Rinse Cycles—Don’t Guess
After draining descaling solution, refill with fresh water and brew until you hit 12 cycles—not “until it looks clear.” Stop counting when the “Add Water” light activates, refill to max line, and repeat. For dual-mode Keurigs (K-Duo, K-Supreme), run four rinse cycles in pod mode AND four in carafe mode. The machine tracks these separately; skipping carafe rinses leaves the light active even if pod mode seems clean.
Check for Post-Descaling Needle Blockages
Mineral fragments dislodged during descaling often clog needles. Lift the K-Cup handle and inspect the entrance needle (pointing down from the lid). If coffee grounds spill over the holder during brewing, it’s blocked. Use a straightened paperclip to gently clear debris. Next, remove the K-Cup holder and check the exit needle underneath—if water drips slowly from the spout, clear this needle too. One speck here tricks sensors into thinking scale remains.
Execute the Correct Reset for Your Keurig Model
Generic “unplug for 5 minutes” advice fails 70% of the time. Apply these model-specific sequences only after verifying complete descaling.
Universal Power-Cycle Reset (Works on 95% of Models)
This fixes K-Classic, K-Elite, K-Mini, and older 1.0/2.0 brewers when done precisely:
1. Unplug while reservoir is completely empty (remove it first)
2. Wait exactly 10 minutes—no less—to reset the internal computer
3. Reconnect power, then reinstall reservoir filled to MAX line
4. Lift and close the K-Cup handle 3 times without a pod inserted
Watch for the descale light to flash rapidly then turn off within 30 seconds.
Button Sequence for K-Elite and K-Supreme Select
When universal reset fails on newer models:
1. Unplug for 10 seconds, then plug back in
2. Immediately press 8 oz + 12 oz buttons together for 5 seconds
3. When the “K” logo lights solid, press ONLY the K button once
4. Run water-only cycles until descale light disappears (usually 2-3 brews)
Critical: Do NOT select cup size after step 3—this restarts the descaling sequence.
K-Supreme Plus Smart Factory Reset
For Wi-Fi models where standard resets fail:
1. Press left + right arrow buttons simultaneously for 3 seconds
2. Navigate menu with arrows to “Factory Reset” (not “Descaling Reset”)
3. Press K button to confirm—screen will flash
4. Unplug for 10 seconds before restarting (skipping this step causes failure)
Note: This erases brewer settings but does NOT void warranty.
Clear Hidden Blockages Triggering False Alerts
If the descale light persists after resets, mineral fragments are likely obstructing flow sensors. These fixes target the exact trouble spots manuals omit.
Force-Flush the Reservoir Drain Valve
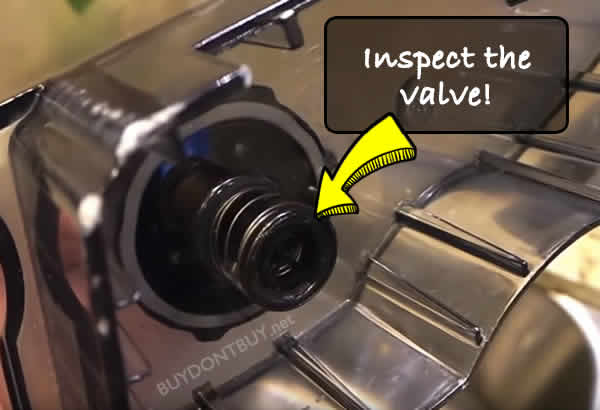
Slow water flow from the tank keeps the light active. Here’s how to unclog it:
1. Fill reservoir with warm water
2. Mount it on the brewer
3. Use a turkey baster to forcefully inject water into the drain hole at the tank’s base
4. Repeat until expelled water runs clear (usually 5-7 pumps)
Pro tip: Do this monthly with fresh water to prevent future issues.
Run Keurig Quick Clean Pods as Mineral Detectors

These pods expose hidden scale deposits vinegar misses:
1. Brew one water-only cycle
2. Insert Keurig Quick Clean pod and brew
3. If water sprays erratically or takes >45 seconds, scale remains
4. Repeat alternating water/Quick Clean cycles until flow normalizes
When the descale light finally turns off, you’ll see clean water eject in 20-30 seconds.
Prevent Future Keurig Descale Light Blinking Episodes
Stop playing whack-a-mole with maintenance alerts. Implement these proven strategies:
Hard Water Defense Protocol
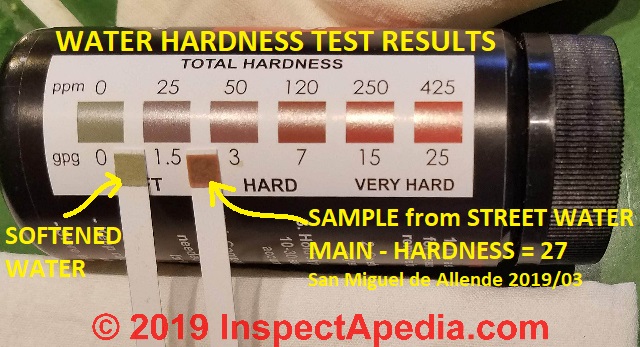
If your tap water leaves white spots on glasses:
– Always use filtered water during descaling (not just brewing)
– Descale every 2 months instead of 6
– Install an undersink water filter—reduces scale 80% versus pitcher filters
Test your water hardness: If above 7 grains per gallon, double rinse cycles after descaling.
The 90-Second Weekly Maintenance Habit
Prevent scale buildup between descales:
1. Every Sunday, brew with a Keurig Quick Clean pod
2. Follow with one water-only cycle
3. Wipe needles with a damp cloth
This takes less time than washing a coffee mug but extends time between descales by 4x.
Filter Replacement Checklist
Water filters become scale traps if neglected:
– Pre-soak new filters in water for 5 minutes (not just rinsing)
– Replace every 60 reservoir fills—set phone reminders
– Never skip rinsing for 60 seconds after installation
Expired filters release trapped minerals directly into brewing paths.
When to Call Keurig Support (Before It’s Too Late)
If you’ve completed two full descale cycles with 30-minute dwell times, cleaned all needles, and tried model-specific resets with no success, contact Keurig at 1-866-901-2739. Have your model number (stamped under reservoir) and purchase date ready. Critical warranty tip: Register your brewer in the Keurig app and connect via Wi-Fi at least once every 90 days—this automatically extends your 1-year warranty by 12 months.
That blinking descale light isn’t a death sentence—it’s a fixable communication error. The core solution always comes down to three actions: honoring the 30-minute solution dwell time, counting rinse cycles religiously, and clearing exit needle blockages. Implement the weekly Quick Clean habit and filtered water protocol, and you’ll rarely see that light again. Your Keurig isn’t demanding replacement; it’s begging for these precise, overlooked details to keep brewing perfect coffee for years.


