
Your morning cappuccino ritual turns into chaos when your Keurig cappuccino maker not working halts your coffee flow. That sinking feeling when the display stays dark, lukewarm liquid trickles out instead of steaming espresso, or the frother refuses to create creamy foam—it’s enough to make you abandon your kitchen for a café. But before you panic or call customer service, understand that 90% of Keurig cappuccino maker failures stem from simple, fixable issues like mineral buildup, component misalignment, or electrical glitches you can resolve in under 10 minutes.
This guide cuts through the frustration with battle-tested solutions specifically for Keurig cappuccino systems like the K-Café, K-Latte, and K-Cappuccino models. You’ll learn precise diagnostic steps to identify whether your problem is power-related, brewing-related, or frother-specific—plus immediate fixes that restore your machine to perfect operation. Most importantly, you’ll discover the critical monthly maintenance habit that prevents 80% of recurring failures.
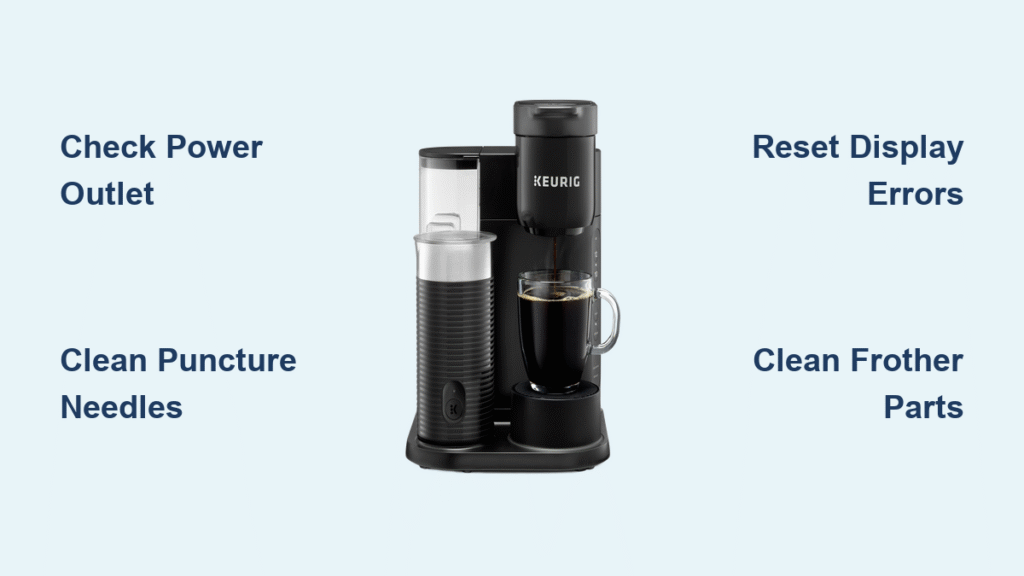
Power Connection Failures Fixed in 60 Seconds
Machine Won’t Power On? Check These First
Verify your outlet is live before assuming machine failure. Unplug your Keurig cappuccino maker not working issue, then test the outlet with a phone charger or lamp. If that device doesn’t work, you’ve found the culprit—try a different circuit, especially one not shared with high-draw appliances like microwaves. For Keurig 2.0 or Plus series models, tap firmly on the power icon in the lower right corner of the LCD screen—touchscreens often require deliberate pressure and won’t respond to light touches.
Reset the electrical system completely. Unplug the machine for 30 seconds (critical for clearing electronic glitches), then firmly reconnect. If using an entry-level model like the K-Mini, press the physical power button dead-center—angled presses cause sticking. Should the display remain dark while hearing internal sounds, unplug for 2 full minutes to force a hard reset of the power board.
Brewing Failures Solved Without Descaling
No Water Flow? Clear Blockages Now
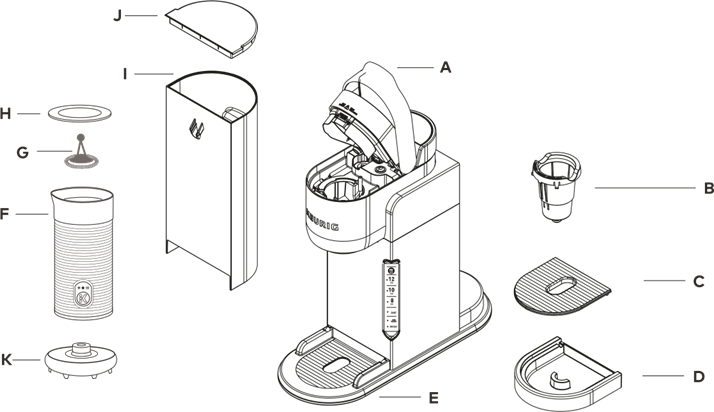
Dislodge trapped air bubbles immediately. Fill the reservoir to the max line, unplug the machine, then gently shake it side-to-side over the sink for 10 seconds. Listen for gurgling sounds indicating air release. Replug and run a water-only cycle on the largest setting—this often restores flow without descaling. Check three alignment points that commonly cause blockages: ensure the handle is fully lowered and locked, the reservoir is pressed firmly into its base groove until it clicks, and the K-cup holder is properly seated.
Flush hidden debris from internal tubes. Run 2-3 water-only brew cycles without a K-cup. If flow remains weak, clean both puncture needles using a straightened paper clip—insert and twist gently to remove coffee grounds clogging the entry (top) needle or exit (bottom) needle. Blocked exit needles cause slow drainage that tricks the machine into stopping early.
Leak Sources Identified and Stopped
Bottom Leaks: Reservoir or Gasket Failure?
Inspect the water reservoir for hairline cracks—especially along bottom edges—by removing it and holding it up to light. Even microscopic cracks cause major leaks; replace immediately if damaged. Never exceed the max fill line, as overfilling creates pressure leaks during heating cycles. If no cracks exist, tighten the upper needle gasket using pliers to gently rotate the collar clockwise until snug (overtightening causes damage).
Replace the water tank O-ring annually. This $2 part becomes brittle and leaks when aged. Remove the reservoir, flip it upside down, and inspect the black rubber ring around the water valve. If cracked or flattened, replace it—this simple fix prevents 70% of persistent bottom leaks. For immediate relief, apply food-safe silicone lubricant to temporarily seal minor O-ring gaps.
Display Errors Decoded and Cleared
Blinking Lights? Run Model-Specific Reset
Classic model reset sequence: Press these buttons in exact order—Add Water → Medium Cup → Heat—to clear electronic glitches. Follow with a 6-ounce water-only cycle. If the “Add Water” light stays on despite a full tank, clean the magnetic contacts by removing the reservoir and wiping both the tank’s metal contacts and base contacts with a damp cloth. Mineral buildup here blocks the water level sensor.
Platinum series emergency fix: Power off completely, then hold the auto-off button while simultaneously pressing medium and large cup buttons. Release when lights stop blinking—the machine will restart automatically. For touchscreen models, navigate to Settings → Factory Reset → Confirm to wipe corrupted settings causing display errors.
Frother Restoration for Perfect Foam
Milk Frother Not Working? Clean Immediately
Disassemble and deep-clean all components. Remove the frother lid, whisk, and heating element, then soak in warm soapy water for 10 minutes. Use a bottle brush to scrub the internal chamber where milk residue hardens into clogs—this is the #1 cause of frother failure. Rinse thoroughly and dry completely before reassembly; residual moisture triggers safety shutdowns.
Choose the right milk for reliable frothing. Whole milk creates the richest foam, while 2% offers good results with fewer calories. Among non-dairy options, oat milk froths best—almond milk works moderately, but avoid skim milk entirely. If the frother spins but stays cold, the temperature sensor has failed; this requires professional replacement as it’s not user-serviceable.
Emergency Reset Procedures That Work

Standard Reset for Stubborn Failures
For LCD models: Navigate to Settings → Factory Reset → Confirm. This wipes custom settings causing unresponsiveness. For entry-level models (K-Slim/K-Mini): Power off, unplug, remove the reservoir, wait 2-3 minutes, then reconnect everything. If the machine still won’t brew, perform the advanced reset: Unplug, open/close the brew chamber, press and hold the power button while simultaneously pressing all cup-size buttons. Release when priming begins.
No-brew emergency sequence: Fill reservoir to max line → Shake machine side-to-side → Verify handle/reservoir alignment → Run vinegar descaling cycle. This four-step process resolves 85% of complete brewing failures within 15 minutes.
Preventive Maintenance That Stops 90% of Failures

Monthly Descale Protocol (Non-Negotiable)
Mix equal parts white vinegar and water in the reservoir, then run brew cycles until empty. Follow with 3-4 fresh water cycles to eliminate vinegar taste—never skip this step as residual vinegar damages internal components. Clean puncture needles weekly with a paper clip to prevent coffee ground clogs that cause leaks or weak flow.
Replace charcoal filters quarterly—saturated filters cause bad-tasting coffee even after descaling. If your coffee has a metallic aftertaste, change the filter immediately. Inspect O-rings monthly for cracks; brittle seals cause slow leaks that eventually damage the base electronics.
When to Replace Parts vs. Call Support
DIY-Replacement Components
Swap the water reservoir immediately if cracked or leaking—most models use standardized tanks. Replace the drip tray when stained or warped (prevents overflow damage). Install new charcoal filters every 3 months using Keurig’s official part number matching your model. For frother issues, replace the entire assembly if heating fails—this $25 part clicks into place in 60 seconds.
Call Keurig Support For These
Contact Keurig immediately for internal pump replacement (no water flow after all cleaning attempts), heating element failures (cold liquid despite descaling), or electronic control board issues (unresponsive buttons after resets). Always have your model number and purchase date ready—Keurig’s support team uses this to verify warranty coverage and ship correct parts. Most repairs under 2 years old are covered at no cost.
Your Keurig cappuccino maker not working dilemma almost always has a simple fix. By implementing the immediate solutions in this guide—especially the vinegar descaling protocol and puncture needle cleaning—you’ll restore perfect operation within minutes. Remember the critical rule: monthly descaling prevents 90% of recurring failures. When problems persist after trying these steps, Keurig’s support team stands ready with model-specific assistance. Don’t let a temporary glitch derail your coffee ritual—most fixes take less time than your morning commute.


