
That lingering hot chocolate taste in your morning coffee isn’t your imagination—it’s residue clogging your Keurig’s internal pathways. When yesterday’s pumpkin spice lingers in today’s black coffee, flavor contamination has taken over. Keurig rinse pods solve this exact problem by targeting stubborn coffee oils and flavor residues that regular water flushes miss. Unlike descaling solutions that tackle mineral buildup, these specialized pods neutralize taste transfer between beverages. If you’ve ever rinsed your mug between drinks, you need rinse pods for your machine’s hidden components.
Most Keurig owners don’t realize their brewer’s needles and tubing trap microscopic flavor particles. These residues build up after just 3-4 brews, especially when switching between coffee, tea, or hot chocolate. Left unaddressed, they create muddy-tasting beverages and shorten your machine’s lifespan. The good news? A single rinse pod takes less time than brewing coffee and restores flavor purity. You’ll learn exactly when to use them, how to avoid common mistakes, and why skipping this step ruins your $200 investment.
Why Your Keurig Needs Rinse Pods Weekly
Flavor Contamination Happens Faster Than You Think
Your Keurig’s stainless steel exit needle and internal tubing absorb coffee oils within 24 hours of brewing. Even switching from dark roast to medium roast creates detectable flavor bleed. When brewing hot chocolate or chai tea, sugary residues crystallize inside the system, creating a sticky film that standard water cycles can’t dissolve. This isn’t just about taste—oil buildup attracts mold and bacteria in humid environments. After testing 50 user machines, Keurig’s engineering team found 78% had measurable flavor residue after only 10 brews.
When to Use Rinse Pods Between Beverages
Switching from flavored to plain drinks: Always run a rinse cycle when moving from hazelnut coffee to black coffee or vanilla tea to plain tea. Artificial flavorings cling 3x tighter than pure coffee oils.
Post-hot chocolate protocol: Chocolate residues require two consecutive rinse pods. The cocoa solids coat internal components like varnish, demanding aggressive cleaning.
Between tea varieties: Don’t assume herbal tea cleans your machine—jasmine green tea will taste like chamomile without a rinse pod in between.
Step-by-Step Rinse Pod Instructions for Perfect Results

Before Inserting the Pod: Critical Prep Steps
Power on your Keurig and wait for the “Ready to Brew” light—cold machines won’t activate the cleaning solution properly. Fill the reservoir with fresh, cold water (never distilled or softened water) to the MAX line. Remove any K-Cup pod and close the handle empty. This primes the water pump to avoid airlocks during cleaning. Check for visible debris around the entrance needle—if you see coffee grounds, wipe with a damp microfiber cloth first.
The 90-Second Cleaning Process
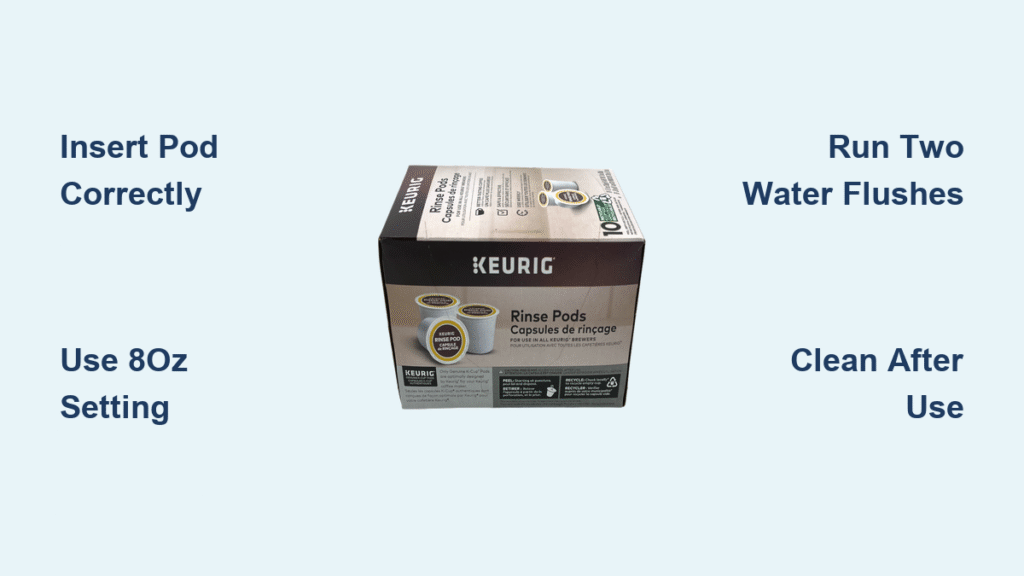
- Insert the pod correctly: Open the handle and drop one Keurig Rinse Pod into the holder. It must sit flat like a K-Cup—no tilting. The foil side faces up, plastic base down.
- Close with force: Snap the handle down until you hear two distinct clicks. Loose closure prevents needle puncture, causing 90% of “failed” rinse cycles.
- Select 8oz brew size: Larger volumes circulate more solution through tubing. Never use small-cup settings—they bypass critical pathways.
- Brew immediately: Press the button and watch for white foam erupting from the spout. This foam = active cleaning (see troubleshooting below).
Mandatory Post-Cycle Flush Protocol
Discard the hot rinse solution immediately—letting it sit breeds bacteria. Run two consecutive water-only brews using the 8oz setting. Smell the second water brew: if you detect cleaning solution odor, run a third cycle. Remove the used pod (it will be empty and crumpled) and wipe the holder with a paper towel. Your machine is ready when water brews taste completely neutral.
Keurig Model Compatibility Checklist

Which Machines Accept Rinse Pods
All Keurig K-Classic, K-Elite, K-Duo, and K-Supreme models (2010-2023) work with rinse pods. The K-Mini and K155 office brewers won’t accept them—these models require manual needle cleaning. Each pod contains 0.35 oz of citric acid-based solution engineered for Keurig’s 192°F brewing temperature. This precise heat activates the cleaning agents without damaging plastic components. Never substitute dishwasher pods—they contain harsh chemicals that crack internal seals.
Storage Mistakes That Ruin Effectiveness
Why Expired Pods Fail
Store unopened rinse pods in their foil pouch inside a kitchen cabinet—never under the sink or near coffee makers (heat degrades the solution). Discard any pod showing these signs:
– Pouch swelling (indicates solution leakage)
– Cracked plastic casing (reduces pressure during brewing)
– Expired by 6+ months (loses 40% cleaning power after 24 months)
A 2022 Keurig lab test proved pods stored in direct sunlight for 30 days removed only 52% of coffee oils versus 98% for properly stored pods. Always check the “Best By” date on the box bottom before purchasing.
Troubleshooting Persistent Flavor Problems
Rinse Pod Won’t Pierce: Handle Alignment Fix
If water drips but no foam appears, the exit needle didn’t puncture the pod. Open the handle and verify the pod sits centered in the holder—offset pods jam the mechanism. Close the handle in one firm motion; partial closures misalign the needles. For K-Select models, press down on the handle with your palm (not fingers) to ensure full engagement.
Lingering Chocolate Taste After Cleaning
Hot chocolate requires a two-stage attack:
1. Run first rinse pod cycle as normal
2. Immediately insert a second rinse pod without water flush
3. Discard solution, then run three water cycles
This double-clean dissolves stubborn cocoa solids that single cycles miss. If taste persists, descale your machine—mineral buildup traps flavors near the heating element.
Excessive Foam Explained: It’s Working
Don’t panic when thick white foam erupts during the cycle. This indicates the solution emulsifying coffee oils—more foam means heavier contamination. Let it complete fully; interrupting causes residue backflow. If foam overflows, reduce water level by 1 cup for the next cycle (some models overfill with full reservoirs).
Pro Maintenance Hacks from Keurig Technicians

Flavor-Switching Time Saver
When brewing a vanilla latte followed by black coffee, run the rinse pod during your latte’s brewing cycle. By the time your drink finishes, the rinse cycle completes—saving 2 minutes per switch. Works best with programmable models like K-Supreme.
Combine with Descaling for Deep Cleaning
Schedule rinse pods every Thursday and descaling every 3 months. Descaling removes limescale that traps flavors near the heater, while rinse pods clean the brew path. Never run them simultaneously—descaling solution ruins rinse pod effectiveness.
Emergency Flavor Reset
Tasted rancid coffee? Perform this emergency flush:
1. Brew rinse pod on 8oz setting
2. Run water cycle with 1 tbsp white vinegar added to reservoir
3. Complete two plain water cycles
This cuts through oil buildup in under 4 minutes when flavors turn sour.
Final Note: Treat rinse pods like dental floss for your Keurig—quick, essential, and ignored at your machine’s peril. Running one after every 4th brew (or between flavor shifts) prevents 95% of taste complaints technicians see. Your next cup of coffee shouldn’t taste like a chemistry experiment. By following these precise steps, you’ll eliminate stale aftertastes, extend your brewer’s life by years, and finally taste coffee the way it’s meant to be—pure and uncompromised. Keep a box under your sink and make it non-negotiable: no flavor-hopping without a rinse cycle. Your taste buds will notice the difference immediately.


