
Your morning coffee tastes stale, the brew cycle drags on forever, or your Keurig sputters and coughs instead of delivering that smooth, hot cup you need to start your day. These aren’t just minor annoyances—they’re clear signals that mineral buildup and coffee residue have compromised your machine’s performance. A Keurig cleaning kit is your solution, but only if you use it correctly. Most users throw the kit in a drawer until their machine fails completely, then waste precious morning minutes trying to figure out the process.
This guide delivers the exact steps to transform your sluggish brewer back to factory-fresh condition. You’ll learn not just what to do, but when to do it, how to avoid common mistakes, and how to verify your cleaning was truly successful. No more guessing whether you’ve rinsed enough or wondering why the descale light won’t turn off—these proven techniques work for every Keurig model.
Keurig Cleaning Kit Components You Must Identify First
What’s Actually Inside Your Kit
Before starting, verify your kit contains these essential items:
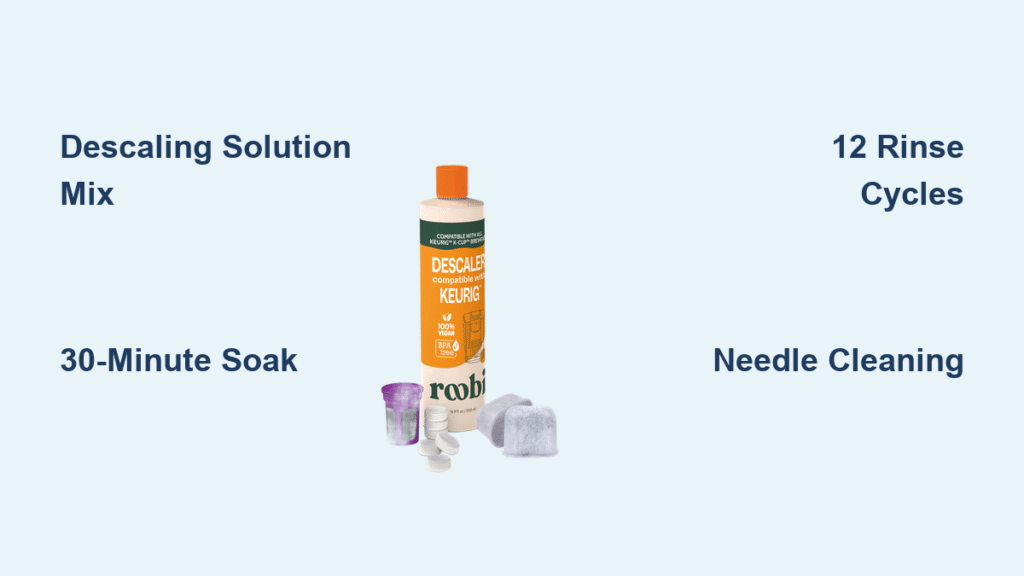
- Descaling solution: Clear liquid concentrate in a small bottle (typically 16oz)
- Cleaning pods: Round, foil-sealed discs resembling K-Cups but with cleaning solution
- Water filter cartridges: Small cylindrical filters that fit in your reservoir
- Cleaning brush: Miniature brush with stiff bristles for tight spaces
Premium kits add critical extras like a specialized needle cleaning tool that fits through the K-Cup holder to clear the puncture mechanism—this is essential if your machine has been skipping punctures or leaking.
Pro tip: Check your kit’s expiration date before starting. Unopened descaling solution lasts 2+ years, but once opened, it degrades within 6 months. Using expired solution creates a weak cleaning mixture that won’t remove stubborn mineral deposits.
Machine Shutdown Protocol Before Cleaning
Critical Pre-Cleaning Checklist
Skipping these steps risks electrical damage or personal injury:
- Power down completely—unplug from wall outlet (don’t just turn off)
- Empty reservoir and discard any standing water
- Remove drip tray and set aside for separate cleaning
- Cooling period: Wait 30+ minutes if machine was recently brewing
- Remove K-Cup holder by lifting handle and pulling straight up
Warning: Never skip the cooling period. Residual heat in internal components can cause burns when disassembling or create steam explosions when adding cleaning solution.
Descaling Solution Mixing and Application

Precision Mixing Ratios by Model
Your Keurig’s size determines the exact solution ratio:
- K-Mini models: 8oz solution + 8oz water (half bottle)
- Standard models (K-Elite, K-Select): Full 16oz bottle + equal water
- K-Supreme series: Full bottle + equal water + additional water to max line
Pour the solution into your empty reservoir first, then add water to prevent inaccurate measurements. Fill to the MAX line—underfilling reduces cleaning effectiveness, while overfilling causes messy overflow during brewing cycles.
Descaling Cycle Execution Sequence
Follow this exact order for complete mineral removal:
- Initial flush: Run largest cup size until reservoir empties (discard hot solution)
- Soak period: Let solution sit in internal tank for 30 minutes minimum (this dissolves stubborn deposits)
- Complete cycle: Resume brewing until reservoir completely empties
Time-saving hack: Place a large ceramic mug (12+ oz) on the drip tray to reduce how often you need to empty containers during the process.
Rinse Cycle Protocol That Actually Works
Why Most Users Fail at Rinsing
The #1 mistake: stopping rinse cycles too early. Residual descaling solution creates chemical-tasting coffee and can damage internal components over time.
Minimum effective rinse protocol:
– Run 12 consecutive brew cycles using the largest cup size
– Discard water after every 2-3 cycles to monitor progress
– Taste-test the final 2-3 cups—stop only when water tastes completely neutral
Pro tip: Run cycles with the K-Cup holder removed. This allows water to flow through the puncture needle at full pressure, clearing any remaining solution from this critical component.
K-Cup Holder Deep Cleaning Technique
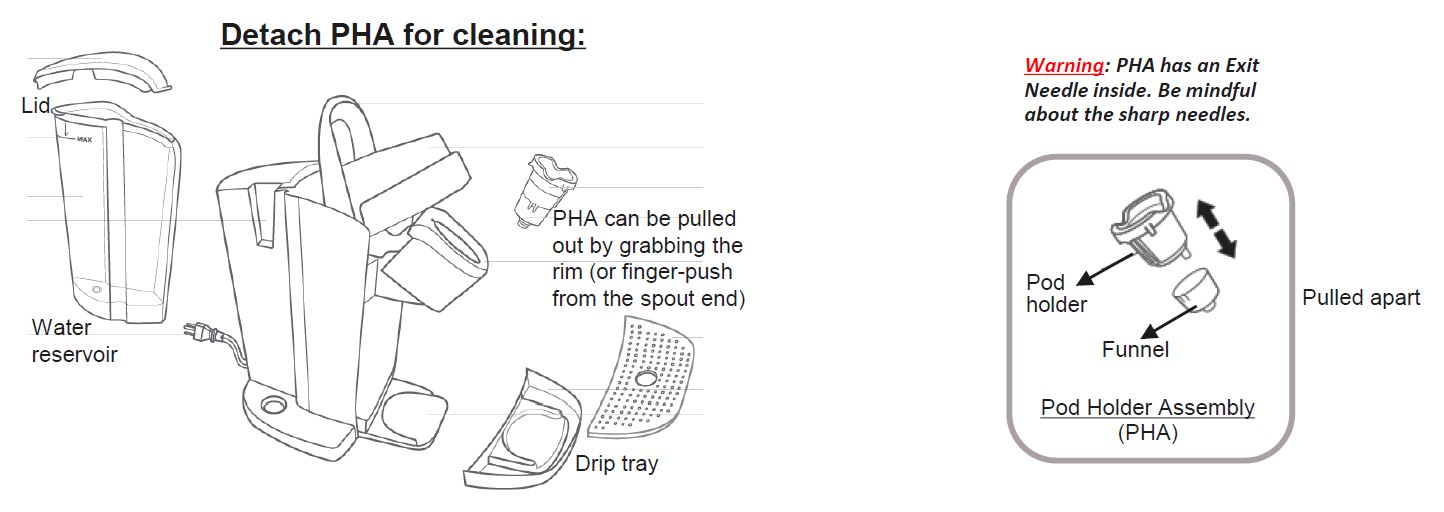
Disassembly Without Damage
Most users break the holder trying to remove it. Do this instead:
- Lift handle to the “open” position
- Grip holder firmly at the base (not the funnel)
- Pull straight up with steady pressure—no twisting
- Separate funnel from holder by pulling straight apart
Visual cue: If you see coffee grounds packed around the needle channel or brown residue in crevices, your holder needs immediate cleaning.
Needle Unclogging That Lasts
Stubborn clogs require this precise method:
- Insert needle cleaning tool straight up into the channel
- Twist gently 2-3 times (never force it)
- Rinse under warm running water while pressing the tool through
- Repeat until water flows freely through both top and bottom
Warning sign: If the needle appears bent or dull, replace it immediately. A damaged needle tears K-Cup foil, causing messy leaks and incomplete brewing.
Water Filter Installation That Eliminates Bad Taste
Filter Activation Mistakes to Avoid
New filters require proper preparation:
- Soak filter in cold water for exactly 5 minutes (timer helps)
- Rinse under tap for 60 seconds—hold under running water while gently squeezing
- Check for carbon dust—continue rinsing until water runs completely clear
Critical step: Run 3-4 brew cycles with the new filter installed before making actual coffee. This flushes loose carbon particles that would otherwise end up in your morning cup.
Post-Cleaning Performance Verification Tests
Speed Test That Confirms Success
Your cleaned Keurig should brew a full cup in under 60 seconds. Time it:
- Select 8oz cup size
- Start timer when brew cycle begins
- Stop when last drop falls into cup
Troubleshooting: If brewing takes longer than 75 seconds, run 5 additional rinse cycles—residual solution is slowing water flow.
Taste Verification That Matters
Don’t trust your machine until you’ve passed this test:
- Brew plain water (no K-Cup)
- Let cool to drinking temperature
- Take a small sip—should taste completely neutral
Red flag: Any chemical, metallic, or vinegar-like aftertaste means you need at least 3 more rinse cycles.
Model-Specific Cleaning Adjustments You Must Know

K-Mini Series Special Requirements
These compact models need modified approaches:
- Use half the standard solution amount due to smaller reservoir
- Hand-wash reservoir only—dishwasher exposure warps the plastic
- Access the needle by removing the entire pod assembly
K-Supreme Series Dual Needle System
This premium model has two critical needles:
- Top needle: Punctures K-Cup lid (clean as standard)
- Bottom needle: Punctures K-Cup bottom (often overlooked)
Pro technique: After cleaning both needles, run a cycle with the K-Cup holder removed to ensure unobstructed flow through the bottom needle channel.
Maintenance Schedule That Prevents Future Problems
Calendar-Based Cleaning Plan
Set these recurring reminders:
- Every 3 months: Full descaling with cleaning kit
- Every 2 months: Water filter replacement
- Weekly: Quick holder cleaning with brush
- Daily: Empty drip tray and air-dry reservoir
Hack: Mark your next cleaning date directly on the kit packaging with a permanent marker—out of sight means out of mind for most users.
Final Success Checklist Before Brewing
Before declaring your cleaning complete, verify these critical points:
- [ ] Completed minimum 12 rinse cycles with neutral-tasting water
- [ ] Brew speed restored to under 60 seconds for 8oz cup
- [ ] No visible coffee grounds in brewed water
- [ ] Smooth K-Cup puncture with no foil tearing
- [ ] Water filter properly installed and activated
Your Keurig should now deliver faster, hotter, and better-tasting coffee. The entire process takes just 45-60 minutes, but the results last for months. Set your next cleaning reminder today—your future self will thank you when your machine keeps delivering perfect coffee without warning lights or strange tastes. Regular cleaning extends your Keurig’s lifespan by 2-3 years, saving you $100+ in potential replacement costs while ensuring every cup meets your morning standards.


