
Sick of watery iced coffee that tastes like disappointment? Your Keurig’s iced coffee button is the game-changer you’ve been ignoring. This specialized setting solves the fundamental problem of home iced coffee—dilution—by brewing coffee hot for maximum flavor extraction, then automatically switching to cool water to prevent ice melt. The result? Bold, café-quality iced coffee without the watery disaster you’ve probably experienced before. Mastering how to use iced coffee button on Keurig transforms your summer mornings from mediocre to magnificent with just one push.
Most coffee drinkers make the critical mistake of brewing hot coffee and pouring it over ice, guaranteeing a watered-down mess. Your Keurig’s dedicated iced coffee function eliminates this problem through intelligent engineering. Understanding how to use iced coffee button on Keurig properly means you’ll consistently enjoy rich, flavorful cold coffee that maintains its integrity from first sip to last drop. Let’s dive into the exact steps to unlock this summer essential feature on your machine.
Locate Your Keurig’s Iced Coffee Button Before Brewing
Don’t waste time searching for a button that might not exist on your model. The iced coffee function appears under different names depending on your Keurig version—look for “Iced,” “Brew-Over-Ice,” or similar labeling. The K-Elite prominently displays this feature, while other compatible models may tuck it among specialty drink options. If you can’t immediately spot it, consult your manual before proceeding.
Pro Tip: Some newer Keurig models integrate the iced coffee function with the strength selector—press and hold the “Strong” button for three seconds to activate the iced setting. If your machine lacks this feature entirely, don’t panic; we’ll cover strong brew alternatives later.
Prepare Your Container and Ice for Optimal Results

Choose the Right Tumbler for Temperature Shock Prevention
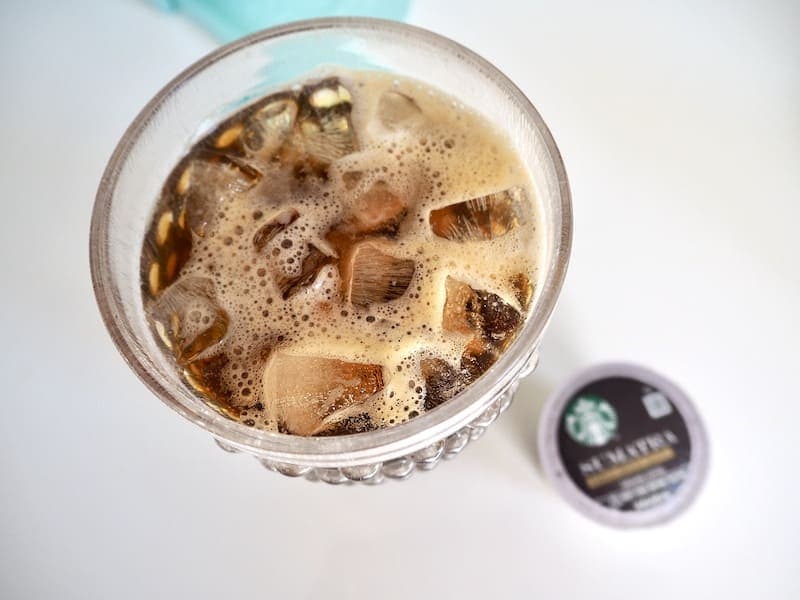
Select plastic or stainless-steel containers only—regular glass shatters from rapid temperature changes. Your Keurig’s iced coffee button delivers hot liquid directly onto ice, creating extreme thermal shifts that standard glass can’t withstand. A properly sized tumbler holds 12-16 ounces comfortably, leaving room for customization without overflow.
Ice Loading Formula for Maximum Flavor
Fill your tumbler ½ to ⅔ full with ice. Too much ice over-dilutes your coffee as it melts; too little won’t chill effectively. Large ice cubes melt slower than crushed ice, maintaining flavor integrity throughout your drinking experience. For best results, use filtered water to make your ice cubes—impurities in tap water can affect taste as they melt.
Select Optimal K-Cup Pods for Iced Coffee Success
Best Pod Types for Bold Iced Coffee
- Dark roasts with 8+ grams of coffee provide the intense flavor needed to cut through ice
- Brew Over Ice varieties (Caramel Vanilla, Pumpkin Spice, Classic Black) are scientifically formulated for cold serving
- Robusta/Arabica blends deliver extra caffeine punch with smooth finish—Robusta adds body while Arabica contributes nuanced flavors
Pods to Avoid for Iced Coffee
Skip light roasts—they’ll taste weak and acidic when chilled. Generic pods containing under 8 grams of coffee won’t deliver sufficient flavor intensity to withstand ice dilution. Save your delicate single-origin coffees for hot brewing and reserve bolder blends for your iced creations.
Perfect Brewing Process: Step-by-Step Execution
Pre-Brew Setup Checklist
- Insert your chosen K-Cup pod (ensure foil is properly punctured)
- Fill reservoir with filtered water to eliminate chlorine taste
- Position your ice-filled tumbler securely under spout
- Select appropriate size (typically 6-8 ounces over ice)
Execute the Iced Coffee Button Sequence
Press your Iced/Brew-Over-Ice button firmly. The machine automatically:
– Starts with hot water for maximum flavor extraction
– Switches to cool water mid-cycle (around 30 seconds)
– Completes brewing while minimizing ice melt
Listen for the transition—you’ll hear a distinct change in the water flow sound when the temperature shifts. This critical moment prevents your ice from melting too quickly while ensuring full flavor development.
Customize Immediately After Brewing for Best Results
Timing is Everything for Flavor Integration
Add sweeteners, syrups, or milk while coffee is still warm for proper dissolution. Cold coffee won’t melt granular sugar effectively—wait too long and your sweeteners will sink to the bottom rather than blending throughout. The window for perfect customization is narrow: act within 30 seconds of brewing completion.
Flavor Layering Technique for Professional Results
Drizzle syrup over ice before brewing. As hot coffee cascades through, it creates natural flavor integration without stirring. This technique works especially well with caramel, vanilla, or chocolate syrups, creating a beautifully layered drink with consistent flavor from top to bottom.
Advanced Iced Coffee Hacks for Coffee Enthusiasts
Coffee Ice Cube Method to Eliminate Dilution
Brew extra coffee into ice cube trays. These specialized cubes chill your drink while adding—not diluting—flavor as they melt. For strongest results, use concentrated coffee (select 6-ounce setting) when making your cubes. Store them in an airtight container for up to two weeks.
Strong Brew Alternative for Older Models
No iced button? Use Strong Brew setting with 6-ounce size for concentrated coffee that withstands ice dilution. This method requires precise ice measurement—fill tumbler only halfway to avoid over-dilution of the stronger brew.
Pre-Chilling Shortcut for Instant Cooling
Brew directly into ¼ cup of chilled milk for instant temperature reduction without waiting. The milk acts as a thermal buffer, preventing rapid ice melt while adding creaminess to your final drink.
Common Mistakes to Avoid with Your Iced Coffee Button
Container Disasters Waiting to Happen
Never use standard glass—temperature shock causes dangerous shattering. Stick with plastic tumblers or insulated stainless steel designed for thermal changes. Your safety isn’t worth the aesthetic of a fancy glass.
Ice Melt Prevention Through Proper Loading
Avoid filling tumbler to brim with ice. Leave room for coffee expansion and flavor additions—overfilling causes immediate overflow when brewing begins. The ideal ice level leaves 1-2 inches of space at the top after brewing completes.
Troubleshooting Guide for Perfect Iced Coffee
Weak Flavor Solutions
If your iced coffee tastes watered down:
– Switch to darker roast pods with higher coffee content
– Reduce ice amount to ½ full instead of ⅔
– Select 6-ounce brew size for more concentrated coffee
Over-Dilution Fixes
When your coffee becomes too weak too quickly:
– Try coffee ice cubes instead of regular ice
– Reduce ice amount by 25% (you likely have too much)
– Brew stronger varieties like espresso roast K-Cups
Button Not Working? Verify Compatibility First
Confirm your model includes iced function—many older Keurigs lack this feature entirely. If your button does nothing, check for error messages or perform a quick reset by unplugging for 30 seconds. If problems persist, consult your manual for model-specific troubleshooting.
Maintenance for Consistent Iced Coffee Results
Weekly Cleaning Routine
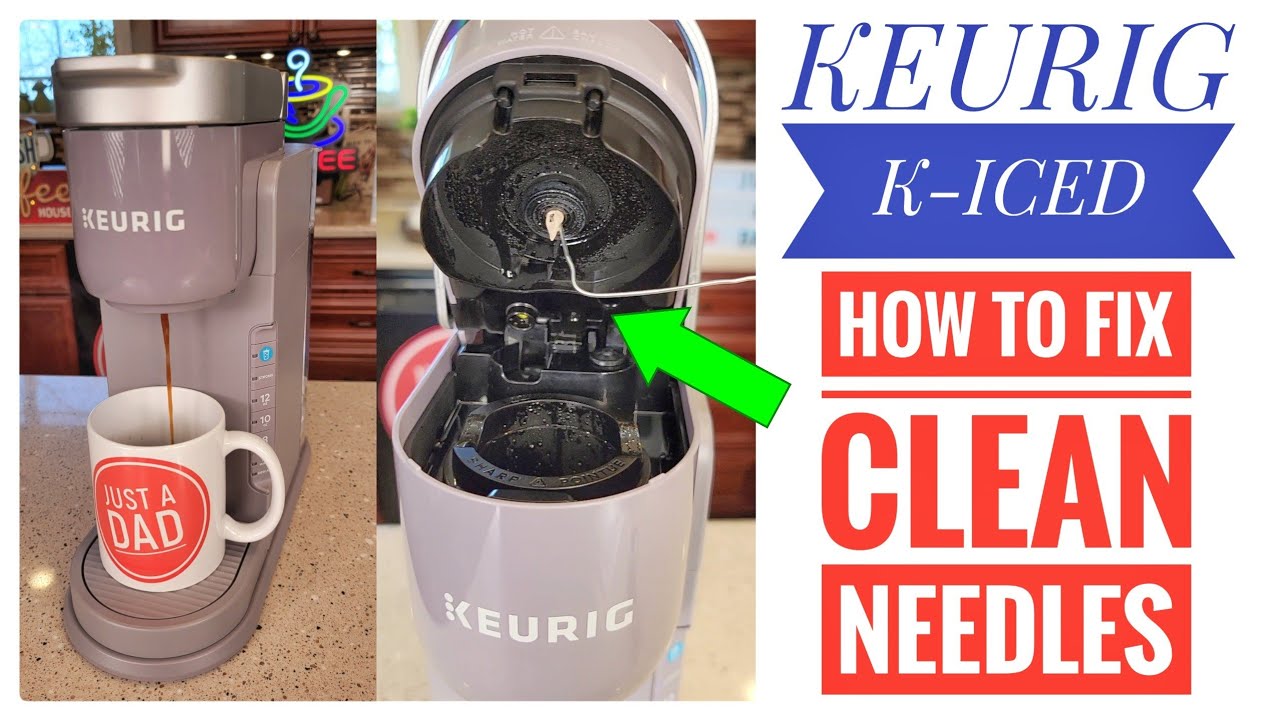
Run a water-only brew cycle after making iced coffee to prevent sugar and flavor buildup in needles. This simple step maintains flavor purity and prevents clogs from sweetened beverages. For thorough cleaning, use Keurig’s descaling solution monthly.
Storage Tips for Flavor Preservation
Store pods in a cool, dry place away from direct sunlight. Heat and humidity degrade coffee oils rapidly, resulting in weaker iced coffee flavor. Keep your favorite iced coffee pods in an airtight container to preserve freshness between uses.
Mastering how to use iced coffee button on Keurig transforms hot summer mornings into café-quality experiences at home. The key lies in proper container selection, optimal ice ratios, and immediate customization after brewing. Once you nail the timing and pod selection, you’ll skip the coffee shop lines entirely—your perfect iced coffee awaits at the push of a single button. Remember the golden rule: never compromise on ice quality or container safety, and always customize while your coffee is still warm for seamless flavor integration. With these techniques in your repertoire, you’ll enjoy bold, refreshing iced coffee all summer long without the common pitfalls of watery disappointment. Your Keurig’s iced coffee button isn’t just a feature—it’s your ticket to barista-quality cold brew in under two minutes.


