
Your office coffee crisis starts with silence—the commercial Keurig stands cold and dark while employees line up for their morning caffeine fix. Unlike home models with simple power buttons, commercial Keurig machines require a precise two-stage activation process that often stumps first-time users. This guide delivers the exact steps to power up any commercial model, plus troubleshooting fixes for stubborn machines. You’ll learn why your K-4000 won’t boot after installation, how to bypass common safety lockouts on K150 units, and why waiting 4 minutes for full temperature is non-negotiable for proper operation.
Verify Critical Setup Before Powering On Commercial Keurig
Skip these checks and your machine will refuse to activate—commercial Keurigs have strict safety interlocks that home models lack. These units weigh 25-40 pounds when full, so place yours on a solid surface that won’t vibrate during high-volume brewing. An unstable desk causes sensor errors that block startup. Next, match the electrical specs: North American commercial units demand 120V on a dedicated 15-20 amp circuit (shared outlets trip breakers when 10 people brew simultaneously). International models require 220-240V—using the wrong voltage fries control boards.
Water and drip tray positioning trigger the most common startup failures. Fill the reservoir to the minimum line—commercial sensors ignore “almost full” levels. Then seat it with a firm downward twist until you hear a click; a loose tank registers as “missing.” Similarly, the drip tray must sit flush against the machine’s interior walls. Run your finger along the edges—if you feel gaps, sensors think it’s overflowing and prevent power-on. Finally, remove all shipping tape from internal components; leftover adhesive jams water valves.
Locate Hidden Power Switches on Commercial Keurig Models

Commercial Keurig machines conceal power points for safety compliance, unlike home units with obvious front buttons. Start at the rear panel: crouch down and look for a rubberized inlet port near the base (covered by a snap-on flap). This is where you firmly insert the power cord until it clicks—partial connections cause intermittent power. For hardwired plumbed models, check behind an access panel requiring a screwdriver; never touch exposed terminals without disconnecting main power.
The real headache is the two-stage switch system. Your machine has two separate power points:
– Primary switch: Usually a flip toggle marked “I/O” on the rear or side panel (often labeled “MAIN POWER”)
– Secondary button: A touch-sensitive icon on the front display or physical button beneath the brew head
Most failures happen because users only press the front button. Commercial units require flipping the rear switch first—within 30 seconds—then activating the front control. If you see a keyhole near the lower front panel (common on K150 series), insert the provided key to unlock the master power switch before proceeding.
Activate Your Specific Commercial Keurig Model (K150, K3000, K4000)
K150/K150P Direct Water Line Startup Sequence
- Insert the provided key into the lower front panel lock and turn counterclockwise
- Flip the exposed master switch to “ON” (you’ll hear pumps priming)
- Tap the screen’s power icon within 20 seconds
- Wait for “PRIMING” message to disappear (60-90 seconds for water line models)
K3000/K3500 High-Capacity Models
- Locate the rear panel switch (often hidden behind a plastic cover)
- Move switch to “I” position—green indicator light should glow
- Press the front “Brew” button twice rapidly to wake the display
- Allow 3 minutes 45 seconds for temperature stabilization (watch the heating light)
K-4000 Advanced System Activation
- Engage the rear soft-start switch to “ON” (reduces electrical surge)
- Hold the “Menu” and “Brew” buttons for 5 seconds to bypass eco-mode
- Navigate to “System Setup” > “Power On” using arrow keys
- Confirm battery backup status shows “ACTIVE” before proceeding
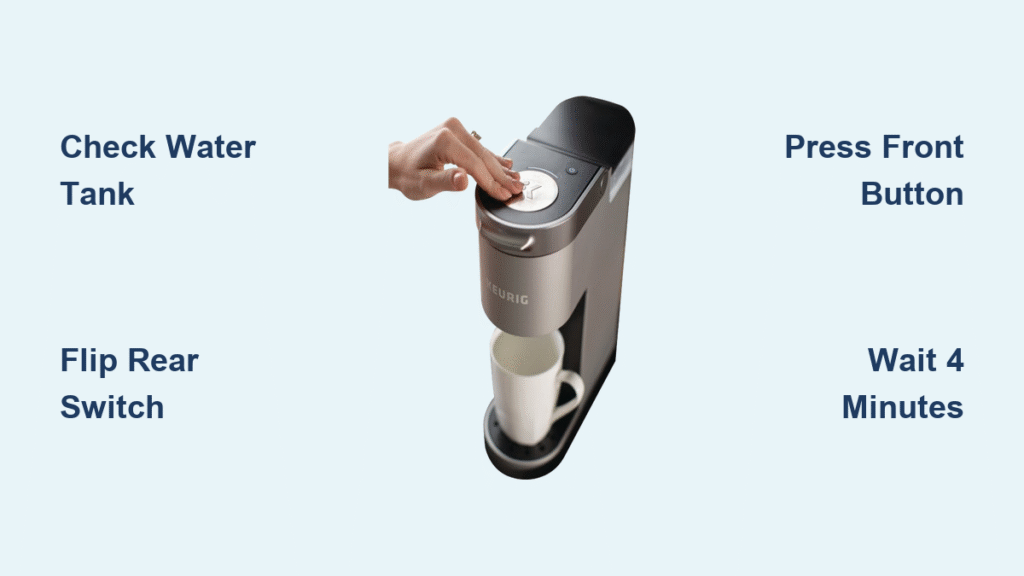
Complete Commercial Keurig Startup Sequence in 4 Critical Steps

Step 1: Secure Power Connection
Plug the cord fully into the machine’s recessed port—commercial units vibrate during operation, so loose connections cause shutdowns. For hardwired models, verify a licensed electrician installed it per NEC Article 422; improper grounding voids warranties.
Step 2: Engage Main Power Switch
Flip the rear/side switch to “ON.” You’ll hear a two-phase pump sequence: first a soft whir (water priming), then a louder hum (heating element activating). If pumps stay silent, check circuit breakers—commercial units often share circuits with microwaves.
Step 3: Activate Front Control Panel
Within 30 seconds, press the front power button. If the display flashes but dies, the main switch wasn’t fully engaged. Hold the button for 3 seconds; commercial touchscreens require longer presses than home models.
Step 4: Monitor Temperature Readiness
Large commercial reservoirs take 3-4 minutes to heat. Watch for:
– Flashing blue light = heating in progress
– Solid green light = ready to brew (K3000 series)
– “READY” text on display with no error codes (K-4000)
Never skip this wait time—premature brewing triggers “PRIME” errors requiring full system restart.
Fix Common Commercial Keurig Power-On Failures

No Response When Plugged In? Try This
First, rule out outlet issues: plug in a lamp to confirm power. Commercial breakers often trip at 80% load—check your panel for switches halfway between ON/OFF. If the outlet works, inspect the cord for kinks near the machine base; commercial units get tugged during cleaning, damaging internal wires. Most critically, verify all safety sensors:
– Press down firmly on the water tank until it clicks
– Slide the drip tray in and out three times to reset sensors
– Wipe the reservoir contacts with a dry cloth (mineral buildup blocks signals)
Display Lights But Won’t Brew?
This means the machine powered on but hit a startup roadblock. For K3500 models showing “ADD WATER” with a full tank, remove and reseat the reservoir—its float sensor sticks if installed crooked. If “PRIME” flashes, run a cleansing brew without a K-Cup to purge air from water lines. K-4000 units stuck on “HEATING” need 4 minutes minimum; rushing this triggers thermal lockouts lasting 15 minutes. Pro tip: Hold the 8oz and 10oz buttons simultaneously for 10 seconds to force-reset most displays.
Emergency Shutdown Steps for Malfunctioning Commercial Keurigs
If you smell burning plastic, see water near electrical ports, or hear grinding noises:
1. Immediately flip the rear main power switch to “OFF” (this cuts all power)
2. Unplug only if safe—never yank the cord if water is present
3. Do NOT open panels—commercial units retain high voltage for 10 minutes after shutdown
4. Contact Keurig commercial support with your model number (found under the drip tray)
Never attempt DIY repairs on electrical components. Commercial machines use 1200W heating elements—10x stronger than home models—that can cause severe burns or electrocution if mishandled.
Program Energy-Saving Modes on Commercial Keurig Machines
Maximize uptime while cutting power costs with these settings:
– Auto-Start Scheduling: In admin menu (code: 1590), set 5 daily startup times matching office hours. The K-4000 auto-adjusts for daylight saving time.
– Eco Mode: Activates after 15 minutes idle—reduces standby power by 25% while keeping water at 140°F for quick recovery.
– Peak Hour Boost: During 8-10 AM rush, the machine skips eco-mode to maintain 192°F brewing temp. Disable this for break rooms with sporadic use.
Warning: Never rely solely on front-panel shutdown. Always flip the rear main switch off nightly—commercial units draw standby power that degrades components over time.
Essential Post-Startup Maintenance for Commercial Keurigs
Your first brew sets up long-term performance:
1. Run a full cleansing brew cycle without a K-Cup to flush manufacturing residues
2. Test all cup sizes (6oz to 12oz) to confirm pressure consistency
3. Record startup date in your maintenance log for descaling reminders
Daily critical actions:
– Power down via rear main switch (not front button) after last use
– Wipe reservoir contacts dry to prevent mineral corrosion
– Check drip tray sensor for coffee grounds (causes false “overflow” errors)
Weekly: Run vinegar solution through water lines if using non-plumbed models. Plumbed units need professional descaling every 3 months—mineral buildup trips temperature sensors during startup.
Mastering how to turn on commercial Keurig machines prevents 90% of “broken brewer” panic calls. Remember the two-stage power ritual, respect the 4-minute heat-up, and always double-check water sensors. When you follow these precise steps, your commercial unit will deliver 10,000+ reliable brews. For persistent issues, contact Keurig commercial support with your model number—they’ll often remote-diagnose startup failures before sending a technician. Keep this guide taped inside your break room cabinet for instant troubleshooting when the office caffeine emergency hits.


