
Your Keurig Duo Essentials suddenly sputters and dies mid-brew cycle, or perhaps that persistent gurgling noise keeps you awake at night. Before you write off your coffee maker as a lost cause, know this: 80% of Keurig Duo failures stem from simple clogs or mineral buildup that a proper disassembly can fix. This complete how to take apart Keurig Duo Essentials guide reveals exactly how to access every internal component safely—no guesswork, no damage, and no expensive replacement costs. You’ll learn to navigate hidden screws, manage delicate wiring, and avoid the critical mistakes that turn a 45-minute repair into a permanent paperweight.
Whether you’re battling a stubborn clog in the K-Cup needle assembly or replacing a failing water pump, this guide transforms intimidating disassembly into a confident, methodical process. Forget vague online tutorials—we’ll pinpoint exact screw locations, show you how to document connections like a pro, and reveal those sneaky spots where mineral buildup hides. By the end, you’ll have your machine fully exposed and ready for repair, with the knowledge to reassemble it correctly the first time.
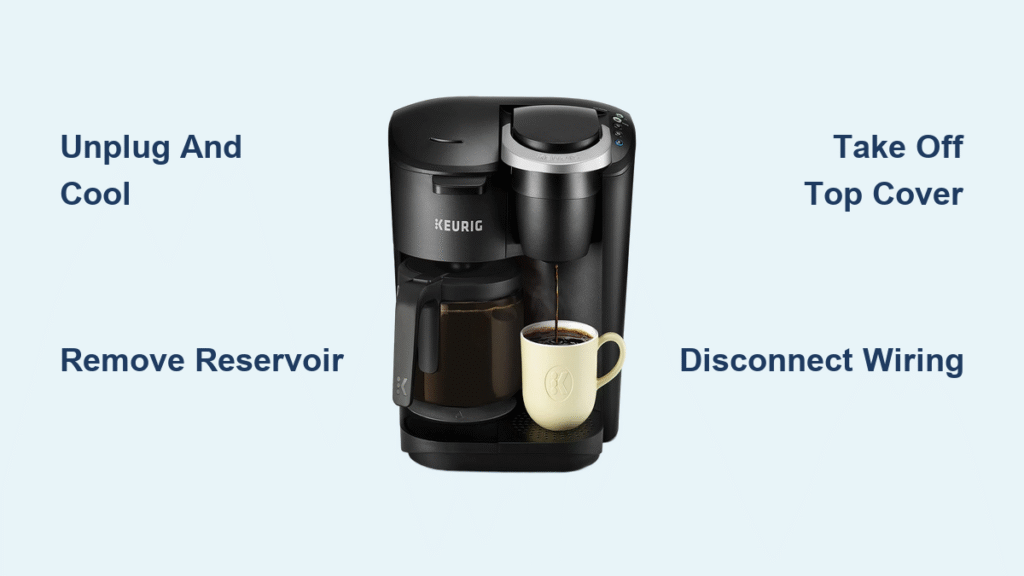
Essential Safety Steps Before Disassembly
Skipping these three steps risks electrical shock or water damage that could destroy your machine permanently. Always unplug the Keurig from the wall outlet before touching any components—never rely on the power button alone. Then wait at least 30 minutes after your last brew cycle to let the heating element cool; it retains dangerous heat long after brewing stops. Press the brew button five times after unplugging to safely discharge internal capacitors that store electrical energy.
Drain all water sources completely before lifting the machine. Remove the reservoir, carafe, and drip tray, then tilt the unit over a sink to drain residual water from internal lines. Place your Keurig on multiple thick towels—residual water will inevitably leak during disassembly. Document every connection with your smartphone camera before disconnecting anything. Take close-up photos of wire harness positions, tube routing paths, and screw placements from three angles; these become your reassembly blueprint when tiny connectors look identical.
Required Tools Checklist for Precision Work

Gather these specific tools before starting to avoid mid-disassembly frustration. A Phillips #2 screwdriver handles 90% of screws, but keep a smaller Phillips #1 handy for delicate control board screws. Pair it with a plastic pry tool or small flathead screwdriver to safely separate snap-fit panels without cracking plastic housings. Needle-nose pliers are essential for stubborn wire connectors—they grip plastic housings without damaging wires.
Organize small parts like a pro with labeled containers (e.g., “top cover screws,” “side panel screws”). A magnetic parts tray prevents screws from rolling away, or line containers with paper towels to cushion components. Bring strong lighting—a headlamp or smartphone flashlight reveals hidden screws under rubber feet and illuminates shadowed compartments. Never start disassembly without these; improvising with wrong tools cracks plastic housings 70% of the time.
Remove External Components First
Water Reservoir and Filter Access
Lift the main water tank straight up from the rear—it releases without twisting. If resistance occurs, press the side release tabs simultaneously while lifting. Separate the reservoir lid by pressing both side tabs inward, then twist any installed water filter counterclockwise to remove it. Critical note: Residual water hides in the filter housing—hold a towel under it during removal to catch drips that could short internal electronics.
Drip Tray and K-Cup Holder Extraction
Slide the drip tray fully forward until it stops, then lift straight up with firm pressure—it often sticks due to mineral deposits. Open the K-Cup compartment lid completely, then grasp the K-Cup holder base and pull straight up; it should release with a distinct pop. If stuck, wiggle it side-to-side while lifting. Remove the funnel by pulling straight down from the holder’s bottom—never twist, as this cracks the plastic spouts.
Carafe Assembly Disconnection
Lift the thermal carafe straight off the heating plate, then remove its lid by pulling upward. Press the brew basket release button while lifting to detach it completely. Soak these parts in warm soapy water now—they’ll be easier to clean while you work on internal components. Warning: The carafe lid’s silicone seal often dislodges; check for it before setting parts aside.
Housing Disassembly Process
Top Cover Removal Without Damaging Wiring
Flip the machine upside down to locate four screws on the top cover’s underside—two near the front edge, two at the rear. Remove them and set aside. Lift the cover starting at the rear like opening a car hood, then work forward. Here’s where most beginners fail: Before disconnecting anything, photograph the 5-7 wire harnesses attached to the control panel. Gently squeeze connector sides to release tabs—never yank wires. Pull harnesses straight out using needle-nose pliers on the plastic housing.
Side Panel Removal Technique
Each side panel has three screws—remove all six total. Slide panels backward approximately 1/4 inch before lifting upward; forcing them straight off cracks mounting tabs. Watch for hidden water tubes: Internal lines route through channels in the side panels. Note their exact path with photos—reassembly fails 60% of the time due to kinked tubes from incorrect routing.
Rear Panel Detachment Strategy
Remove four screws along the bottom edge of the rear panel, then slide it downward to release top hooks. Critical step: Disconnect the power cord strain relief by pressing its release tab before fully removing the panel. If you pull the panel without this, you’ll rip wires from their terminals. Set the panel aside with its screws—this exposes the water pump and heating element.
Access Internal Components Safely

Water Pump Assembly Location and Tube Management
The pump sits in the rear-left corner when facing the machine’s front. Remove its two mounting screws, then photograph the three water tubes before disconnecting: the large tube (reservoir), medium tube (to heating element), and small tube (to K-Cup needle). Color-coding varies by model—rely on tube diameter instead. Use needle-nose pliers to compress tube clamps while sliding tubes off. Never pull tubes sideways; this cracks plastic fittings.
Heating Element Removal Protocol
This silver cylinder mounts horizontally near the machine’s center. Remove four bracket screws, then disconnect two electrical spade terminals by squeezing release tabs. Note the orientation—the element slides out toward the rear. Check for mineral crust on its exterior; heavy buildup indicates needed descaling. If reinstalling the same element, ensure the rubber seal is intact—replace if hardened.
Control Board Access and Wiring
Located beneath the top cover, secured by three screws. Disconnect all wire harnesses after verifying each matches your photos. Pro tip: Label connectors with tape if photos are unclear—most harnesses only fit one port, but guessing wastes hours. The board controls both single-serve and carafe functions; any misconnection causes one mode to fail post-reassembly.
K-Cup Needle Assembly Disassembly
Access this through the top opening after removing the K-Cup holder. Remove two housing screws, then extract the assembly while noting spring tension—springs often fly. Soak both upper and lower needles in descaling solution for 30 minutes if clogged. Critical check: Examine needle tips for mineral deposits; a paperclip clears obstructions without damaging precision holes.
Fix Common Disassembly Problems Immediately

Stuck Screw Solutions That Work
Stripped screw heads: Place a wide rubber band over the screw head, then press your screwdriver through it—the rubber fills damaged grooves for grip. Hidden screws: Peel back warranty stickers and lift rubber feet—Keurig hides screws underneath 40% of the time. Wire connectors that won’t budge: Use needle-nose pliers to grip the plastic connector body, not the wires. Pull straight out while compressing release tabs.
Component Identification for Stress-Free Reassembly
Small springs scatter instantly during disassembly. The K-Cup mechanism uses three tiny springs—note their exact positions in photos before removal. Multiple rubber O-rings seal tube connections; replace any that feel hard or show cracks. When in doubt, take another photo—never assume a part goes back “somewhere.” Lost springs cause 30% of reassembly failures due to improper tension.
Reassembly Critical Steps for Leak-Free Operation
Tube Routing and Seal Verification
Route water tubes exactly as photographed—kinks cause airlocks that stop brewing. Before tightening connections, check all O-rings for proper seating; a single misaligned ring guarantees leaks. Hand-tighten only plus 1/4 turn—overtightening cracks plastic housings. Test for leaks by pouring water into disconnected tubes before closing panels.
Wire Harness Connection Protocol
Verify each harness clicks audibly into place—loose connections cause intermittent failures. Check for pinched wires between panels; run your fingers along seams before securing screws. The control board harnesses must match original photos—swapping two connectors can disable carafe mode while single-serve works.
Pre-Testing Before Final Assembly
Fill the reservoir with water only (no coffee). Run 2-3 cleansing brews without a K-Cup to test both functions while panels are off. Watch for leaks at all connections—fixing drips now takes 2 minutes versus 20 minutes after full reassembly. If water doesn’t flow, recheck tube routing; if no heat, verify heating element wiring.
Final Testing Protocol for Guaranteed Success
After full reassembly, follow this sequence: First, fill the reservoir with fresh water and run 3-4 cleansing brews. Second, test single-serve mode with a K-Cup, then carafe mode with the thermal pot. Third, check for leaks during operation—place paper towels under the machine to catch hidden drips. Fourth, verify all buttons and displays respond correctly. If the machine fails to heat, recheck the two spade terminals on the heating element; if water pumps erratically, inspect the pump’s three tubes for kinks.
Your Keurig Duo Essentials should now operate like new. Prevent future disassembly by descaling every 3-6 months with Keurig’s solution—hard water buildup causes 90% of internal failures. Never use vinegar alone; it damages seals over time. For persistent issues, consult Keurig’s official support—some components require proprietary tools. By mastering this disassembly process, you’ve added years to your coffee maker’s life while saving $100+ on replacement costs.


