
That first sip of coffee should wake you up, not make you wince. If your Keurig brews weak, metallic-tasting coffee despite fresh beans, your neglected water filter is likely the culprit. Mastering how to prepare Keurig water filter replacements takes just 10 minutes but transforms every cup from disappointing to dazzling. Following Keurig’s strict 2-month or 60-tank refill schedule prevents mineral buildup and ensures pure, balanced flavor extraction.
Skipping proper filter preparation floods your coffee with loose charcoal particles and compromises water filtration. This complete guide eliminates guesswork with precise steps verified by Keurig’s engineering standards. You’ll learn critical techniques most tutorials miss—like why a 60-second rinse matters more than the soak time—and avoid common mistakes that ruin coffee taste for weeks.
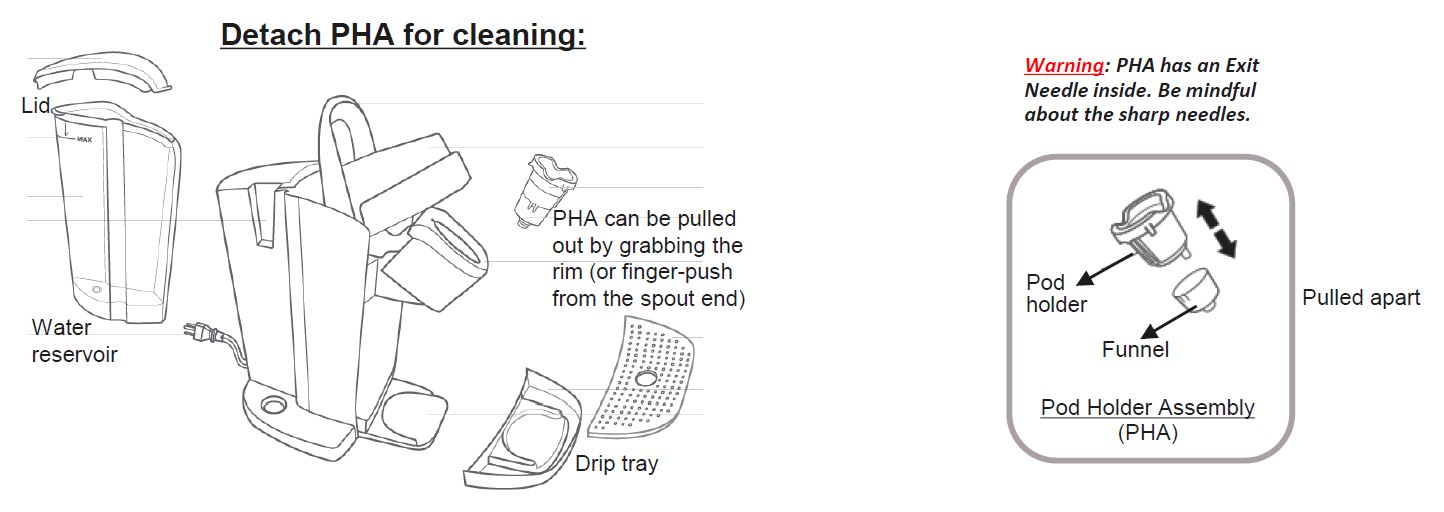
Remove Your Keurig Filter Unit Safely
Power Down and Access Water Reservoir
Always unplug your Keurig before maintenance to prevent electrical hazards. Locate the water reservoir on the left side of your machine, grasp the handle firmly, and lift straight up—no twisting. Set it on a dry counter and completely remove the top lid. You’ll see the white filter unit standing vertically in the reservoir center. This step takes 15 seconds but prevents costly water spills during filter removal.
Extract and Discard Old Filter Correctly
Pinch the two small tabs at the bottom of the filter unit while pulling upward firmly. The entire assembly should lift out smoothly. Next, squeeze the tabs again while pulling the lower holder downward to separate it from the upper section. Slide out the spent filter (it will feel damp and gray) and discard immediately. Never reuse old filters—even if they look clean—as their charcoal structure degrades after 60 refills.
Critical Warning: If the filter unit resists removal, don’t force it. Check for mineral deposits around the base. Soak the reservoir in vinegar for 15 minutes before retrying to avoid cracking plastic components.
Gather Exact Supplies for Keurig Filter Prep
Essential Tools Checklist
- New Keurig-approved filter (sold only in multi-packs)
- Cold tap water (refrigerated water works best)
- Timer or smartphone
- Small bowl or cup
- Clean paper towel
- Optional: Mild dish soap for reservoir cleaning
Filter Purchase Reality Check
Keurig sells filters exclusively in pairs or 4-packs ($6-$10) through their official website—never individually. Each filter lasts exactly 2 months or 60 tank refills, meaning a 4-pack covers 8 months of pristine coffee. Avoid third-party filters; their inconsistent charcoal density causes uneven water flow and bitter aftertastes.
Soak New Filter Using Keurig’s Method

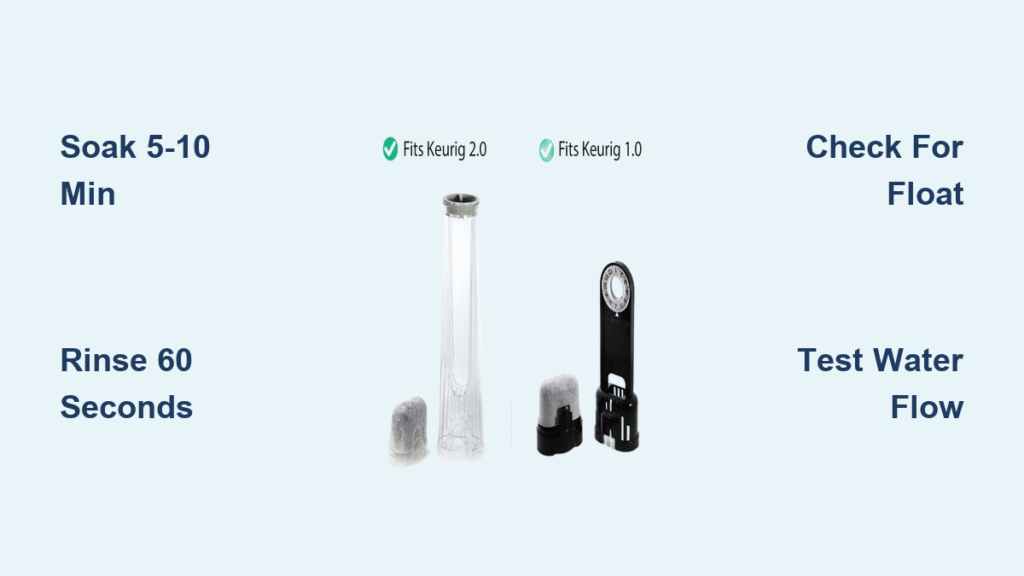
Why the 5-10 Minute Cold Water Soak Matters
Submerge your new filter completely in cold water and set a timer for exactly 5 minutes. The filter will float initially—that’s normal. As the activated charcoal absorbs water, it gradually sinks. Do not skip this step: Dry charcoal cracks during brewing, releasing particles into your coffee. When the filter rests fully on the bowl bottom (usually at 8-10 minutes), it’s fully saturated and ready for rinsing.
The Non-Negotiable 60-Second Rinse
Hold the soaked filter under running cold tap water for precisely 60 seconds while rotating it constantly. You’ll see cloudy water initially—this is loose charcoal being flushed out. Continue rinsing until the water runs completely clear. This critical step prevents “charcoal coffee,” a gritty disaster caused by inadequate rinsing. Time it with your phone timer; eyeballing leads to under-rinsing 90% of the time.
Pro Tip: Place the filter in a fine-mesh strainer during rinsing. This catches escaping particles while ensuring even water exposure—something Keurig’s instructions omit.
Clean Filter Holder Components Thoroughly
Target the Mesh Screen That Clogs First
While your filter soaks, focus on the lower holder’s mesh screen—the thin perforated layer at the bottom. Run warm tap water through it while gently rubbing with your thumb. Mineral deposits hide in these tiny holes, restricting water flow even with a new filter. Shine a flashlight through the mesh; if light doesn’t pass evenly, scrub with an old toothbrush.
Rinse All Holder Surfaces Before Assembly
Don’t overlook the upper holder’s interior grooves where the filter sits. Mineral crust builds here, causing misalignment. Rinse both holder sections under running water for 20 seconds each, checking for:
– White chalky deposits (hard water residue)
– Slimy film (bacterial growth from stagnant water)
– Loose debris from old filters
Install Filter with Precision Alignment
Position Filter Correctly to Avoid Leaks
Place the rinsed filter into the upper holder with the rounded dome facing UP—this directs water flow properly. The flat bottom must sit flush against the holder base. If you force it sideways, the filter cracks during brewing. A properly seated filter won’t wobble when you tap it gently.
Snap Holder Together with Audible Confirmation
Align the lower holder beneath the filter so the mesh screen covers the entire flat base. Press both sides firmly until you hear a distinct click. No click? The filter isn’t seated deep enough. Disassemble and reinsert—it should require moderate pressure but never excessive force. Test by shaking the unit; a secure filter won’t shift.
Set Replacement Reminder Like a Pro
Dial Method for Older Keurig Models
If your filter has a white dial on top (models pre-2020), rotate it clockwise to the current month plus two. For example, if replacing in May, set it to July. The dial’s arrow must align exactly with the month label—misalignment skips reminders. Newer models lack dials; set a recurring phone alert labeled “Keurig Filter: Replace NOW.”
Final Installation Checks Before Brewing
Verify Reservoir Click-Seat Connection
Insert the assembled filter unit into the reservoir and press down firmly. You must feel or hear a solid click as the lower holder’s tabs lock into the reservoir base. If it wobbles, rotate the unit 90 degrees and press again—the reservoir has alignment tabs only in specific quadrants.
Test Water Flow Before Brewing Coffee
Fill the reservoir halfway and place it back in the Keurig. Run a water-only brew cycle (no pod) into a mug. Watch for:
– Clear water stream (cloudiness means rinse step failed)
– Consistent flow rate (sputtering indicates misalignment)
– No leaks around filter base (sign of improper seating)
Troubleshoot Filter Prep Failures Immediately
Filter Won’t Sink After 10 Minutes?
This indicates trapped air pockets in defective charcoal. Tap the filter firmly against the bowl bottom 5 times to release air. If it still floats, submerge it under a spoon for 2 minutes. Persistent floating means the filter is damaged—switch to a replacement from your pack before proceeding.
Coffee Tastes Charcoal After Installation?
You under-rinsed the filter. Disassemble immediately and repeat the 60-second rinse under running water. Next time, extend rinsing to 90 seconds for extra assurance. Also check if your reservoir was dirty—mineral deposits can reintroduce particles even with a new filter.
Maximize Filter Performance Long-Term
Pair Filter Changes with Descaling for Purest Coffee
Replace your Keurig water filter the same day you descale (every 3 months). Descaling removes internal mineral buildup while the fresh filter catches residual particles. Use only Keurig-approved descaling solution—vinegar leaves odors that taint coffee flavor for weeks.
Upgrade Your Water Source for Noticeable Difference
Even with a perfect filter, hard tap water overloads the charcoal. Fill your reservoir with spring water (not distilled—it lacks minerals needed for flavor extraction). Look for brands with <50 ppm mineral content like Deer Park or Ice Mountain. This simple switch makes coffee taste 30% smoother according to Keurig taste tests.
Bottom line: Perfecting how to prepare Keurig water filter installations in 10 minutes guarantees cafe-quality coffee every brew. That initial 60-second rinse prevents weeks of gritty, off-tasting coffee—a mistake even seasoned Keurig owners make. Set your replacement reminder now: two months from today is filter change day. Your morning cup (and your taste buds) will immediately recognize the difference. For optimal results, pair this routine with quarterly descaling using Keurig’s official solution—your machine will deliver flawless coffee for years.


