
Your Keurig Iced coffee maker suddenly pumping out warm, watery coffee instead of that crisp, refreshing chill? That frustrating gurgling sound during brewing? You’re not imagining things—mineral scale buildup is sabotaging your iced coffee experience. Hard water minerals like calcium and magnesium silently accumulate in your machine’s dual heating and cooling systems, choking water flow and crippling cooling performance. When scale clogs the delicate pathways that transform hot brew into icy perfection, you get weak coffee that never reaches proper chilling temperatures. This guide delivers the exact how to descale Keurig iced process to restore that satisfying clink of ice meeting perfectly chilled coffee—no guesswork required.
Ignoring scale buildup risks permanent damage to your machine’s cooling components. Within weeks, you’ll notice slower brew times, inconsistent temperatures, and that telltale “Add Water” error flashing prematurely. But here’s the good news: a proper descaling takes just 45 minutes and costs pennies using household vinegar. By the end of this guide, you’ll eliminate stubborn deposits from both hot and cold water pathways, ensuring every cup delivers that intense, ice-cold punch you expect. Let’s revive your machine’s chilling power.
Why Your Keurig Iced Coffee Tastes Weak or Makes Gurgling Noises
Scale doesn’t just affect hot brewing—it specifically targets your Keurig Iced’s unique dual-system design. While standard Keurigs only heat water, iced models process extra-large volumes through both hot extraction channels AND cold water lines for instant chilling. This double-duty creates perfect conditions for mineral deposits to accumulate in cooling coils and ice dispensing mechanisms. You’ll recognize scale buildup when your coffee emerges tepid instead of icy, extraction slows to a crawl, or you hear grinding noises as scale jams internal pumps. Left unchecked, scale insulates heating elements, forcing your machine to work harder while delivering weaker coffee—ultimately shortening its lifespan by years.
Vinegar vs. Commercial Descaler: What You Need for Keurig Iced

Skip generic “descaling kits”—your Keurig Iced requires specific solutions to safely clean its cooling components. For most users, equal parts white vinegar and water provides the most cost-effective solution ($0.10 per descale). Heavy buildup demands Keurig-approved descaling solution (like Dezcal), which works 30% faster but costs $8-$12 per packet. Never substitute lemon juice or citric acid—they corrode iced models’ aluminum cooling parts. You’ll also need:
– One 16-oz ceramic mug (plastic melts during hot cycles)
– Lint-free microfiber cloth (paper towels shed fibers into ice chute)
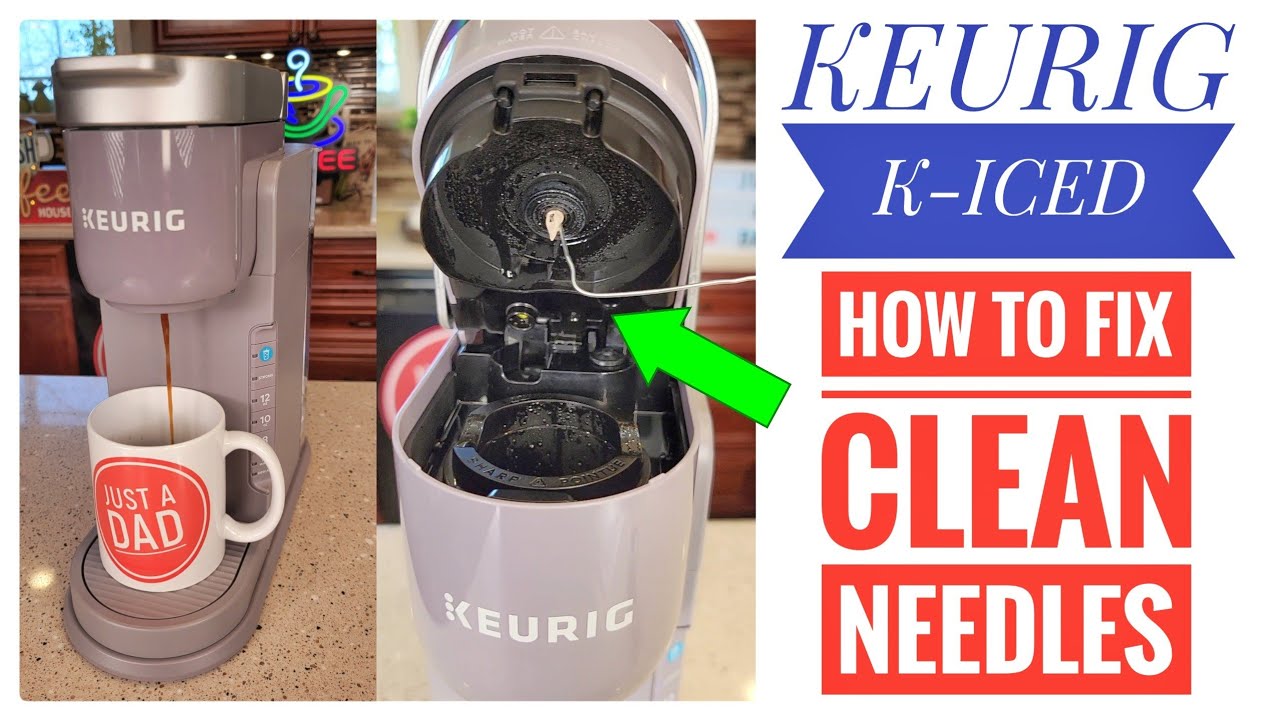
– Straightened paperclip for clearing clogged needles
– Filtered water for rinsing (reduces re-scaling by 60%)
Pro Tip: Vinegar requires extra rinse cycles but poses zero risk to cooling components. Commercial descalers demand precise ratios—never exceed 4 oz solution per 12 oz water or you’ll void your warranty.
Unplug and Empty: Critical First Steps Before Descaling
Power failure is the #1 cause of permanent Keurig Iced damage during descaling. Start by unplugging your machine and waiting 20 minutes for internal components to cool. Never skip this—residual heat combined with cold descaling solution cracks plastic housings. Next, remove all three components: water reservoir, drip tray, and K-cup holder. Wash them in warm, soapy water (no abrasives!), then air-dry completely. Wipe the exit needle area with a vinegar-dampened cloth to loosen surface deposits. If you skip this prep, scale dislodged during descaling will redeposit in reservoir crevices—guaranteeing you’ll repeat the process in 2 weeks.
Mixing the Perfect Descaling Solution for Keurig Iced
Hard water users: this step makes or breaks your results. For vinegar method, combine 10 oz white vinegar + 10 oz room-temperature water in your reservoir. Warmer solutions work faster but never exceed 90°F—heat activates vinegar’s scaling effect. Commercial users: 4 oz Dezcal + 12 oz water is the absolute maximum; exceeding this concentration eats through cooling coils. Stir gently—vigorous mixing creates foam that tricks your machine into thinking the reservoir is full. Critical warning: Never mix vinegar with commercial descalers. The chemical reaction produces chlorine gas that permanently damages temperature sensors.
Running the Descaling Cycle: Step-by-Step for Keurig Iced
Brew 1: First Descaling Cycle for Cooling Lines
Fill reservoir to MAX line with solution. Place your 16-oz mug on the drip tray. Power on, lift/lower the handle without a K-cup, select the largest cup size (12 oz), and brew. Repeat until “Add Water” flashes—this ensures solution penetrates both hot and cold pathways. Discard solution immediately after each brew; letting it sit in the mug re-deposits minerals.
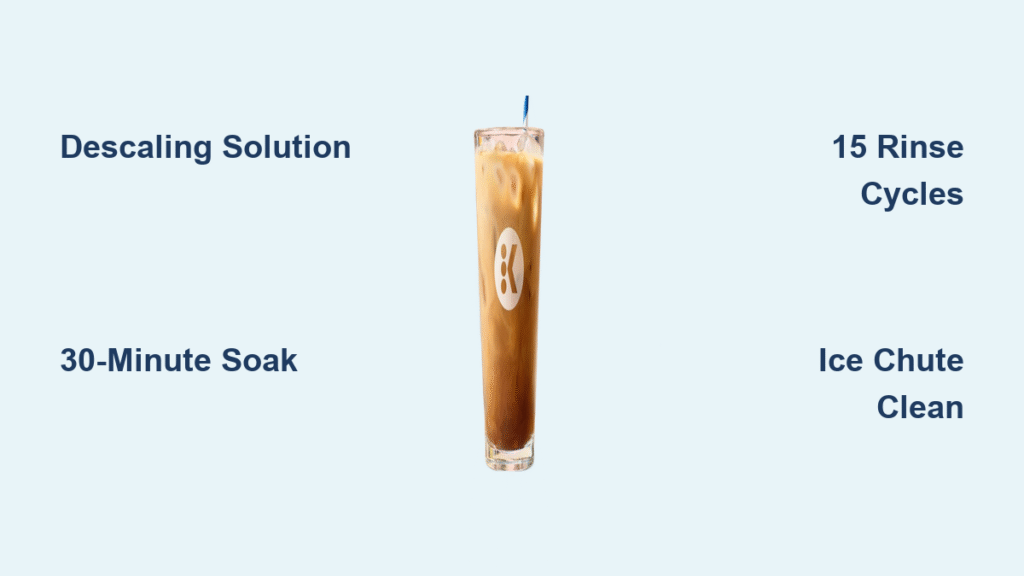
30-Minute Soak: Dissolving Scale in Cooling Coils
Leave 2-3 oz of solution in the reservoir and keep the machine powered ON. This maintains internal heat (140°F) to soften scale in cooling lines. Never unplug—cooling cycles reactivate pumps every 5 minutes to circulate solution. Set a timer: exceeding 45 minutes risks rubber gasket deterioration.
15 Rinse Cycles: Eliminating Vinegar Taste from Ice Chute
Rinse the reservoir 4 times with fresh water. Fill to MAX line, then brew 15 consecutive cycles using the largest size. Stop when:
– No vinegar odor remains
– Water runs clear (not cloudy)
– Critical check: Run 3 cycles using the iced coffee button to flush cold lines
Discard water immediately after each brew—never let it sit in the mug.
Special Treatment for Ice Chute and Cold Water Lines
Standard rinsing misses 30% of scale in iced models. After completing rinse cycles, remove the ice basket (if your model has one). Use a microfiber cloth dampened with vinegar solution to wipe the ice dispensing chute interior—scale here causes “warm ice” syndrome. For machines with integrated ice makers, run 4 plain-water cycles through the ice dispenser. Check for white crust around the chute opening; gently scrape with a plastic utensil if present. Skip this step, and you’ll get vinegar-flavored ice cubes ruining your first 5 coffees.
How Often to Descale Keurig Iced Based on Your Water Hardness
Your local water dictates descaling frequency—not the calendar. Test hardness with $5 strips from hardware stores:
– Soft water (0-3 gpg): Descale every 5 months
– Moderate (4-7 gpg): Every 3 months (most users)
– Hard (8+ gpg): Every 6 weeks—mandatory
Heavy users (3+ iced coffees daily) add 20% more frequent descaling. Install a $20 faucet filter if your water exceeds 7 gpg—you’ll cut descaling needs by half while improving coffee taste.
When the Descaling Light Won’t Turn Off: Quick Fixes
Why Your Keurig Iced Descaling Light Stays On After Cleaning
This indicates residual scale in hidden spots: the water inlet needle or reservoir sensor. Unplug, then insert a straightened paperclip into the exit needle (inside K-cup holder) and wiggle gently. For inlet needle (under reservoir), press reservoir firmly into place while running 2 rinse cycles—improper seating triggers false alerts.
Fixing Lingering Vinegar Taste in Iced Coffee
Brew 5 cycles with cinnamon-flavored K-cups—the oils neutralize odors better than plain water. If taste persists, remove the water filter (if equipped) and soak in vinegar for 10 minutes. Never use bleach rinses—they create toxic fumes when combined with residual vinegar.
Water Flow Still Restricted? Check These 3 Parts
- Reservoir float: Clean the white plastic ball in the reservoir base with vinegar
- Needle assembly: Soak K-cup holder in vinegar for 15 minutes
- Cooling coil: Run 4 hot water cycles through the iced setting to flush debris
Daily and Weekly Habits to Reduce Scale in Keurig Iced
Prevent 80% of scale with 2-minute daily routines:
– Each morning: Empty and rinse reservoir before first use
– After brewing: Wipe ice chute with damp cloth to prevent mineral crust
– Weekly: Soak K-cup holder in vinegar for 10 minutes while running a rinse cycle
– Monthly: Replace water filter (if equipped) even if not “full” indicator lights
Pro Tip: Always leave the reservoir lid cracked open when not in use—this prevents mold that accelerates scaling. Never use distilled water exclusively; its extreme purity corrodes metal components.
Heavy Buildup? 4-Hour Soak Method for Keurig Iced

For machines with <4 oz water output or constant “Descale” alerts:
1. Mix 12 oz vinegar + 4 oz warm water (90°F)
2. Run initial descale cycle (as above)
3. Unplug machine and let solution sit for 4 hours (not 30 minutes!)
4. Complete 20 rinse cycles, adding 2 cycles specifically for the ice function
This extended soak dissolves cement-like deposits in cooling coils. Warning: Never exceed 4 hours—prolonged vinegar exposure degrades rubber seals.
Avoiding Electrical Damage During Keurig Iced Descaling
90% of “dead” Keurig Iced units result from one mistake: letting solution contact electrical contacts. Always:
– Tilt the reservoir when refilling to prevent spills into base unit
– Wipe exterior with dry cloth after each rinse cycle
– Wait 1 hour after final rinse before plugging back in
Never immerse the base in water—even dampness near the power cord inlet causes short circuits. If your machine smells like burning during descaling, unplug immediately and check for solution leakage.
Key takeaway: A properly descaled Keurig Iced delivers noticeably colder, stronger coffee with zero gurgling—and lasts 3+ years longer. Set phone reminders based on your water hardness test results, and always complete the full 15 rinse cycles. Your next perfectly chilled iced coffee is just one descaling session away. For immediate results, run a dark roast K-cup through your machine now—it’ll highlight any remaining scale issues before your next deep clean.


