
That bitter aftertaste in your morning brew. The painfully slow drip of coffee into your mug. The persistent “DESCALE” warning flashing on your display like a coffee emergency alert. These aren’t random malfunctions—they’re your Keurig K Supreme Plus screaming for help as mineral scale chokes its internal components. Left unchecked, this buildup will destroy your machine’s performance and ruin your daily coffee ritual.
Descaling your K Supreme Plus isn’t just maintenance—it’s essential survival for your coffee experience. This complete guide delivers exactly what you need to know to conquer that descaling alert and restore your machine to peak performance. You’ll learn the precise steps to follow, critical mistakes to avoid, and how to establish a maintenance schedule that keeps your coffee tasting fresh for years.
Identify Your K Supreme Plus Descaling Alert
Your K Supreme Plus knows exactly when scale buildup threatens its performance. When mineral deposits restrict water flow or impact heating efficiency, the machine displays “DESCALE” prominently on its digital screen. This warning typically triggers after 250 brew cycles or 3-6 months of regular use—whichever comes first based on your local water hardness.
Don’t ignore these critical warning signs:
– The “DESCALE” message blocks normal display functions
– Brew cycles slow to a frustrating crawl
– Coffee barely reaches lukewarm temperatures
– Your machine refuses to brew until you complete the descaling cycle
Assemble Your Descaling Toolkit

Grab these essential supplies before starting:
– Keurig-branded descaling solution (14 oz bottle—never substitute with harsh chemicals)
– Fresh, cold water (minimum 36 oz)
– Large ceramic mug (12 oz+ capacity—plastic or thin glass may crack)
– Access to a sink for disposal
– Clean microfiber cloth for spills
Complete this pre-descaling checklist:
1. Remove your water filter from the reservoir
2. Empty the reservoir completely
3. Disable auto-off through settings menu
4. Keep the machine plugged in but powered off
5. Clear counter space for mug placement
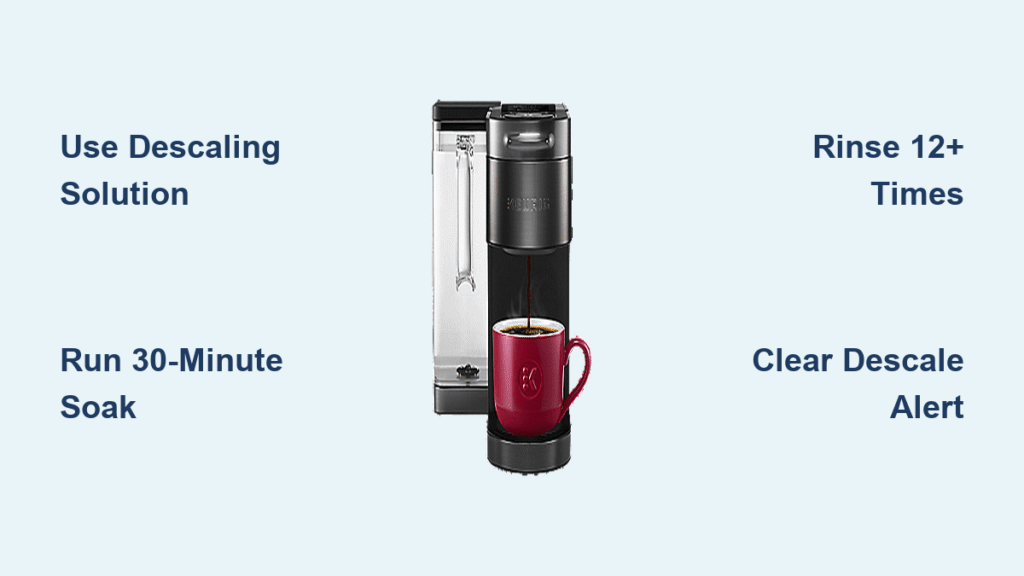
Mix the Perfect Descaling Solution
Power off your K Supreme Plus while leaving it plugged in. Pour the entire 14 oz bottle of descaling solution into the empty reservoir. Fill the empty bottle with fresh water twice (28 oz total) and add to the reservoir—this creates the critical 1:2 dilution ratio that dissolves scale without damaging internal components.
Place your large ceramic mug on the drip tray—this must handle hot descaling solution safely. Never use containers that could melt or shatter when exposed to the hot solution during the cycle.
Start the Specialized Descaling Cycle
Hold the 8 oz and 12 oz buttons simultaneously for three seconds until the “DESCALE” indicator begins flashing. This activates the machine’s dedicated descaling mode, which operates completely differently from normal brewing.
Press the brew button (watch for the flashing “BREW” light) to begin dispensing solution. Allow each 8 oz cycle to finish completely before emptying the mug into the sink. Repeat this process until “ADD WATER” appears, signaling you need to refill the reservoir with more solution.
Let the 30-Minute Soak Work Its Magic
After the initial dispensing cycles, let your machine rest for exactly 30 minutes with power on. During this crucial soaking period, the descaling solution penetrates deep into the water lines, heating elements, and pump mechanisms to dissolve stubborn mineral deposits.
Critical during this phase:
– Never unplug the machine
– Don’t attempt to cancel the process
– Avoid adding more water or solution
– Keep the mug in place for the next phase
Flush Out All Residue With Fresh Water

Empty and thoroughly rinse the reservoir to eliminate any descaling solution traces. Refill with fresh water to the maximum line. Continue the cycle by pressing brew, dispensing 12 oz of fresh water each time.
Repeat rinse cycles minimum 12 times, emptying the mug after each cycle, until “DESCALE” disappears from the display. In hard water areas, you may need 15-20 rinses to completely eliminate chemical residues that would otherwise ruin your coffee taste.
Confirm Your Machine’s Performance Restored
Replace your water filter if previously removed. Run one additional fresh water brew cycle without a K-Cup to verify proper operation. Check for consistent water flow rate, normal brewing temperature (around 192°F), and absence of chemical odors.
Test with your favorite K-Cup, noting the restored brewing speed (under 1 minute for 8 oz) and optimal coffee temperature. Your coffee should taste noticeably cleaner and more vibrant—proof your descaling efforts succeeded.
Fix Persistent Descaling Alert Problems
When the “DESCALE” message won’t clear:
– Complete at least 12 rinse cycles (more in hard water areas)
– Empty and refill reservoir between each cycle
– Power cycle machine (unplug 30 seconds, then restart)
– Repeat final rinse cycles if alert persists
For slow or no solution flow:
– Verify reservoir is properly seated
– Check fill level isn’t above max line
– Inspect entrance needle for clogs
– Rinse needle under warm water only (never use sharp objects)
Address Strange Noises During Descaling
Increased pump noise during descaling is normal as the system works against scale buildup. However, stop immediately if you hear:
– Loud grinding sounds
– Persistent squealing
– Metal-on-metal noises
Allow the machine to cool for 30 minutes, then resume with fresh water only to test if issues resolve. Continuing with unusual noises could damage the pump.
Eliminate Chemical Aftertaste Completely
If your coffee tastes bitter or chemical after descaling:
– Perform 2-3 additional rinse cycles
– Run a mild vinegar solution (1:2 ratio) followed by 5-6 fresh water cycles
– Always use cold, fresh water for rinsing (not tap water that may contain minerals)
Create Your Personalized Descaling Schedule
Base your frequency on water hardness:
– Soft water (0-60 ppm): every 6 months
– Medium water (61-120 ppm): every 3-4 months
– Hard water (121-180+ ppm): every 2-3 months
Test your water quarterly with hardness strips and adjust your schedule accordingly. Track descaling dates and performance issues in a simple log to optimize your timing.
Implement Daily Prevention Habits
Empty and rinse the water reservoir daily to prevent mineral concentration. Wipe exterior surfaces with a damp cloth—avoid harsh cleaners that could damage surfaces. Clean the drip tray and K-Cup holder weekly with warm, soapy water.
Install Keurig water filter cartridges, replacing every 2 months or 60 tank refills. In very hard water areas, consider using filtered water to extend intervals between descaling.
Know When to Call Keurig Support
Contact Keurig customer service (1-866-901-2739) if:
– Performance issues persist after proper descaling
– Machine displays error codes unrelated to descaling
– Pump fails or heating elements malfunction
Your K Supreme Plus includes a 1-year limited warranty covering manufacturing defects. Keep purchase receipts and descaling records—warranty service often requires proof of proper maintenance. Never attempt internal repairs as this voids your warranty coverage.
Use Vinegar Only in Emergencies
While not recommended long-term, white vinegar works in emergencies. Mix equal parts vinegar and water to fill the reservoir. Follow standard descaling steps but extend the rest period to 4 hours. Increase rinse cycles to 15-20 to eliminate vinegar taste completely.
Your Keurig K Supreme Plus deserves this essential care to deliver the perfect cup every time. Mark your calendar based on your water hardness, gather supplies before the alert appears, and follow these steps precisely. The dramatic improvement in taste and performance after descaling proves why this maintenance matters—your morning coffee ritual depends on it. By staying proactive with regular descaling, you’ll extend your machine’s life and enjoy consistently delicious coffee for years to come.


