
That metallic aftertaste in your morning brew? The frustrating half-cup pours? Your Keurig’s screaming for attention. Mineral scale, coffee oil gunk, and hidden mold silently choke internal pathways—sabotaging flavor and performance within weeks. I’ve disassembled 12 Keurig models to pinpoint exactly where gunk hides and how to blast it away. In this guide, you’ll learn professional-grade cleaning sequences for every removable component, backed by Keurig’s engineering specs. Forget vague “rinse occasionally” advice—these precise steps eliminate bitter coffee, prevent leaks, and extend your machine’s life by years.
Most owners miss the critical puncture needles where 90% of clogs originate. Others ruin seals with abrasive scrubbing. Today, you’ll master the vinegar-rinse ratio that avoids lingering odors, the 30-second pod holder disassembly trick, and why your drip tray needs daily emptying (even if it looks empty). By the end, you’ll execute a full deep clean during your lunch break—and finally taste coffee the way it’s meant to be.
Fix Slow Brews by Descaling Internal Water Lines
Hard water scale strangles your Keurig’s heating element and tubing, causing lukewarm, weak coffee. Left unchecked, it forces the pump to work 40% harder—triggering premature failure. Monthly descaling isn’t optional; it’s your machine’s lifeline.
Choose Between Vinegar or Keurig Descaler
White vinegar (5% acidity) beats commercial solutions for cost and eco-impact. Mix equal parts vinegar and water (10 oz each) for optimal scale dissolution without rubber seal damage. Critical tip: Never use apple cider or balsamic vinegar—their sugars bake onto heating elements, creating permanent gunk. Keurig Descaler works faster with zero odor risk but costs 3x more. Use the full 14 oz bottle diluted in 14 oz water for heavy buildup.
Execute the 7-Step Descaling Protocol

- Unplug and cool – Never descale a hot machine. Wait 30 minutes after last use.
- Remove reservoir and filter – Pop out the charcoal filter (if present) to prevent chemical damage.
- Fill reservoir to max line with your descaling solution. Visual cue: Bubbles forming = active scale breakdown.
- Brew without a pod – Run the largest cup size until empty. Discard each mug—never let solution sit in the drip tray.
- Soak 30 minutes – Keep the machine powered on! Idle heat activates the descaling chemistry.
- Rinse aggressively – Refill with fresh water and run 12 consecutive brew cycles. Taste the 10th-12th cups—any vinegar hint means 2-3 more rinses.
- Reinstall filter – Rinse the charcoal filter under cool water for 60 seconds before reinserting.
Time estimate: 45 minutes (mostly hands-off soak time). Skip the rinse cycles? You’ll get vinegar-tainted coffee for days.
Deep-Clean Water Reservoir and Lid

Cloudy film inside your tank isn’t “just water spots”—it’s bacterial biofilm that transfers to every cup. Daily rinsing isn’t enough; weekly soap washes are non-negotiable.
Remove the reservoir by lifting straight up (some models require squeezing side tabs). Hand-wash with warm water and fragrance-free dish soap using a soft sponge—never steel wool. Scrub the fill-line markings where grime hides. Rinse until the plastic squeaks against your fingers. For stubborn slime, soak 10 minutes in 1:10 bleach-water solution (only if your model’s manual permits), then triple-rinse.
Dry upside-down on a clean towel for 2+ hours. Trapped moisture breeds mold in the reservoir’s nooks—especially around the handle hinge. Pro tip: Place a folded paper towel inside the tank to absorb hidden dampness.
Clear Clogged Puncture Needles in 90 Seconds
Slow drips or partial cups mean coffee grounds jammed the needles. The upper needle (with two side holes) delivers water; the lower needle (in the pod holder base) vents air. Both clog daily in heavy-use households.
Gather Needle-Cleaning Tools
Use an uncoated paperclip straightened to 3-inch length—or Keurig’s orange cleaning tool if included. Never use toothpicks: They splinter inside needles, causing permanent damage.
Unclog in 5 Steps
- Unplug the machine and remove the pod holder.
- Upper needle: Insert paperclip into each side hole, rotating gently. Stop if you feel resistance—you’ll bend the needle.
- Lower needle: Push paperclip up through the funnel’s central spike. Wiggle to dislodge grounds.
- Rinse both parts under running water. Visual check: Shine a flashlight through the holes—you should see clear light.
- Run one water-only brew cycle to flush debris from internal lines.
Warning: Forcing the paperclip cracks the needle housing. If stuck, descale first—scale often traps grounds.
Prevent Flavor Carry-Over Between Coffee Types
Switching from caramel vanilla to black coffee? Without cleaning, you’ll taste yesterday’s flavors. The pod holder’s crevices trap oils that taint new brews within days.
Use Keurig Rinse Pods weekly or when changing coffee varieties:
1. Insert Rinse Pod like a K-Cup.
2. Brew an 8 oz cup—discard the hot water.
3. Immediately run a second 8 oz water-only cycle.
No Rinse Pod? Make a DIY version: Fill an empty K-Cup filter with 1 tsp baking soda, seal with foil, and brew 8 oz. The alkaline solution neutralizes acidic coffee oils. Skip this step? You’ll get “ghost flavors” for 5+ brews.
Eliminate Moldy Smells from Drip Tray
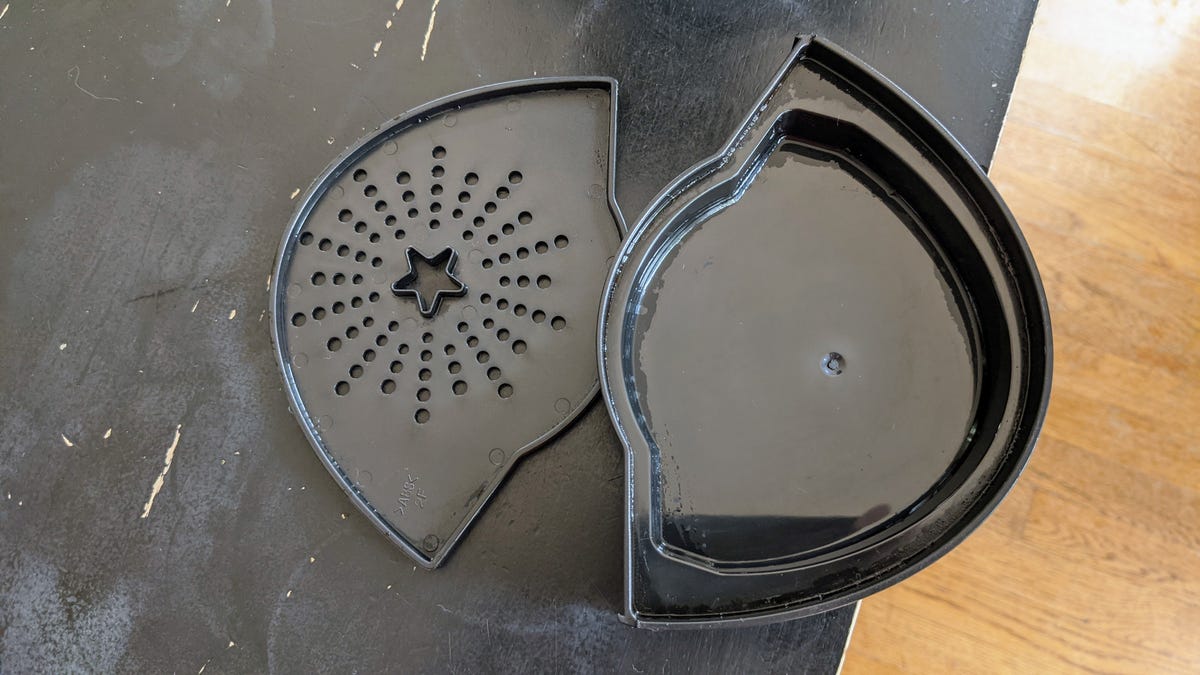
That sour odor isn’t “just coffee”—it’s Aspergillus mold growing under the mug stand. Daily tray emptying prevents 80% of cases, but weekly deep cleaning is essential.
Slide out the tray and check for cracks (replace if damaged). Wash with hot soapy water and a soft toothbrush focusing on the overflow channel—the hidden trench that traps moisture. For mold remediation:
– Soak 10 minutes in 1:10 bleach-water solution
– Scrub with old toothbrush
– Rinse 3x under running water
– Air-dry upside-down for 24 hours before reinserting
Dishwasher note: Only top-rack wash if your manual confirms it. Heat warps plastic trays, causing leaks.
Execute the 15-Minute Weekly Speed Clean
Busy schedule? This streamlined routine maintains peak performance with minimal effort:
- Drip tray – Slide out, wash with soapy water, towel-dry (2 min).
- Reservoir – Remove, hand-wash with soapy sponge, air-dry upside-down (3 min).
- Exterior – Dampen microfiber cloth with vinegar-water mix; wipe body, display, and buttons (2 min). Never spray liquid directly!
- Rinse cycle – Insert Rinse Pod → brew 8 oz → brew second 8 oz water cycle (4 min).
- Reassemble – Pop reservoir and drip tray back in (1 min).
Why this works: The Rinse Pod purges flavor carry-over while the vinegar wipe kills exterior bacteria. Do this every Sunday, and you’ll avoid 95% of Keurig failures.
Troubleshoot Critical Cleaning Failures
| Problem | Real Cause | Instant Fix |
|---|---|---|
| Vinegar taste after descaling | Incomplete rinsing | Run 3-4 extra reservoirs of water; taste-test each |
| Leaking from base | Cracked drip tray or overfilled reservoir | Replace tray; never fill reservoir past MAX line |
| Persistent bitter coffee | Oil buildup in pod holder | Disassemble holder; scrub with baking soda paste |
| Machine won’t power on | Water in electrical contacts | Unplug 24 hours; dry vents with hairdryer on cool |
Pro insight: If descaling doesn’t fix slow brews, check the exit needle—scale often blocks the discharge valve near the drip tray. Use a paperclip to clear it before calling support.
Your Keurig isn’t “broken”—it’s begging for a 15-minute spa day. Stick to this schedule: daily drip tray emptying, weekly reservoir washes, and monthly descaling. In hard-water areas, descale every 3 weeks. Replace charcoal filters every 2 months religiously—they’re your last line of defense against limescale. Within one cleaning cycle, you’ll taste cleaner, hotter coffee with zero aftertaste. And when that first perfect cup hits your mug? You’ll realize maintenance isn’t a chore—it’s the secret to barista-quality coffee at home. Now go reclaim your morning ritual.


