
That first morning sip should be rich and satisfying—not watery and weak. When your Keurig K-Classic starts producing lackluster coffee or sluggish brews, mineral buildup is almost certainly sabotaging your machine. This common issue stems from hard water minerals coating internal components, but the solution is surprisingly simple. You can completely revive your coffee maker’s performance in under an hour using just vinegar and household tools. Follow this exact process to eliminate scale deposits, fix flow problems, and reclaim barista-quality coffee from your K-Classic.
Most users wait until the cleaning light flashes before addressing buildup, but by then, your coffee has already suffered for weeks. Mineral deposits silently accumulate in narrow tubes and heating elements, degrading taste and efficiency long before visible warnings appear. The good news? Regular maintenance prevents 90% of common Keurig failures. This guide delivers the precise steps to deep-clean your machine properly—no guesswork required. You’ll learn to spot early warning signs, execute a foolproof descaling process, and establish a maintenance routine that keeps your K-Classic brewing flawlessly for years.
Why Your Keurig K-Classic Coffee Suddenly Tastes Weak or Bitter
Critical Performance Warning Signs
When mineral scale invades your K-Classic’s internal pathways, these symptoms signal immediate cleaning needs:
- Coffee tastes noticeably weaker or more bitter than usual
- Water trickles out instead of flowing steadily during brewing
- Brew cycles take significantly longer than normal (over 1 minute)
- Machine stops mid-brew with incomplete coffee output
- Water pools under the unit after brewing
- Cleaning indicator light activates (though performance issues usually precede this)
Don’t ignore early symptoms—mineral buildup worsens with each brew cycle. Hard water minerals like calcium and magnesium rapidly form stubborn scale deposits when heated, coating critical components. This insulating layer forces your machine to work harder while reducing water flow and brewing temperature. The result? Subpar coffee and potential permanent damage to heating elements. Addressing buildup promptly prevents costly repairs and extends your machine’s lifespan significantly.
Never Use Distilled Water in Your K-Classic (Keurig’s Official Warning)
Optimal Water Selection for Longevity
Your water choice directly impacts cleaning frequency and machine health:
- Bottled spring water provides ideal mineral balance for consistent brewing
- Filtered tap water removes most impurities while retaining beneficial minerals
- Never use softened water (alters mineral composition, damages components)
- Avoid distilled water (lacks minerals needed for proper electrical conductivity)
Keurig explicitly warns against distilled water because its complete lack of minerals interferes with the machine’s internal sensors. Using proper water can double the time between deep cleanings while preserving coffee flavor. If you have extremely hard water, consider installing a countertop filter specifically designed to reduce scale-forming minerals without stripping all minerals.
3-Minute Weekly Exterior Cleaning to Prevent Sticky Buildup
Essential Daily Maintenance Routine
This quick process prevents coffee residue from hardening on surfaces:
Supplies needed:
– Microfiber cloth dampened with water
– Mild dish soap (optional for stubborn stains)
Step-by-step procedure:
1. Power down and unplug your K-Classic
2. Wipe exterior surfaces with a slightly damp cloth
3. Remove the drip tray and empty any collected water
4. Wash the drip tray with soapy water, then rinse thoroughly
5. Clean crevices around the K-cup holder using the cloth’s corner
6. Slide the drip tray back into position
Pro tip: Clean immediately after morning use while coffee residue is still wet—dried spills require aggressive scrubbing that risks damaging surfaces. This weekly habit prevents sticky buildup that attracts more grime and complicates future deep cleanings.
Complete Descaling Process for Stubborn Mineral Buildup

Essential Supplies for K-Classic Deep Cleaning
Gather these before starting:
– 10 ounces white distilled vinegar (half reservoir)
– Clean water for rinsing
– 12+ ounce ceramic mug
– Straightened paperclip
– Mild dish soap
Critical note: Never use lemon juice, CLR, or commercial descaling solutions unless explicitly approved by Keurig—they may damage internal components.
Safely Removing and Washing All Detachable Parts
Detailed disassembly guide:
1. Unplug machine and wait 10 minutes for cooling
2. Remove water reservoir and lid
3. Slide out drip tray assembly completely
4. Lift out K-cup holder/pod holder assembly
5. Wash all parts in warm, soapy water (avoid abrasive scrubbers)
6. Rinse thoroughly under running water
7. Air dry completely on clean towel (never towel-dry)
Warning: Never submerge the main machine base in water—only removable components should contact liquids. Improper drying causes electrical shorts and mold growth.
Unclogging Coffee Grounds from Piercing Needles
Precision needle cleaning method:
1. Straighten a clean paperclip completely
2. Gently insert into upper needle (pierces K-cup top)
3. Rotate paperclip to dislodge coffee grounds (do not force)
4. Repeat for lower needle (pierces K-cup bottom)
5. Flush both needles with clean water from reservoir
Critical technique: Approach needles from the side rather than directly above to avoid injury from sharp points. Clogged needles cause incomplete brewing and weak coffee—this simple fix resolves 30% of common K-Classic issues.
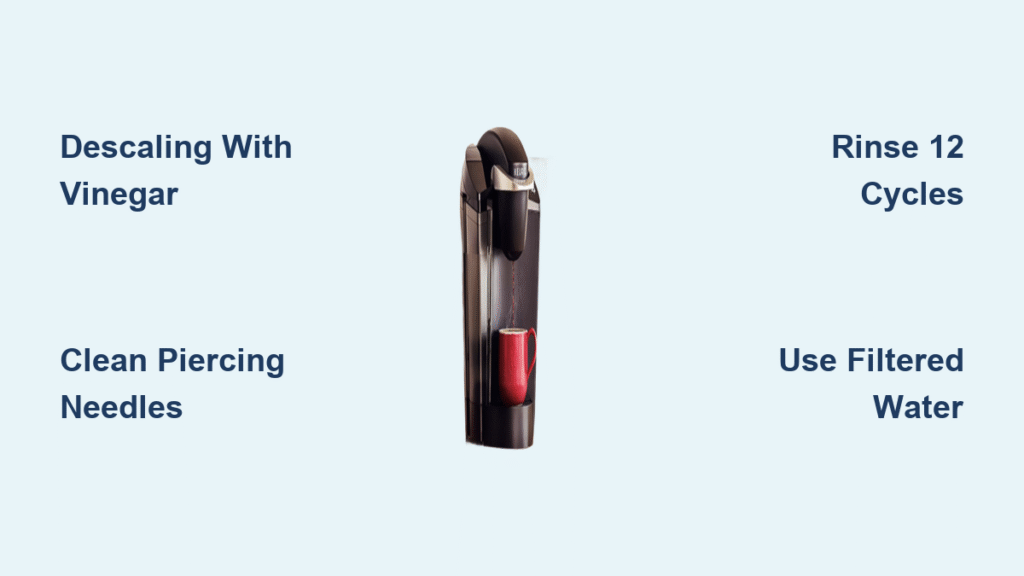
Perfect Vinegar Solution Ratio for Effective Descaling
Exact mixing instructions:
– Fill reservoir halfway with white vinegar (≈10 oz)
– Top off with fresh water to MAX fill line
– Never exceed 50% vinegar concentration
Using undiluted vinegar risks damaging rubber seals and internal components. The 1:1 vinegar-to-water ratio effectively dissolves scale without harming your machine. Never substitute apple cider or other vinegars—they contain additives that leave sticky residues.
Executing Flawless Descaling Brew Cycles
Step-by-step descaling sequence:
1. Place large mug on drip tray
2. Press BREW button without inserting K-cup
3. Discard each mug of solution immediately
4. Continue until reservoir empties completely
5. Let machine sit powered on for 30 minutes
6. Discard final vinegar solution
What to expect: Early cycles may produce cloudy liquid as mineral deposits dissolve. If flow stops mid-cycle, gently shake reservoir to dislodge air pockets. Never force the process—mineral chunks can temporarily obstruct narrow tubes.
Eliminating Vinegar Aftertaste with Proper Rinsing
Guaranteed rinse protocol:
1. Wash reservoir thoroughly with soapy water
2. Rinse 3-4 times with clean water
3. Refill reservoir with fresh water only
4. Brew 12 consecutive water-only cycles
5. Discard water after each cycle
6. Verify neutral taste in final rinse
Skipping rinse cycles leaves vinegar residue that ruins coffee flavor. The 12-cycle standard ensures complete removal—fewer cycles risk acidic aftertaste. Test by brewing a cycle into a clean mug; water should taste completely neutral with no vinegar hint.
Customized Cleaning Schedule Based on Your Water Hardness
Personalized Maintenance Timeline
Adapt this schedule to your specific usage:
– Weekly: Exterior wipe-down (2 minutes)
– Monthly: Water filter replacement (if using)
– Every 2 months: Deep cleaning (softer water areas)
– Every 3 months: Deep cleaning (average water hardness)
– Every 4-6 weeks: Deep cleaning (very hard water areas)
Pro insight: Track your first performance decline (e.g., longer brew time) to establish your personal cleaning interval. Hard water areas may need monthly descaling—don’t rigidly follow generic 3-month advice.
Daily Habits That Prevent 80% of Keurig Problems
Simple Preventative Measures
Implement these immediately:
– Empty drip tray nightly to prevent mold growth
– Leave water reservoir lid ajar when not in use
– Always use filtered or bottled water
– Wipe exterior spills within 1 hour
– Store machine in dry, temperature-stable location
Monthly quick-check routine:
– Inspect needles for visible coffee grounds
– Time a standard brew cycle (should complete in 45-60 seconds)
– Listen for unusual gurgling or grinding sounds
– Check for leaks around reservoir base
These small habits prevent the most common failure points. Proper maintenance ensures consistent brewing temperature (critical for flavor extraction) and prevents permanent scale adhesion that requires professional servicing.
Following this precise cleaning methodology restores your Keurig K-Classic to factory performance. The 45-minute quarterly investment eliminates weak coffee, slow brewing, and unexpected shutdowns while extending your machine’s lifespan by years. Remember that water quality determines your cleaning frequency—adjust the schedule based on your local water hardness. Within 24 hours of proper descaling, you’ll notice richer flavor, faster brewing, and consistent cup quality. Don’t wait for the cleaning light—address mineral buildup at the first sign of performance decline to keep your morning ritual perfect. Your coffee deserves nothing less than a perfectly maintained K-Classic.


