
Your morning coffee tastes bitter, your Keurig takes twice as long to brew, and you spot chalky white flakes in your cup. These aren’t random annoyances—they’re urgent signals that mineral deposits and coffee oil buildup are sabotaging your machine. While “Keurig coffee pot” is technically a misnomer (it’s a brewer, not a traditional pot), the cleaning process for your single-serve machine is critical for flavor and function. Neglecting this maintenance invites bacteria growth, clogs, and premature breakdown—especially if you use hard water.
The good news? A thorough Keurig cleaning takes less time than your weekly grocery run and requires only household items. This guide cuts through the confusion with battle-tested methods for every model. You’ll discover why vinegar outperforms commercial solutions for descaling, how to unclog needles in 60 seconds, and the exact rinse cycle count needed to eliminate vinegar taste. No more guessing—just consistently perfect coffee.
Essential Cleaning Supplies You Already Own
Skip expensive specialty kits—your kitchen stash handles 95% of cleaning needs. Grab white distilled vinegar (5% acidity is crucial for dissolving limescale without damaging seals), fresh filtered water, and a single drop of mild dish soap. A microfiber cloth prevents scratches on touchscreens, while a paperclip or safety pin tackles needle clogs. For stubborn buildup, add a soft-bristled toothbrush to scrub reservoir corners where scale hides.
Pro Tip: Avoid these common mistakes:
– ✘ Using apple cider vinegar (its sugars leave sticky residue)
– ✘ Substituting lemon juice (citric acid requires precise ratios)
– ✘ Skipping the reservoir rinse (soap residue ruins coffee flavor)
Daily Quick Clean Routine (2 Minutes)
Wipe Down Exterior Surfaces Immediately After Brewing
Moisten a microfiber cloth with water and one drop of dish soap. Wipe the housing, control panel, and drip tray in circular motions—never spray liquid directly onto the machine. Focus on the area around the K-Cup holder where coffee oils splatter. Dry immediately with a lint-free towel to prevent electrical shorts. This daily habit stops sticky buildup that attracts dust and bacteria.
Empty and Unclog the Drip Tray Before Coffee Stains Set
Pull out the drip tray after your last brew. Dump liquid, then rinse under warm water while checking the drain hole with a flashlight. If coffee grounds clog it (a common cause of countertop puddles), insert a toothpick to clear debris. Wash with soapy water, ensuring no residue remains in the tray’s grooves. Air-dry completely before reinserting—trapped moisture breeds mold within 48 hours.
Weekly Deep Clean Components (10 Minutes)
Flush Mineral Buildup from Water Reservoir
Remove the reservoir and dump old water. Scrub interior surfaces with a bottle brush dipped in soapy water, paying special attention to the water intake valve—that tiny mesh screen traps limescale. Rinse 3-4 times under running water until no suds appear. Hold it up to light: if you see white, chalky spots near the base, repeat cleaning. Air-dry upside down for 20 minutes to prevent musty odors.
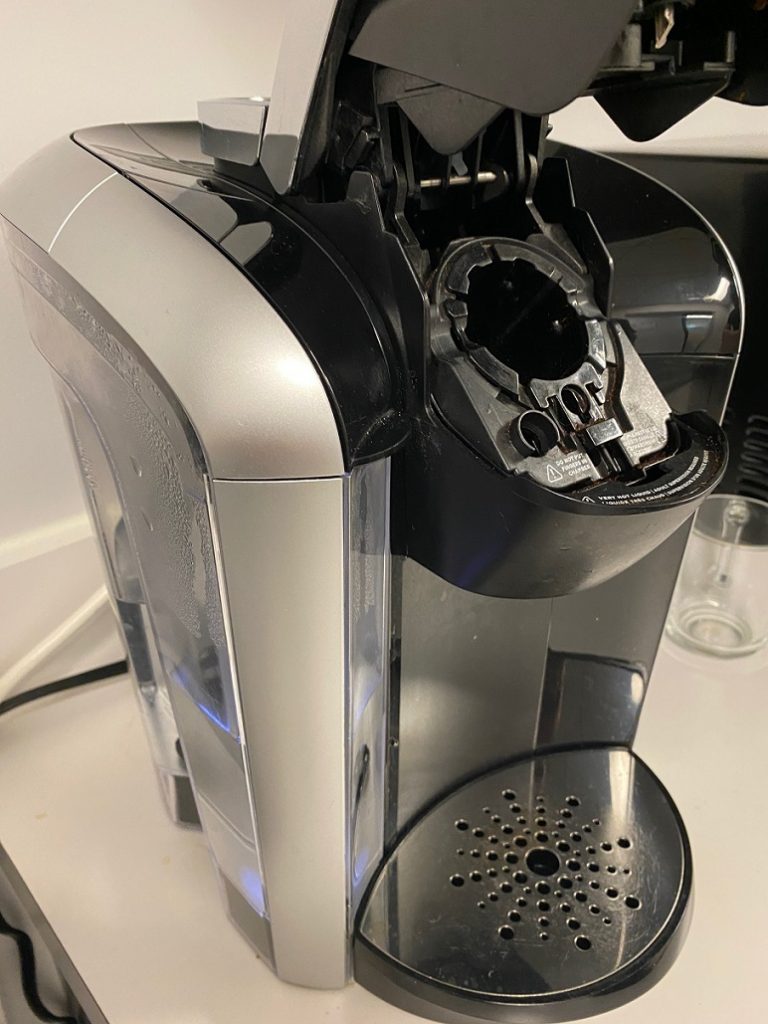
Clear Clogged Needles That Cause Incomplete Brewing
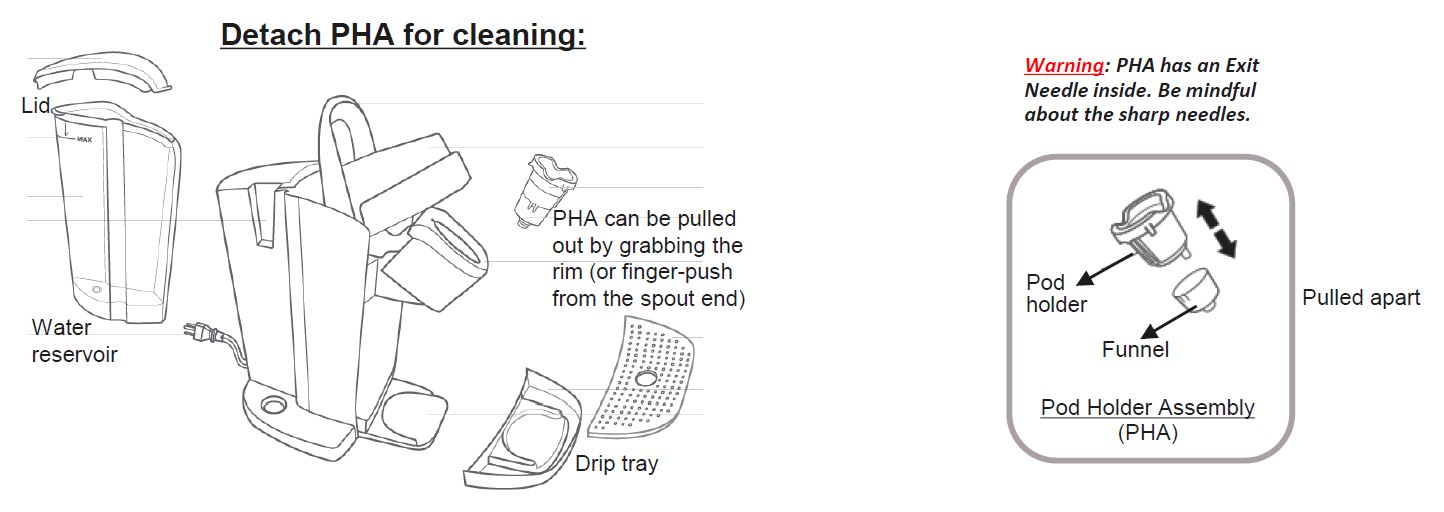
Unplug the machine first—this is non-negotiable for safety. Lift the K-Cup holder handle and pull the assembly straight up. Separate the funnel from the holder. Insert a paperclip into the exit needle (the sharp point on the holder’s bottom) and twist gently to dislodge coffee grounds. For the entrance needle (inside the brew head), press the paperclip in and out 5 times while the holder is removed. Rinse all parts under warm water before reassembling. If coffee still leaks after this, mineral deposits likely require descaling.
Monthly Descaling Process (45 Minutes)
Why Vinegar Beats Commercial Solutions for Deep Cleaning
While Keurig sells descaling kits, undiluted white vinegar costs pennies and works faster. It dissolves limescale in half the time of citric acid solutions because acetic acid penetrates mineral deposits more aggressively. Fill the reservoir to MAX with vinegar, place a large mug on the tray, and run brew cycles (no K-Cup) until empty. Critical step: Let the machine sit powered on for 4 hours—this dwell time breaks down stubborn scale commercial products miss.
Eliminate Vinegar Taste in 7 Rinse Cycles
After descaling, rinse the reservoir thoroughly and fill with fresh water. Run 7 full brew cycles (not partial cups) to clear vinegar from narrow internal tubing. Smell each cup: if vinegar lingers, run 3 more cycles. Pro shortcut: Brew one cup of coffee and discard it—the grounds absorb residual odors faster than water alone. Never skip this step; vinegar taste ruins your next 5 brews.
Model-Specific Cleaning Fixes

Keurig 2.0 Carafe Models: Stop Sour Milk Residue
For K-Cafe series with milk frothers, rinse the whisk immediately after use with warm water. Weekly, fill the frother cup with soapy water, reattach, and run a “clean” cycle. Use a toothpick to scrape dried milk off the whisk’s coil—this prevents the sour smell that develops when proteins bake onto hot metal.
Mini Models: Prevent Mold in Compact Reservoirs
Small reservoirs trap moisture in corners. After washing, invert the reservoir and tap it firmly to expel trapped water. Run an extra rinse cycle post-descaling to clear narrow tubing. If you spot black spots, run two consecutive vinegar cycles—compact models need more aggressive treatment due to tighter water pathways.
Solve Persistent Cleaning Problems
Remove White Residue That Survives Descaling
Hard water leaves calcium flakes even after cleaning. Mix 2 tablespoons of citric acid powder with 16oz water, pour into the reservoir, and run a full brew cycle. Let sit 30 minutes, then complete the cycle. Rinse 10 times. Prevention: Always use filtered water—this cuts descaling frequency by 60%.
Kill Mold in Water Lines Without Chemicals
For black mold behind the drip tray:
1. Run two back-to-back vinegar descaling cycles
2. Fill reservoir with bottled spring water for 3 days
3. Store machine with reservoir removed when unused
If mold returns, replace the water tube—it’s a $5 part but requires disassembly.
Safety Rules That Prevent Costly Damage
Electrical hazards cause 34% of Keurig repairs—always unplug before cleaning. Never soak the base unit; wipe spills with a damp (not wet) cloth. After descaling, wait 10 minutes for hot components to cool before handling. Critical warning: Bleach and ammonia-based cleaners erode internal seals—stick to vinegar or approved descaling solutions.
Verify Your Machine Is Truly Clean
Brew a Test Cup That Exposes Hidden Issues
After cleaning, brew black coffee (no creamer) in a clear glass. Check for:
– ✅ Brew time under 60 seconds (slow brewing = residual clogs)
– ✅ Full cup volume (reduced output = needle blockage)
– ✅ No floating grounds (indicates incomplete needle cleaning)
– ✅ Smooth taste (bitterness = insufficient rinsing)
If coffee still tastes metallic, run one more descaling cycle—the entrance needle likely has hidden scale.
Maintenance Schedule That Prevents 90% of Breakdowns
Daily (90 seconds): Wipe exterior, empty drip tray, discard used pods
Weekly (8 minutes): Clean reservoir, unclog needles, replace water filter
Monthly (40 minutes): Full descaling, deep-clean all removable parts
Quarterly: Replace charcoal filters (they turn gray when exhausted)
Following this routine extends your Keurig’s lifespan by 2+ years. Your coffee gains brighter acidity and richer aroma—no more “stale” taste from oil-coated components. Remember: skipping just one descaling cycle allows limescale to harden, making future cleaning 3x harder.
Final Tip: Set phone reminders for descaling dates. Machines used daily need monthly treatment; weekly users can stretch to 6 weeks. Within 24 hours of cleaning, you’ll taste the difference—a clean Keurig unlocks the true flavor of even budget K-Cups. Ready for coffee that actually tastes like the bag promises? Your freshly cleaned machine awaits.


