
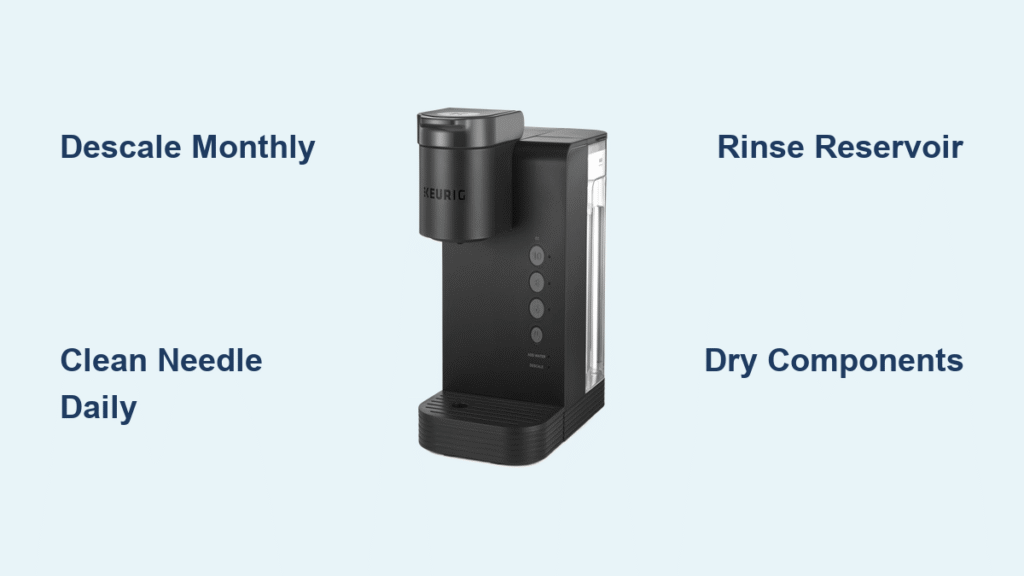
Your Keurig Express sputters like a clogged artery, delivering weak coffee that tastes stale instead of vibrant. Mineral deposits from hard water and coffee residue have silently sabotaged your morning ritual. The truth? A single how to clean a keurig express session can revive your machine’s performance and transform bitter brews back into smooth, flavorful coffee—all without calling for repairs. You’ll reclaim your appliance’s original speed and taste in under an hour using supplies you already own.
This isn’t just wiping the outside—it’s a targeted assault on hidden buildup that chokes water flow and taints flavor. By the time you finish this guide, you’ll know exactly how to deep-clean every component, when to descale, and how to prevent mold from returning. Let’s turn that frustrating sputter back into your perfect cup.
Unplug Before Touching Any Parts
Critical safety step: Always disconnect your Keurig Express from power before removing components. This prevents electrical shock and protects sensitive internal parts during cleaning. Working on a dry, stable surface with good lighting ensures you won’t miss hidden grime or damage delicate parts.
Remove all K-Cups from the holder and empty the drip tray before disassembly. This clears the workspace and prevents coffee grounds from scattering during cleaning. Never skip this step—residual pods can leak during handling, creating a sticky mess that attracts more debris.
Wipe Exterior Surfaces in 5 Minutes
Materials needed: Microfiber cloth, damp cloth with mild dish soap
Start with the outside to remove coffee splatters and fingerprints that accumulate daily. Use a dry microfiber cloth to wipe the top, sides, and front—this lifts dust without water spots. For stubborn dried-on coffee rings near the spout, dampen your cloth with warm water and a pea-sized drop of dish soap.
Work in small circular motions, focusing on the spout area where coffee residue hardens fastest. Immediately rinse soap residue with a clean damp cloth, then dry thoroughly with the microfiber cloth. Skipping the drying step invites water spots that make your machine look perpetually dirty. Do this weekly to maintain a professional appearance and prevent sticky buildup.
Deep Clean Removable Components
Eliminate Mold in Water Reservoir
Materials needed: Warm soapy water, disposable sponge (if mold present)
Lift the reservoir straight up to detach it. Pour remaining water into a plant—never down the drain where minerals feed plumbing buildup. Rinse thoroughly to remove loose debris before deep cleaning.
Fill your sink with warm water and 2 drops of dish soap. Submerge the reservoir and scrub all interior surfaces with a sponge, especially corners where mold hides. Never use bleach—it degrades plastic and leaves toxic residues even after rinsing. If you spot black mold or slime, scrub vigorously and discard the sponge afterward to prevent spreading spores.
Rinse 4 times under running water until no suds remain. Air-dry upright for 20 minutes—never reassemble while damp, as moisture breeds new mold. Clean this weekly; skip it, and mold returns within days.
Unclog K-Cup Holder Needle

Materials needed: Paper clip, old toothbrush, cotton swab
Lift the machine handle and push up gently from beneath to pop out the K-Cup holder assembly. It separates into two pieces: the black holder and the funnel with the brewer needle. This is where coffee grounds and mineral deposits cause 90% of brewing failures.
Straighten a paper clip and gently circle inside the funnel opening to dislodge packed grounds. Use a toothbrush to scrub the holder’s ridges where coffee cakes hard. For the critical brewer needle, insert the paper clip straight down into the tiny hole—this releases clogs causing weak flow. Warning: Never force the paper clip sideways, as this bends the needle and worsens clogs.
Rinse both pieces under hot water until runoff runs clear. Air-dry completely on a clean towel before reassembly—moisture here causes immediate re-clogging.
Remove Drip Tray Coffee Sludge
Materials needed: Warm soapy water, old toothbrush
Slide the drip tray forward to remove it. This hidden component collects overflow coffee that turns into sticky sludge, attracting dust and odors. Wash with warm soapy water, using a toothbrush to scrub residue from textured surfaces and drainage channels.
Rinse thoroughly until water flows freely through drain holes. Dry completely with a towel—trapped moisture causes rust spots and foul smells. This 2-minute task prevents the “wet cardboard” odor that ruins coffee flavor.
Descaling: Dissolve Internal Mineral Buildup
Spot When Descaling Is Critical
Descaling becomes urgent when you notice:
– Coffee volume dropping below 6 ounces per cup
– Loud gurgling or sputtering during brewing
– Visible white flakes in the water reservoir
– 20% slower brew times than normal
Hard water users need this every 3 months; soft water areas can stretch to 6 months. Delaying causes permanent damage to heating elements—don’t wait until your machine fails completely.
Use Keurig Solution for Guaranteed Results
Materials needed: Keurig descaling solution, filtered water, large mug
Pour the entire 16oz bottle into the empty reservoir, then fill to MAX line with filtered water. Place a 16oz mug under the spout and select the largest brew size (8-10oz). Run cycles until the reservoir empties—typically 3-4 brews.
Critical step: Let the solution sit for exactly 30 minutes. This dissolves stubborn limescale without damaging rubber seals. Never exceed 45 minutes—prolonged exposure degrades internal components.
Rinse the reservoir thoroughly, refill with fresh water, and run 12 consecutive brew cycles (no pod) to flush all chemicals. Taste the last flush—if it’s not neutral, run 3 more cycles. This prevents bitter aftertastes ruining your coffee.
White Vinegar Alternative for Budget Cleaning
Materials needed: White vinegar, water, large mug
Mix equal parts vinegar and water in the reservoir (never full-strength vinegar—it corrodes seals). Let sit 30 minutes max; exceeding 3 hours risks seal damage. Run brew cycles until empty, then rinse the reservoir.
Flush with 15 fresh water cycles using filtered water—this eliminates vinegar taste faster than tap water. Leave an empty mug under the spout overnight to catch residual drips. Vinegar works well for light buildup but struggles with heavy mineral deposits.
Prevent Daily Buildup With 5-Minute Routine
Skip tomorrow’s deep clean with this daily habit:
– Empty and rinse the water reservoir with warm water
– Wipe exterior surfaces with a dry microfiber cloth
– Remove and rinse the drip tray after each use
– Run one rinse cycle with water when switching between coffee and tea K-Cups
This prevents coffee oils from hardening into permanent residue. For reusable K-Cups, hand-wash after each use and air-dry completely—dishwasher heat warps their filters.
Fix Post-Cleaning Problems Fast
Machine Won’t Brew After Cleaning
Verify two critical points:
– The water reservoir is fully clicked into place (listen for the “snap”)
– Power is restored after the safety-unplug step
If still unresponsive, re-clean the K-Cup holder needle—mineral deposits often re-clog during initial flush cycles. Use the paper clip method again before considering descaling.
Vinegar Taste Lingers in Coffee
Run 5 additional flush cycles with filtered water, then let the machine sit 12 hours before brewing. Place a charcoal water filter in the reservoir for 24 hours—it absorbs residual flavors faster than multiple flushes. Never brew coffee until water tastes completely neutral.
Mold Returns Within a Week
This signals incomplete drying. After cleaning, leave the reservoir lid open and store all components upside-down on a drying rack for 2 hours. Switch to distilled water—it contains zero minerals that feed mold growth. If using tap water, replace the reservoir filter cartridge monthly instead of the standard 2-month interval.
Maintain Peak Performance With This Schedule
Daily: Empty drip tray and wipe exterior
Weekly: Clean reservoir and holder components
Monthly: Deep-clean brewer needle with paper clip
Quarterly: Full descaling cycle (every 3 months)
Bi-monthly: Replace water filter cartridge
When storing your Keurig Express for vacations, empty the reservoir completely and leave all lids open. Store in a dry cupboard—not under the sink where humidity breeds mold. Keep a bottle of descaling solution in your pantry so you never delay cleaning.
Your Keurig Express should now deliver strong, flavorful coffee with zero sputtering. Mark your calendar for the next descaling date—set a phone reminder 10 days early so you’re never caught with weak coffee. For immediate issues, repeat the needle-cleaning step; it solves 80% of flow problems between deep cleans. Keep this guide handy, and your machine will brew like new for years.


