
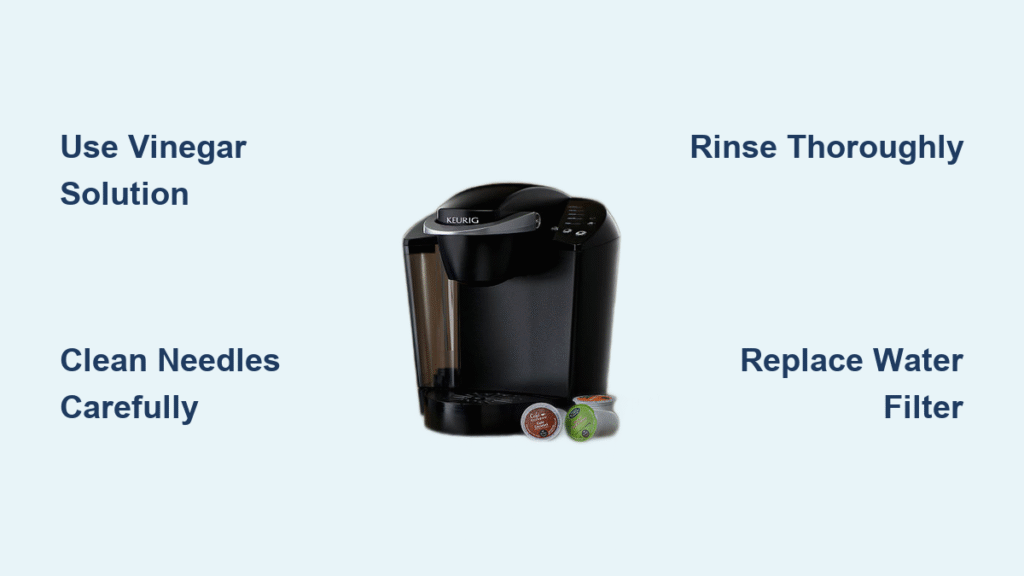
That first morning cup of coffee should be a ritual of pure enjoyment—not a frustrating battle with a sputtering machine that drips half a cup or spits out bitter brew. When mineral deposits from hard water silently clog your Keurig’s internal pathways, vinegar becomes your secret weapon. This natural descaling method dissolves stubborn limescale for pennies, restoring smooth operation without harsh chemicals. In the next few minutes, you’ll learn exactly how to clean Keurig brewer with vinegar safely and effectively, avoiding common pitfalls that could damage your machine.
Most users don’t realize coffee quality directly reflects their machine’s cleanliness. As Carolyn Forté from the Good Housekeeping Institute warns: “Coffee oils and hard water minerals build up inside. Not only can build-up impact the taste of your coffee, but if left unchecked, the minerals can clog the machine to the point where it can stop working.” The good news? A proper vinegar cleaning takes under an hour and costs less than $1, making it the most cost-effective maintenance you’ll ever perform on your brewer.
Why Vinegar Cleans Your Keurig Better Than Store-Bought Descalers
White distilled vinegar’s acetic acid naturally breaks down calcium and magnesium deposits that choke your Keurig’s water lines. Unlike commercial descalers priced at $10-15 per treatment, vinegar delivers identical results without toxic residues. It safely dissolves mineral bonds in needles and heating elements while eliminating bacteria growth—something chemical cleaners often miss.
The critical advantage? Vinegar won’t degrade internal seals when used correctly. Many users accidentally damage their Keurig by using undiluted vinegar or over-descaling. Stick to the 50/50 vinegar-water ratio, and you’ll maintain peak performance without risking gasket deterioration. For daily users in hard water areas, this natural approach becomes essential maintenance—not just a quick fix.
Vinegar Solution Requirements You Must Follow
- Only use white distilled vinegar—flavored or apple cider varieties leave residues that taint coffee
- Mix exactly 16 oz vinegar with 16 oz water (32 oz total) for proper concentration
- Never exceed 50% vinegar—higher ratios corrode rubber seals over time
- Limit descaling to every 3-6 months based on usage frequency
Essential Tools Beyond Vinegar
- Large 12+ ounce mug for collecting solution
- Straightened paperclip for needle maintenance
- Soft microfiber cloth for exterior wiping
- Mild dish soap for removable components
Critical Pre-Cleaning Steps to Avoid Keurig Damage
Skipping these setup steps risks permanent damage to your brewer. Always begin by powering down and unplugging your Keurig—never clean a live machine. Remove every detachable part: water reservoir, drip tray, K-cup holder, and reservoir lid. Crucially, take out the water filter cartridge and set it aside; vinegar permanently saturates filter media, causing lingering taste issues later.
Empty all remaining water from the reservoir and internal lines. This prevents solution dilution and ensures maximum descaling power. If your reservoir has visible white crust along the waterline, gently scrub it with a vinegar-dampened cloth before proceeding—this surface buildup often gets overlooked.
Step-by-Step: Cleaning Your Keurig Brewer with Vinegar
For Models With Dedicated Descale Mode
- Activate descale mode by pressing the 8oz and 12oz buttons simultaneously for 3 seconds (light turns solid red)
- Fill reservoir with your 50/50 vinegar solution to MAX line
- Place large mug on drip tray and lift brew handle
- Brew largest cup size without K-cup, discarding each hot vinegar batch
- Continue until ADD WATER indicator appears, then let machine rest 30-45 minutes
This dwell time is non-negotiable—mineral deposits need extended acid exposure to dissolve completely. During this pause, wipe the exterior with a vinegar-dampened cloth to remove coffee oil splatters.
For Standard Keurig Models
- Fill reservoir with vinegar solution
- Run continuous brew cycles until reservoir empties
- Refill and repeat 2-3 times or until solution runs clear
- Allow 30-minute rest period before rinsing
Never force cycles if flow slows—this indicates heavy buildup requiring additional dwell time. Patience here prevents motor strain.
How to Flush Vinegar Residue from Your Keurig

Incomplete rinsing causes the #1 complaint: vinegar-tasting coffee. After descaling, thoroughly wash the reservoir with warm, soapy water—vinegar leaves invisible film that taints subsequent brews. Refill with fresh water to MAX line and run 12+ rinse cycles using the largest cup size.
Critical checkpoint: Smell each rinse batch. If you detect vinegar odor, continue cycling until the water runs completely neutral. In hard water areas, this often takes 15-20 cycles. Never reinstall the water filter yet—it must be replaced after vinegar exposure.
How to Clean Keurig Needles After Vinegar Descaling
Mineral deposits often remain in needle assemblies even after descaling, causing “slow brew” issues. This step requires extreme care—needles are surgically sharp.
Upper Needle Cleaning
- Unplug machine and locate entrance needle under brew head
- Insert straightened paperclip into both small holes
- Gently rotate to dislodge coffee grounds and scale
- Wipe debris with damp cloth
Lower Needle Cleaning
- Remove K-cup holder and separate from funnel
- Identify razor-sharp exit needle at bottom
- Insert paperclip into exit tube, working debris loose
- Wash all components in soapy water and air-dry
Pro tip: Run 2 extra water-only cycles after needle cleaning to flush dislodged particles. Skipping this causes immediate re-clogging.
Keurig Maintenance Schedule: Prevent Clogs Between Vinegar Cleanings
Daily Habits That Extend Time Between Cleanings
- Replace reservoir water daily (stagnant water accelerates scaling)
- Wipe exterior with damp cloth after each use
- Never leave water sitting in reservoir overnight
Weekly Deep Cleaning Routine
- Wash all removable parts in warm, soapy water
- Scrub drip tray with old toothbrush
- Air-dry components completely before reassembly
Vinegar Descaling Frequency Guide
| Usage Level | Descaling Schedule | Filter Replacement |
|---|---|---|
| Daily (2+ cups) | Every 3 months | Every 2 months |
| Occasional (1-3x/week) | Every 6 months | Every 3 months |
Set phone reminders for March, June, September, and December—seasonal cleaning prevents buildup from reaching critical levels.
Fixing Common Problems After Cleaning Keurig with Vinegar

Red Descale Light Won’t Turn Off
This signals incomplete descaling. First, verify you activated descale mode before starting. Then run 3 additional rinse cycles. If light persists, unplug machine for 30 minutes to reset sensors—often solves false alerts.
Lingering Vinegar Taste in Coffee
Immediately replace the water filter (vinegar permanently contaminates it). Run 5 extra rinse cycles with fresh water. If taste remains, repeat the entire descaling process—residual minerals are likely reactivating vinegar compounds.
Machine Still Brews Slowly
Thoroughly re-clean both needles with a paperclip. Check reservoir for “chalky” deposits along waterline—scrape gently with vinegar-soaked cloth. For persistent clogs, run one more vinegar cycle with 10-minute dwell time between brews.
Keurig Won’t Power On Post-Cleaning
Ensure all components are fully reseated, especially the water reservoir. Check for moisture in electrical contacts—dry with compressed air. Never immerse the base unit in water during cleaning.
Critical Safety Warnings for Vinegar Descaling
Never skip these precautions:
– Always unplug before disassembling components
– Handle needles with needle-nose pliers to avoid cuts
– Let machine cool 45+ minutes before cleaning
– Never submerge main unit in water
The vinegar solution must stay diluted—undiluted vinegar eats through rubber seals within weeks. And never use vinegar more than once quarterly; over-descaling causes more damage than mineral buildup.
Vinegar vs. Keurig Descaling Solution: Which Wins?
Keurig’s official descaling solution follows identical procedures but costs 20x more than vinegar ($0.50 vs $10 per treatment). Both dissolve minerals equally well, but vinegar offers a crucial advantage: it kills bacteria in addition to descaling. The only valid reason to choose Keurig’s product is if you’ve damaged seals through previous overuse of vinegar—its milder formula is less abrasive.
For 99% of users, white vinegar remains the superior choice. Just remember: proper dilution and frequency control make all the difference between a revitalized brewer and a costly replacement.
Regular vinegar descaling transforms a struggling Keurig into a precision coffee machine. By dedicating one hour every 3-6 months to this simple process, you’ll enjoy faster brews, purer flavors, and years of trouble-free service. Your morning ritual deserves that perfect cup—start your next cleaning cycle today and taste the difference immediate mineral removal makes. Remember to set that seasonal reminder; your future self will thank you when your Keurig still performs like new years later.


