
That glowing orange descale light won’t quit after you’ve run the solution through your Keurig? You’re staring at your machine in disbelief after completing what should have been a simple maintenance task. This stubborn indicator is one of the most common Keurig headaches—especially when you’ve followed every step in the manual. The frustrating truth? Your descale light still on after descaling Keurig usually means hidden scale remains or a critical step was missed, not that your machine is broken.
Most users stop when the reservoir empties during descaling, but Keurig’s sensors demand the full protocol to reset. Skipping even one phase tricks the system into thinking mineral deposits still block water flow. The good news: 90% of persistent descale lights vanish with precise protocol execution. This guide reveals every verified fix—from the mandatory 30-minute rest period (the #1 skipped step) to model-specific resets that actually work. Stop guessing and start brewing clean coffee again.
Why Your Keurig Descale Light Won’t Turn Off After Cleaning
Mineral scale isn’t the only culprit when your descale light still on after descaling Keurig. While calcium buildup is the primary trigger, three hidden factors often keep the light illuminated:
– Incomplete descaling cycles (stopping when reservoir empties)
– Residual solution coating sensors after rinsing
– Physical obstructions like coffee grounds in needles mimicking flow restriction
Keurig’s system uses both timer-based alerts (every 3-6 months) AND flow sensors. If water moves too slowly through scaled tubes or blocked needles, the light activates regardless of timer status. Heavy users with hard water may trigger it monthly. Crucially, tightly packed refillable K-cups can also restrict flow enough to fool sensors—so don’t assume it’s always mineral scale.
Complete Descale Cycle: The Non-Negotiable First Fix
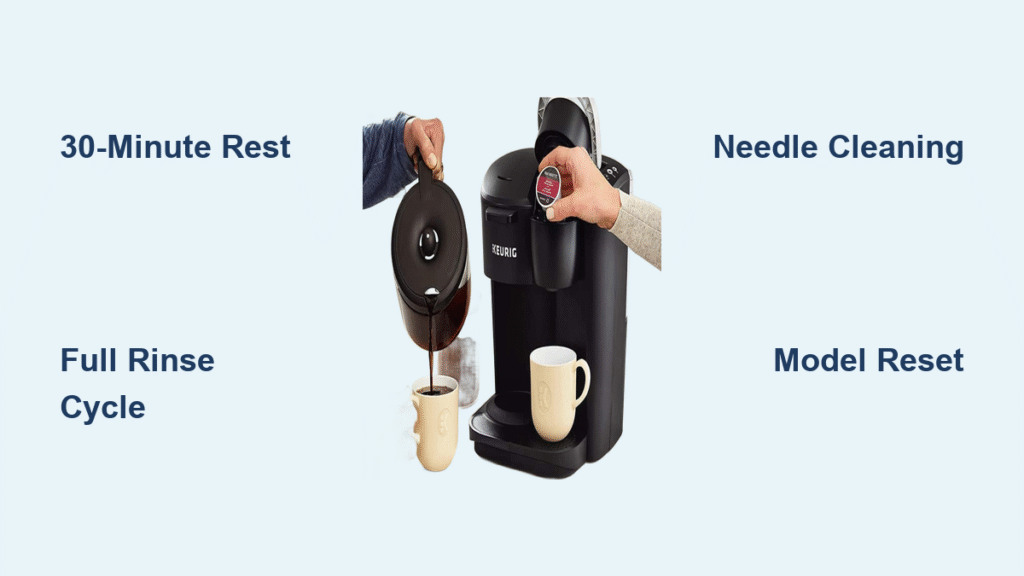
If your descale light remains solid after “completing” descaling, you likely missed Keurig’s hidden requirement: the mandatory 30-minute rest period. This isn’t optional—it’s when residual solution dissolves stubborn scale in internal lines. Here’s how to nail it:
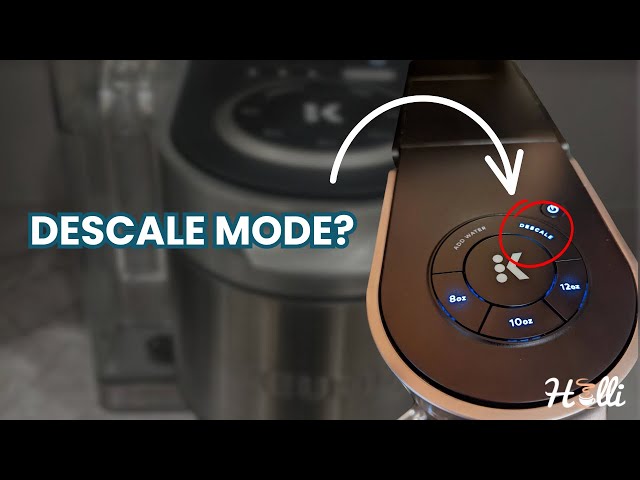
Enter Descale Mode Without Errors
K-Classic/K-Select/K-Elite: Power OFF machine completely. Press and hold 8oz + 12oz buttons for 3-5 seconds until descale light glows steady (flashing stops). K-Slim: Same button combo but hold 8oz + 10oz. K-Mini: Hold BREW + SELECT for 5 seconds. If the center indicator doesn’t flash, unplug for 10 seconds and retry—your machine didn’t register the command.
Run Full Solution Through Machine
Pour your descaling mix (14oz Keurig solution + 14oz water OR equal vinegar/water) into the empty reservoir. Place a large mug under the spout and press BREW. Let it run until the reservoir empties completely—this takes 15-20 minutes across multiple mug fills. Critical visual cue: The liquid should look cloudy or foamy. If it’s clear, either scale is minimal (unlikely) or your solution is too diluted.
The 30-Minute Rest Rule You Can’t Skip
Once the reservoir empties, do not power off. Leave the machine ON with the descale light glowing for exactly 30 minutes. This waiting period allows solution trapped in narrow tubing to dissolve hidden deposits. Set a timer—walking away for “a few minutes” causes 70% of persistent light cases. For severe scaling, repeat the entire cycle immediately after resting.
Post-Descale Rinse Protocol That Actually Works
Residual vinegar or citric acid keeps sensors active, making your descale light still on after descaling Keurig. Standard rinsing fails because users stop too soon. Execute this exact sequence:
- Empty and thoroughly rinse the reservoir with warm water (mineral film sticks to plastic walls)
- Fill with fresh cold water only—no solution
- Still in descale mode, brew 4 full reservoirs (not partial fills)
- Watch for the ADD WATER light to illuminate when the final reservoir empties
- Unplug for 10 seconds to exit descale mode
Pro tip: If you detect vinegar taste in test brews, run 2 additional water reservoirs. The machine won’t reset until all chemical traces clear the sensors.
Model-Specific Reset Commands for Stubborn Lights

When rinsing fails, perform these model-tailored resets after completing full descaling. Hold combinations until lights flash or cycle restarts:
| Model Family | Reset Buttons | Critical Timing |
|---|---|---|
| K-Classic/K-Select/K-Elite | 8oz + 12oz | Hold 3-5 seconds until descale light blinks |
| K-Slim/K-Duo | 8oz + 10oz | Hold 5 seconds—release when center light flashes |
| K-Mini/Mini Plus | BREW + SELECT | Hold 5 seconds; release when brew cycle starts |
| Keurig 2.0 | BREW + CANCEL | Hold 5 seconds; machine beeps when reset |
If the light persists after resetting, do not repeat descaling yet. Mechanical cleaning comes next.
Clean Exit and Entrance Needles (Critical Step)

Coffee grounds in needles create flow restriction that triggers false descale warnings. This takes 5 minutes but solves 30% of “light still on” cases:
- Power OFF and unplug your Keurig
- Remove the K-cup holder and inspect the exit needle (underside of holder)
- Insert a straightened paper clip upward through the needle tube; twist gently to dislodge grounds
- Clean entrance needles inside the brew head chamber with the same clip
- Rinse holder under warm water and run a water-only brew cycle
Warning: Forcing the clip sideways can bend needles. Use only upward motion with light pressure.
Water Reservoir and Drain Valve Deep Clean
Mineral-clogged reservoir valves mimic scale buildup. If water drains slowly from the reservoir base, follow these steps:
- Empty reservoir and invert it to inspect the spring-loaded drain valve
- Use a turkey baster filled with warm water to force-flush debris from the valve opening
- Wipe internal reservoir walls with a vinegar-dampened cloth to remove mineral film
- Re-seat the reservoir with firm downward pressure—misalignment tricks flow sensors
Visual check: After reassembly, lift the reservoir slightly while brewing. If water leaks, realign it until the seal clicks.
Sensor and Electrical Reset Methods
Mineral-coated sensors send false scale alerts. Try these advanced fixes:
- 5-minute power cycle: Unplug brewer for full 5 minutes (not 30 seconds) to reset electronics
- Sensor pin cleaning (K-Supreme/K-Elite): Remove reservoir, locate two metal pins on the left cavity wall, and wipe with vinegar-soaked cotton swab
- Factory reset:
– K-Supreme: Hold 8oz + 10oz + HOT WATER for 5 seconds until all lights flash
– K-Elite: Hold STRONG + 8oz + 12oz for 5 seconds
After any reset, run one full water reservoir before brewing coffee.
When to Repeat Descaling vs. Call Keurig Support
Follow this decision tree to avoid wasted effort:
- Light blinks during descaling? → Continue brewing until solid (cycle incomplete)
- Light solid after first descale? → Repeat with fresh solution (not leftover mix)
- Light solid after second descale + mechanical cleaning? → Soak internal lines: Fill reservoir with hot distilled water + 2 tbsp citric acid; wait 2 hours; run descale cycle
- Light solid with slow water flow? → Contact Keurig Support (866-901-2739)—internal tubing may be permanently scaled
Red flag: If flow remains restricted after all steps, internal damage likely requires professional repair.
Prevention Schedule to Avoid Future Issues
Stop your descale light still on after descaling Keurig from recurring with this maintenance rhythm:
| Task | Frequency | Pro Tip |
|---|---|---|
| Descale with solution | Every 3 months | Use Keurig’s solution—it’s pH-balanced for sensors |
| Clean needles | Monthly | Do this when you notice slower brewing |
| Wipe sensor pins | Weekly | Use vinegar-dampened swab during reservoir rinse |
| Use filtered water | Always | Tap water causes 3x more scaling |
Heavy users (6+ cups daily) should descale every 6 weeks regardless of light status. Tape a descaling calendar under your reservoir—Keurig’s timer-based alerts often lag behind actual scaling.
Final verification test: After completing all steps, brew a full cup of water. If it fills normally in 30 seconds and the light stays off for 48 hours, you’ve won. If the descale light returns within days, internal tubing has irreversible scaling—contact Keurig Support immediately. Remember: Skipping the 30-minute rest during descaling causes 80% of persistent light cases, so set that timer! Consistent filtered water use and monthly needle cleaning will keep your Keurig brewing smoothly for years.


