
That first morning cup tastes stale, or worse—like wet cardboard. You check the brew date on your coffee pods, refill the water tank, but the problem persists. What you’re not seeing is the hidden culprit: your Keurig’s cup holder has become a graveyard for dried coffee grounds, mineral deposits, and potentially mold. This critical component traps residue from every brew cycle, directly contaminating your beverage and compromising your health. Left uncleaned, it turns your coffee maker into a bacterial breeding ground that ruins flavor and risks illness. In this guide, you’ll learn exactly how to deep-clean your Keurig cup holder safely, recognize early warning signs of buildup, and implement a foolproof maintenance system that guarantees fresh-tasting coffee every time.
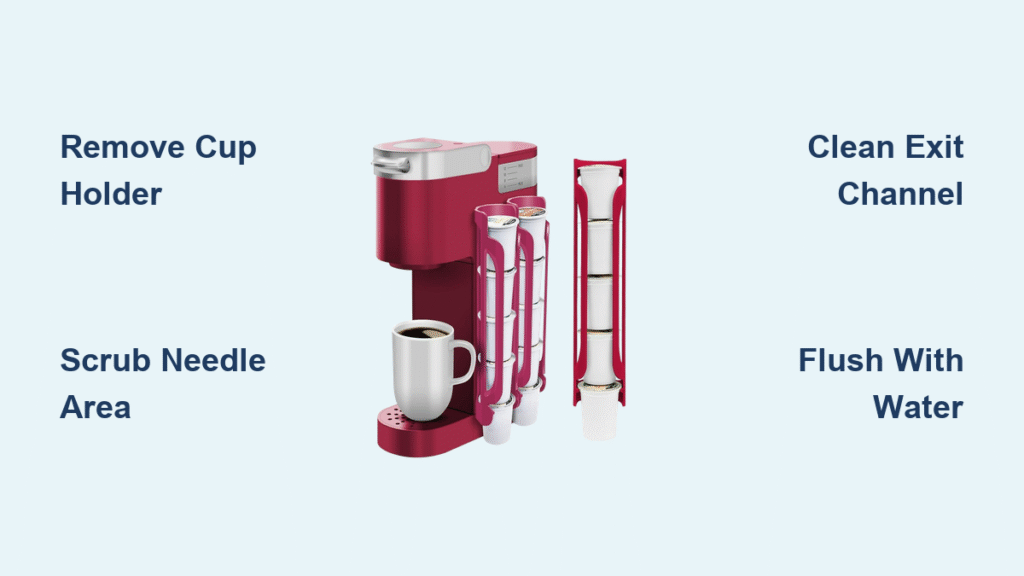
Remove Cup Holder Without Damaging Your Machine

Power down and unplug your Keurig immediately before touching any components. This non-negotiable safety step prevents electrical hazards and burns from residual heat in the heating element. Wait 20-30 minutes for internal parts to cool completely—rushing this risks scalding your hands on hot water reservoirs.
Lift straight up with firm pressure to remove the entire cup holder assembly. Don’t twist or wiggle; most models release cleanly with vertical motion. Expect a cascade of old coffee grounds when lifting—this visual proof of internal buildup confirms why cleaning is urgent. Place the assembly on a paper towel-lined tray to catch debris and prevent countertop messes.
Why Forcing the Holder Causes Costly Damage
Never yank or use tools to pry out the cup holder. Forcing it can crack plastic components or dislodge the internal puncture needle, requiring expensive replacements. If resistance occurs, gently rotate the assembly 1/4 turn clockwise while lifting—this releases hidden latches on newer models. Check for trapped K-Cup remnants wedged beneath the holder; use tweezers (not fingers) to remove them before proceeding.
Deep Clean Upper Holder Components
Rinse immediately under warm running water to dissolve loose coffee residue. Hold the upper holder with the puncture needle facing downward—this prevents water from forcing debris deeper into the exit channel. Focus your stream directly on the sharp metal needle where grounds accumulate most heavily, as clogged needles cause incomplete brewing.
Scrub mineral deposits with a vinegar-soaked toothbrush using tight circular motions. Dip an old soft-bristled toothbrush in equal parts white vinegar and water, then target the rubber gasket seal and needle base where limescale hides. For stubborn buildup, wrap a vinegar-dampened cloth around the needle area for 8 minutes before scrubbing—this dissolves calcium without harsh chemicals.
Critical Mistake: Ignoring the Exit Channel
Most users miss the tiny exit hole beneath the puncture needle—the #1 source of bitter coffee taste. Insert a toothpick wrapped in a vinegar-soaked paper towel into this channel, rotating gently to clear coffee oil blockages. Rinse repeatedly until water flows freely and runs completely clear. Any remaining residue will taint your next 5-7 brews.
Clean Lower Holder Thoroughly

Disassemble removable funnel sections by twisting counterclockwise—many models have a detachable lower portion that reveals hidden buildup zones. Soak these pieces in warm soapy water for 5 minutes to loosen coffee oils before scrubbing. Pay special attention to the tapered funnel walls where dark, sticky residue collects and harbors bacteria.
Eliminate coffee oil film with dish soap using circular scrubbing motions. Apply Dawn dish soap directly to your toothbrush (no water dilution) for maximum grease-cutting power. Target the drainage grooves along the funnel’s base—this is where oils pool and turn rancid. Rinse each component under running water while squeezing the rubber gasket to flush trapped particles.
Warning: Soap Residue Ruins Your Next Brew
Insufficient rinsing leaves soap film that creates chemical-tasting coffee. Hold components up to light while rinsing; any cloudy film means repeat washing. Final rinse must produce crystal-clear water with zero suds. Air-dry all pieces upside down on a clean towel for 20 minutes—never reassemble damp parts.
Clean Hidden Brewing Areas

Scrub the chamber beneath the holder while it’s removed. Use your vinegar-dipped toothbrush to clean the circular platform where the cup holder seats—this area traps splashed coffee that dries into a mold-prone film. Focus on the small drainage holes around the platform’s edge; blocked holes cause overflow and electrical hazards.
Wipe the drip tray with soapy water immediately after cup holder removal. This tray catches coffee spills that evaporate into sticky residue, breeding mold in 48 hours. Remove the tray completely, soak in warm water for 10 minutes, then scrub corners with your toothbrush. Dry thoroughly before reinserting—damp trays warp and crack over time.
Pro Tip: Prevent Stains on Exterior Surfaces
Wipe coffee splatters from the machine’s exterior before they dry using a vinegar-dampened cloth. Dried stains require abrasive scrubbing that damages plastic finishes. Target the cup platform edges and handle crevices where liquid seeps during brewing.
Reassemble and Test Properly
Dry all components completely before reassembly—this prevents mold growth in hidden seams. Shake out excess water, then pat dry with a lint-free cloth. Pay special attention to the rubber gasket groove; trapped moisture here causes leaks during brewing. Reassemble parts in reverse order of disassembly, ensuring the lower funnel clicks securely into the upper holder.
Flush residual vinegar with 3 water-only cycles. Fill the reservoir with fresh water, brew a full cup without a K-Cup, and discard. Repeat twice more—the first cycle removes cleaning residue, the second eliminates vinegar taste, and the third guarantees pure coffee flavor. Never skip this step; leftover vinegar ruins your next brew.
Troubleshooting: Holder Won’t Seat Correctly
If the cup holder doesn’t click into place, check for misaligned funnel pieces or trapped debris in the machine’s seating channel. Remove and reinsert slowly while applying even downward pressure. A properly seated holder sits flush with the machine—no gaps or wobbling.
Establish a Foolproof Cleaning Schedule
Clean weekly if you brew daily—this prevents hard-to-remove buildup. Set a recurring phone alarm for “Keurig Cleaning Day” every Sunday morning. For light users (2-3 cups/week), bi-weekly cleaning suffices but monitor for early warning signs.
Descaling quarterly is non-negotiable for mineral-heavy areas. Hard water regions require monthly descaling using Keurig’s odorless solution (not vinegar) to avoid taste contamination. Always run 2 full reservoir rinse cycles after descaling—residual solution creates metallic-tasting coffee.
Calendar Hack: Track Maintenance Visually
Place a small sticker on your Keurig reservoir after each cleaning. Different colors for weekly (blue) and quarterly (red) tasks create instant visual reminders. This eliminates guesswork about when maintenance was last performed.
Spot Warning Signs Before Damage Occurs
Taste changes demand immediate action. Bitter or sour notes indicate coffee oil buildup, while papery flavors signal mold growth. If coffee grounds appear in your cup, the puncture needle is clogged—stop brewing immediately to prevent machine damage.
Visible mold requires emergency cleaning. Black or green spots inside the holder mean you’ve waited too long. Soak all components in undiluted vinegar for 30 minutes before scrubbing, then increase cleaning frequency to twice weekly until resolved. Never brew with visible mold—this risks respiratory illness.
Proactive Inspection Routine
After removing your K-Cup, shine a flashlight into the holder for 10 seconds. Look for: white mineral crust (hard water), dark coffee sludge (oil buildup), or fuzzy patches (mold). Catching these early means 5-minute cleanings instead of 30-minute deep cleans.
Choose Safe Alternative Cleaners
Use odorless descaling solution if vinegar taste lingers. Keurig’s official product works identically to vinegar but leaves zero aftertaste—critical for sensitive palates. Mix one packet with 32oz water, run through the machine, then complete 3 rinse cycles.
Try citric acid for gentle descaling. Dissolve 1 tablespoon in 32oz water for a natural mineral remover that’s safer for frequent use. Unlike vinegar, it won’t degrade rubber gaskets over time. Avoid lemon juice—it leaves citrus oils that alter coffee flavor for days.
Hard Water Survival Kit
Install a Keurig water filter cartridge (replaced every 2 months) to slash mineral buildup by 80%. Pair with filtered tap water instead of bottled—this reduces plastic waste while improving taste. In extreme hard water zones, use 50% distilled water to prevent rapid scaling.
Prevent Future Buildup with Daily Habits
Wipe the cup platform daily with a vinegar-dampened cloth after your last brew. This removes fresh coffee splatter before it dries into stubborn residue. Never use abrasive sponges—they scratch surfaces where bacteria hide.
Never leave used K-Cups in the holder. Residual moisture in discarded pods breeds mold in 24 hours. Empty the holder immediately after brewing, then run a quick water-only cycle to flush coffee oils.
Game-Changing Water Hack
Fill your reservoir with cold water only—hot tap water contains more dissolved minerals that accelerate scaling. Always use fresh water each morning; stagnant water develops bacteria that circulate into your cup.
Troubleshoot Lingering Issues
Fix persistent vinegar taste by brewing 2 extra rinse cycles with cold water (not hot). Cold water better dissolves residual vinegar molecules trapped in plastic. If taste remains, switch to citric acid solutions for future cleanings.
Eliminate recurring mold by extending vinegar soak time to 45 minutes and ensuring 100% dryness before reassembly. Place components on a drying rack in direct sunlight for 1 hour—UV rays kill residual spores. Increase cleaning frequency to every 5 days until resolved.
Needle Clog Emergency Fix
When coffee flow slows drastically, unplug the machine and use a paperclip to gently clear the puncture needle. Insert vertically without twisting, then run 3 water cycles. If flow doesn’t improve, the needle may be damaged—contact Keurig support immediately.
Maintain Long-Term Machine Health
Replace water filters every 60 days without fail—expired filters harbor bacteria that flow into your coffee. Mark replacement dates on your calendar, and store spare filters in a sealed bag to preserve freshness.
Store cleaning supplies together in a dedicated “Keurig Kit” (vinegar, toothbrush, cloth). Keep it near your coffee maker so cleaning takes 2 minutes instead of becoming a chore.
Ultimate Performance Tip
Brew a water-only cycle after every flavored coffee or hot chocolate pod. Sugary residues crystallize rapidly, causing clogs. This 30-second habit prevents 90% of major cleaning emergencies.
Your Keurig cup holder cleaning routine directly determines whether you get café-quality coffee or a health hazard in your mug. By following these specific, actionable steps—removing components safely, targeting hidden buildup zones, and establishing a maintenance rhythm—you’ll eliminate bitter tastes and mold risks permanently. Remember the critical trio: weekly soap-and-water cleans, quarterly descaling, and daily wipe-downs. Implement just one change today—like setting that recurring phone alarm—and you’ll taste the difference tomorrow. A pristine cup holder means every brew delivers the pure, vibrant coffee experience you deserve, cup after cup.


