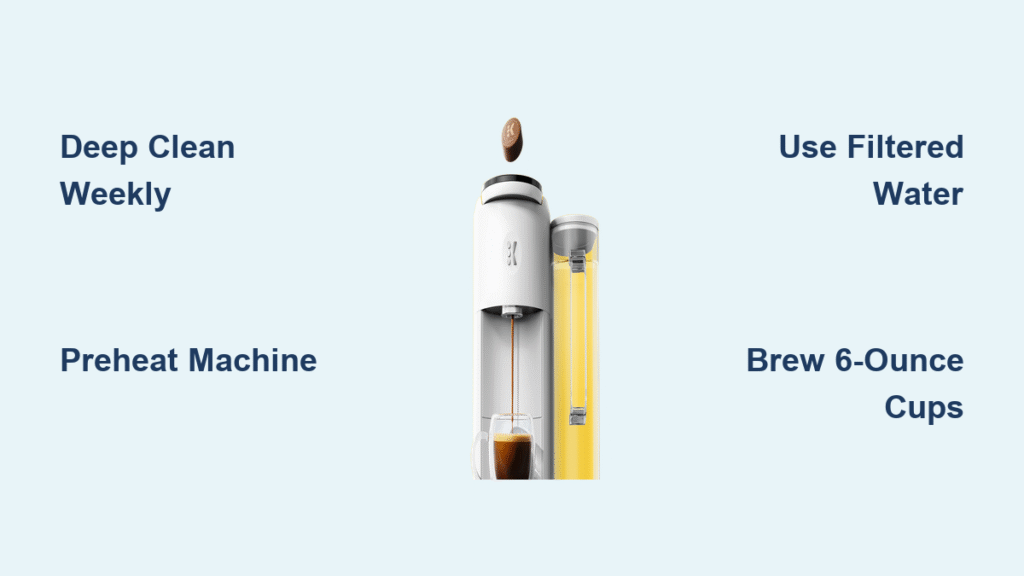
That blinking brew button while you’re half-awake? The weak coffee that tastes like disappointment? Mastering how to load a Keurig correctly solves 95% of daily frustrations before your first sip. Whether you’re wrestling with a K-Classic, K-Duo Plus, or K-Mini, this guide cuts through the confusion with model-specific steps. Forget generic manuals—here’s exactly where to position pods, how much water prevents leaks, and why that click matters more than you think. You’ll brew consistently bold coffee in under 90 seconds, every single morning.
First-Time Setup That Prevents Future Headaches
Skip this step, and you’ll battle residue and weak coffee for months. Place your Keurig on a flat, stable counter near a grounded three-hole outlet—never on a wobbly table. Peel off all shipping tape, including hidden strips inside the water reservoir and pod chamber. New machines often ship with plastic guards blocking the puncture needles; missing these causes “brew failed” errors.
Now run a critical rinse cycle: Fill the reservoir with cold filtered water (distilled works too), place a 10+ oz mug under the spout, lift the brew handle, and leave it empty. Close the handle firmly until you hear a distinct click, then press the largest cup-size button. Discard this hot water—it flushes manufacturing oils and plastic particles. This isn’t optional; skipping it guarantees that “new machine” plastic taste in your coffee.
Water Loading Methods by Model Type

Removable Reservoir Models (K-Classic, K-Select, K-Elite)
Lift the reservoir straight up—no twisting—and rinse it under cool water to remove dust. Fill only to the MAX FILL line (typically 48–75 oz). Overfilling causes leaks when the water heats and expands. Pro tip: Use distilled water exclusively if you live in a hard-water area; it slashes scale buildup by 70% compared to tap water. When reinserting, push down until you feel resistance—most users stop too early, leaving gaps that trigger “add water” errors.
Single-Serve Reservoir Models (K-Mini, K-Slim)
Open the top lid fully. Measure water using your actual coffee mug: Pour 6–12 oz directly into the rear well, stopping ½ inch below the MAX line molded into the plastic. Close the lid with a firm snap—loose lids cause air bubbles that halt brewing. Why measure in your mug? These models draw only what you added, so guessing leads to half-empty cups or overflow.
K-Duo Plus Carafe Brewing
Fill the shared reservoir to the MAX FILL line (60 oz). Pull out the ground-coffee drawer and add one level tablespoon of medium-grind coffee per six ounces of finished carafe coffee (e.g., ten tablespoons for a full 12-cup pot). Critical step: Push the drawer until it snaps audibly closed. A partially seated drawer is the #1 reason K-Duo machines refuse to brew. Place your carafe on the heating plate before pressing buttons—starting without it triggers safety errors.
Pod Loading Without Costly Errors
Standard K-Cup Insertion
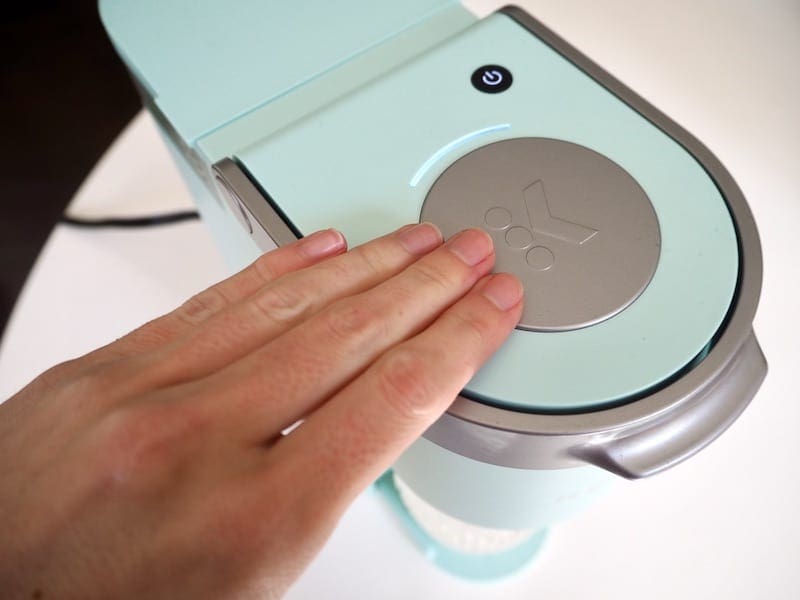
Lift the brew handle all the way up. Drop the K-Cup in foil-side up—never pre-puncture it. The pod should sit flat on the bottom needle without wobbling; tilting causes leaks. Close the handle with deliberate force until you hear a solid click. If your display shows “Ready to Brew,” you’ve seated it correctly. Select 6–8 oz for bold coffee (not the max size!), press STRONG if available, then hit brew.
My K-Cup Reusable Filter Technique
Unscrew the filter cap and add exactly two tablespoons of medium-grind coffee. Never tamp or compress the grounds—this restricts water flow, creating weak coffee. Screw the cap on tightly until the threads fully engage; loose caps spray grounds everywhere. Insert like a regular pod, brew immediately, and rinse the filter within 5 minutes of use. Leftover damp grounds turn sour and clog the filter.
Travel Mug Brewing Setup
Remove the drip tray by pulling it straight out—this creates 7 inches of clearance for tumblers. Position your mug dead center under the spout; off-center placement causes splashing on tall cups. Select only 10–12 oz sizes (never 14 oz on K-Elite models), as larger volumes overwhelm travel mugs.
Fix These Loading Mistakes Immediately
Blinking Brew Button? Handle Isn’t Fully Closed
Your brew button flashes but won’t start? 90% of the time, the handle isn’t clicked shut. Push down harder until you feel and hear the latch engage. On K-Duo models, the ground-coffee drawer must snap closed—run your finger along its edge to confirm full seating. If “Prime” appears, run two water-only cycles to purge air bubbles from the lines.
Water Leaking From the Top? You Overfilled the Reservoir
Water pooling around the base means you exceeded the MAX FILL line. Pour out excess water immediately and dry the exterior. Leaks during brewing usually happen when you select a 12-oz brew for a 6-oz mug—match the cup size to your vessel.
Weak Coffee? Wrong Cup Size Selection
Watery coffee means you chose too large a brew size. For standard K-Cups, always select 6–8 oz (not 10+ oz) for full strength. Press the STRONG button to slow extraction. If using distilled water exclusively, alternate with filtered tap water—pure distilled lacks minerals needed for optimal flavor extraction.
Daily Loading Maintenance That Extends Machine Life
Post-Brew Cleanup in 30 Seconds
Wait 10 seconds after brewing stops, then lift the handle to eject the pod. Used pods stay hot for minutes—drop them directly into recycling (peel foil, compost grounds, recycle cup). Never leave standing water in the reservoir overnight; empty it and leave the lid open to prevent mold. Wipe the drip tray with a damp cloth daily to remove coffee splatter that hardens into clogs.
Weekly Deep Clean Checklist
Remove the reservoir and lid, then hand-wash with mild soap—never dishwasher. Rinse thoroughly to avoid soap residue that taints coffee. Use a cotton swab to clean the pod chamber’s puncture needles (clogged needles cause “add water” errors). Wipe the water well with vinegar weekly if you use tap water; skip this if you stick to distilled.
Advanced Loading Hacks for Perfect Coffee
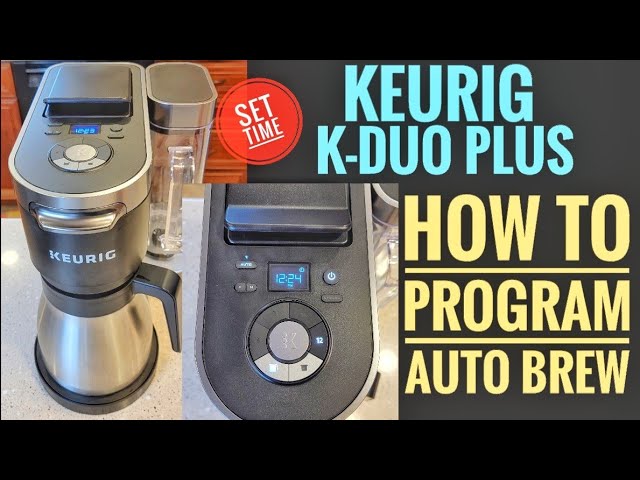
Auto-Brew Programming (K-Duo Plus/K-Supreme)
Fill the reservoir to MAX, load the coffee drawer with grounds, and place the carafe on the plate. Press AUTO, then use H/M buttons to set your wake-up time (e.g., 6:30 AM). Press the blinking BREW button to confirm—the clock icon must illuminate. If it doesn’t, repeat within 10 seconds. This works up to 24 hours ahead, but never program an empty reservoir.
Strength Customization Beyond the STRONG Button
For bolder single-serve coffee, use dark roast K-Cups in the 6-oz setting—smaller volumes concentrate flavor. With reusable filters, add ¼ teaspoon extra coffee grounds. For carafe brewing, increase grounds by one tablespoon (use 11 Tbsp for 12 cups) and engage STRONG mode. Pro tip: Pre-heat your mug with hot water before brewing; cold mugs cool coffee instantly, muting flavor.
Mastering how to load a keurig transforms it from a temperamental appliance into your most reliable morning ally. Remember: the click when closing the handle, the MAX FILL line on your reservoir, and matching cup sizes to your mug are non-negotiable for consistent results. Implement these model-specific steps today, and you’ll never waste another K-Cup chasing that perfect cup. For ongoing success, alternate distilled and filtered water, clean puncture needles weekly, and always pre-rinse new machines—your taste buds will thank you before the coffee’s even poured.