
Waking up to the aroma of freshly brewed coffee without lifting a finger is one of life’s simple pleasures—and your Black and Decker coffee maker can deliver this daily luxury with its auto-program feature. Learning how to auto program black and decker coffee maker models properly ensures you’ll never miss your morning caffeine fix again. Whether you’re rushing to work or enjoying lazy weekend mornings, programming your coffee maker takes just a few minutes but pays off with months of perfectly timed brews.
The frustration of setting your coffee maker only to find it didn’t brew when expected is all too common, usually due to simple oversights in the programming process. This guide walks you through every step of auto programming your Black and Decker coffee maker, explains model-specific variations, and helps you troubleshoot common issues that prevent automatic brewing. By following these instructions, you’ll have your coffee maker programmed to deliver hot, fresh coffee exactly when you need it—every single time.
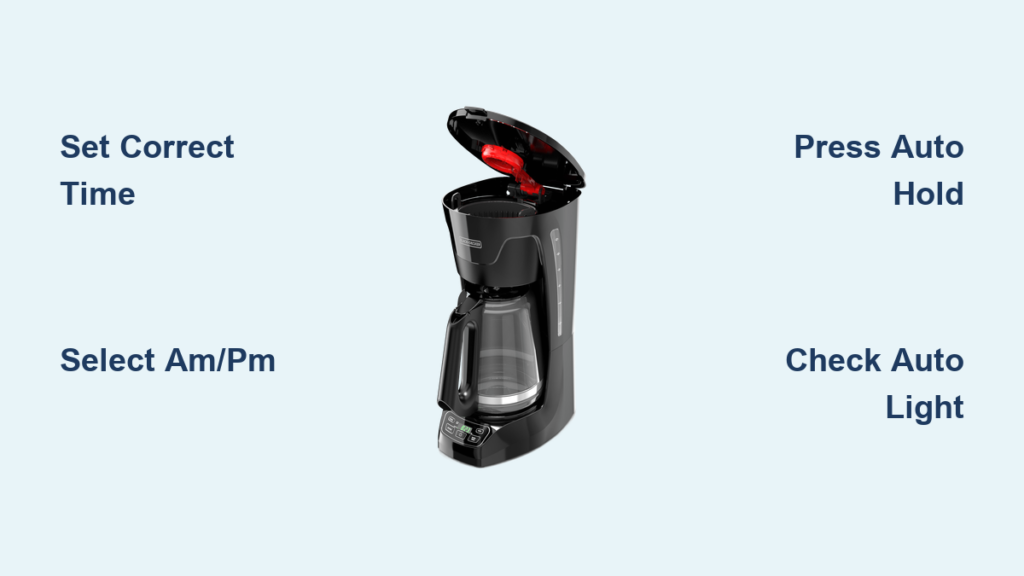
Set Your Current Time Correctly Before Programming
The most common reason coffee makers fail to brew at the programmed time is an inaccurate current time setting—this single mistake derails the entire auto-program process. Your Black and Decker coffee maker’s internal clock must display the exact current time because the auto-brew function calculates when to start based on this reference point. If your clock shows 6:00 AM when it’s actually 7:00 AM, your coffee will brew an hour later than expected.
Press the “CLOCK,” “TIME,” or “SET” button until the display begins flashing or shows a blinking colon. Now carefully adjust the time using the hour and minute buttons—typically marked with arrows, “+” and “-” symbols, or labeled “HR” and “MIN.” Remember that most Black and Decker models use a 12-hour format, so pay special attention to selecting the correct AM or PM period. If you’re in a hurry, press and hold the adjustment buttons for faster time changes. Once you’ve matched the current time, press the “CLOCK” or “ENTER” button again to save your settings—the flashing colon should stop, confirming the time is stored.
Why Your Clock Might Reset Unexpectedly
If your coffee maker frequently resets to “12:00” after brief power outages, the internal backup capacitor is likely failing. Most Black and Decker models include a capacitor that preserves settings for 5-15 minutes during power interruptions, but this component degrades over time. When this happens, you’ll need to reset both the clock and programming after every power disruption. Some models have user-replaceable backup batteries—check your manual for specifics. Until you replace the capacitor or battery, keep a backup alarm clock nearby to remind you to reprogram after power returns.
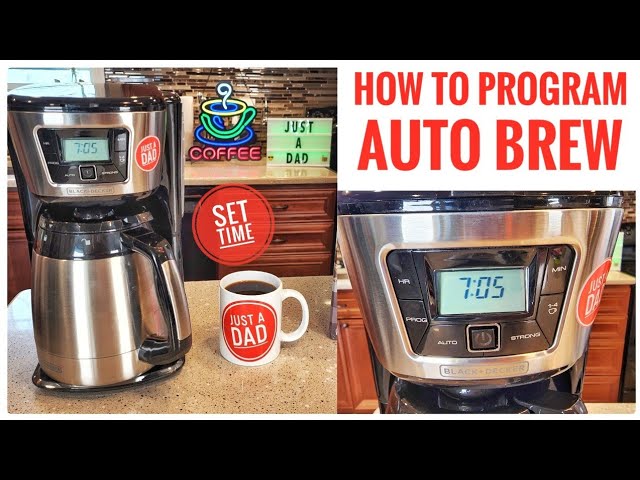
Program Your Exact Brew Time Without Errors

With the current time set accurately, you’re ready to program when you want your coffee to brew—this is where the magic happens. Press the “PROG,” “PROGRAM,” or “SET” button to enter programming mode, indicated by a flashing display or “PROG” message. Now navigate to the hour setting using the hour adjustment button, being extremely careful with AM/PM selection—this is the #1 mistake users make when programming fails.
Fix Common Time Selection Mistakes
Many users accidentally set evening times for morning brewing (or vice versa) because they overlook the AM/PM indicator. Before confirming your brew time, visually verify whether “AM” or “PM” appears on the display. If programming for 6:30 AM, ensure “AM” shows—not “PM.” If your display doesn’t clearly indicate AM/PM, count backward from noon: times before 12:00 are AM, after are PM. Once you’ve selected the correct hour and minute, press and hold the “AUTO” or “AUTO START” button for 2-3 seconds until you hear a confirmation beep or see the “AUTO” indicator light up—this final step is crucial and often missed.
Activate Auto Brew Mode Properly
Programming the time alone isn’t enough—you must actively engage the auto function for scheduled brewing to occur. After setting your brew time, look for the “AUTO” indicator light on your control panel. If it’s not illuminated, press the “AUTO” button until it lights up, confirming your coffee maker is in standby mode waiting for the programmed time. During this waiting period, the display will show the current time, not your programmed brew time, which confuses many first-time users.
Verify Auto Mode Before Leaving
Before going to bed or leaving home, double-check that the “AUTO” indicator is illuminated—this visual confirmation prevents morning disappointment. Some models emit a soft beep when auto mode activates, but don’t rely solely on sound as it may be too quiet to hear from another room. If the “AUTO” light won’t stay on, ensure you pressed and held the button for the full 2-3 seconds required for activation. Brief presses often don’t register with the control panel, leaving your coffee maker in manual mode despite correct time programming.
Program Specific Black and Decker Models Correctly
While most Black and Decker coffee makers follow similar programming procedures, specific models have unique button sequences that must be followed precisely for successful auto-programming.
CM1160B and CM1161B Programming Steps
For these popular models, press “SET TIME” and use the “+” and “-” buttons to adjust the current time, then press “SET TIME” again to confirm. Next, press “SET PROG” to enter brew time mode, adjust hours and minutes, then press “SET PROG” once more to save. Finally, press “AUTO ON” to activate—when the green indicator illuminates, your programming is complete. These models feature one of the most intuitive interfaces in the Black and Decker lineup, with clear visual feedback at each step.
Standard 12-Cup Programmable Models
For most Black and Decker 12-cup models, press and hold the “PROGRAM” button for about 3 seconds until the display flashes. Set your desired brew time using the hour and minute buttons, then press “PROGRAM” again to save. The “AUTO” indicator will light automatically. These models include a handy “SNOOZE” function—press the button repeatedly to add 1-2 hour increments to the current time for quick delayed brewing without manual time calculation.
Compact and Single-Serve Model Programming
Compact models often feature a single “DELAY” button that adds one-hour increments to the current time with each press. Set your current time first, then press “DELAY” until the display shows your desired brew time. Other compact models require pressing and holding the “AUTO” button for 3 seconds to enter programming mode before setting the time. If unsure which method applies to your machine, consult your manual—many compact models have simplified programming with fewer steps than full-size units.
Fix Common Auto-Programming Failures Immediately

Even with correct programming, issues can prevent your coffee maker from brewing automatically—knowing how to troubleshoot saves morning frustration.
Why Your Coffee Maker Won’t Activate Auto Mode
If the “AUTO” indicator won’t illuminate after programming, first verify your coffee maker is plugged into a working outlet by testing with another device. Ensure you pressed and held the “AUTO” button for the full 2-3 seconds required—many users press it too briefly. Confirm the programmed time is set for a future moment, not a time that has already passed today. If your display shows “12:00” or is constantly flashing, reset the clock before attempting to reprogram. If problems persist, unplug the unit for 30 seconds to reset the internal electronics before trying again.
Why Coffee Brews at the Wrong Time
The most frequent cause of incorrect brewing times is an improper AM/PM designation when setting your brew time. Daylight saving time changes can also throw off your schedule—always verify clock accuracy after time changes. If your coffee brews consistently 12 hours off, you’ve likely selected the wrong period indicator. The solution is simple: reset both the current time and programmed brew time, carefully confirming AM/PM at each step. Reset your coffee maker’s clock monthly against a reliable time source to maintain accuracy.
Maximize Advanced Auto-Programming Features

Many Black and Decker models offer additional programming capabilities beyond basic time-based brewing that can enhance your coffee experience.
Program Brew Strength with Auto Start
Several models let you combine brew strength selection with auto programming. Fill the water reservoir to your desired level, add coffee grounds, select your preferred strength (regular, strong, or bold), then program the auto brew time as usual. When the programmed time arrives, your coffee maker will brew at the strength you selected, ensuring your morning cup tastes exactly how you like it—no manual adjustments needed.
Use Multiple Program Settings for Different Schedules
Premium models support multiple programmable brew times, allowing different schedules for weekdays versus weekends. These machines feature “PROG 1” and “PROG 2” buttons—set Program 1 for weekday mornings and Program 2 for weekend mornings, then activate the appropriate program each day. This eliminates the need to reprogram your coffee maker when your schedule changes, providing consistent convenience regardless of the day.
Maintain Reliable Auto-Programming Performance
Regular maintenance ensures your coffee maker’s programming functions work reliably over time. Descale your machine monthly with white vinegar or commercial cleaner to remove mineral buildup that affects heating performance. In hard water areas, descale every month; in soft water regions, every 3-6 months suffices. Keep the control panel buttons free of coffee residue by wiping with a damp cloth—avoid excessive moisture near buttons to prevent malfunctions.
Professional technicians report that well-maintained Black and Decker programmable coffee makers operate reliably for 5-10 years. The mechanical durability of the programming buttons typically exceeds that of touch-sensitive panels found in some competing models, which can fail due to coffee residue penetration. Consistent maintenance preserves both programming functionality and brewing quality for years of trouble-free operation.
Quick Auto-Programming Reference for Busy Mornings
When you need to program your coffee maker quickly: plug in the machine and verify the clock shows correct time → press and hold “PROGRAM” until display flashes → set brew time carefully noting AM/PM → press “PROGRAM” again to save → press “AUTO” to activate → confirm “AUTO” indicator is illuminated. Remember these critical points: always set current time first, AM/PM designation is essential, hold buttons for 2-3 seconds, verify “AUTO” light is on, reprogram after power outages, and descale monthly. Following these simple steps ensures your Black and Decker coffee maker delivers perfectly timed coffee day after day.


