
Cold brew coffee has surged in popularity for its smooth flavor and lower acidity, but commercial producers and home enthusiasts face a critical food safety challenge: how to safely extend shelf life without compromising quality. Without proper treatment, cold brew becomes a breeding ground for harmful bacteria that can cause serious foodborne illnesses. Pasteurization is the scientifically proven method to eliminate pathogens while preserving the unique characteristics of cold brew. In this guide, you’ll learn exactly how to pasteurize cold brew coffee safely at home or in small-scale production, with precise temperature guidelines, equipment requirements, and common pitfalls to avoid. By following these evidence-based procedures, you’ll transform your cold brew from a short-lived beverage into a shelf-stable product that maintains its distinctive flavor profile for weeks.
Why Pasteurization Is Essential for Cold Brew Safety
Cold brew’s extended steeping process creates ideal conditions for bacterial growth that hot-brewed coffee naturally avoids. Unlike traditional coffee brewed with near-boiling water that kills pathogens immediately, cold brew sits at room temperature or refrigerated conditions for 12-24 hours, allowing microbes to multiply. The FDA considers cold brew a potentially hazardous food due to its pH level (typically between 5-6), which falls within the danger zone where pathogens thrive. Without proper pasteurization, your cold brew could harbor dangerous bacteria like E. coli or Salmonella that cause severe gastrointestinal illness. Commercial producers face strict regulatory requirements for cold brew safety, but even home brewers who share their creations need to understand these risks. The consequences of skipping pasteurization aren’t just theoretical—multiple documented cases of foodborne illness outbreaks have been traced back to improperly handled cold brew coffee.
The Critical Temperature Threshold for Cold Brew Pathogens
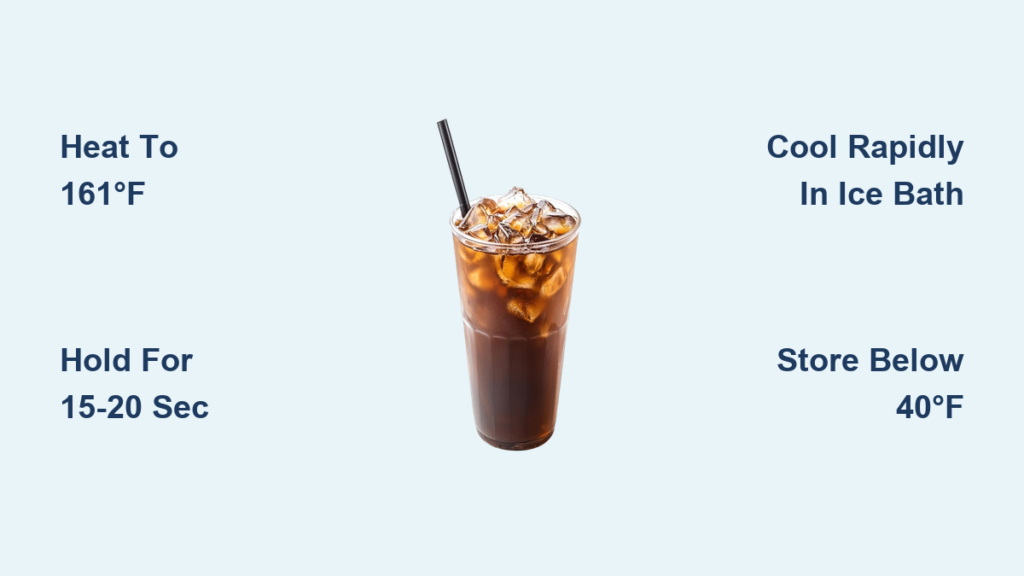
Pasteurization works by applying precise heat for specific durations to destroy harmful microorganisms without cooking the coffee. For cold brew, the target is eliminating pathogens while preserving delicate flavor compounds that degrade at higher temperatures. Research shows that heating cold brew to 161°F (71.7°C) and holding it at that temperature for 15-20 seconds effectively destroys common coffee contaminants. This method, known as HTST (High-Temperature Short-Time) pasteurization, strikes the perfect balance between safety and quality preservation. Going beyond 175°F risks “cooking” the coffee, creating off-flavors and diminishing the smooth characteristics that make cold brew desirable. Crucially, pasteurization differs from sterilization—you’re not eliminating all microorganisms, just reducing pathogens to safe levels. This approach maintains some beneficial microbes that contribute to flavor complexity while ensuring the beverage meets food safety standards.
Home Pasteurization vs. Commercial Methods
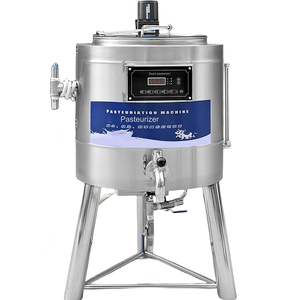
While commercial operations use automated pasteurization systems, home brewers can achieve similar results with careful temperature control. The fundamental principle remains the same regardless of scale: precise heat application for pathogen reduction. Home methods require more vigilance with temperature monitoring but can produce excellent results with proper equipment. Commercial producers typically use plate heat exchangers that rapidly heat and cool the coffee through metal plates, while home brewers rely on more accessible methods like water baths or carefully controlled stove-top heating. The key difference lies in consistency—commercial systems maintain exact temperatures throughout the process, whereas home methods require constant monitoring to avoid under-pasteurization (safety risk) or over-pasteurization (quality loss). Understanding these differences helps you adapt professional techniques to your home kitchen without compromising safety.
Essential Equipment for Safe Cold Brew Pasteurization
Must-Have Temperature Control Tools
Accurate temperature measurement is non-negotiable for successful cold brew pasteurization. Invest in a digital instant-read thermometer with a precision of ±0.5°F that provides readings in 3-5 seconds—this prevents temperature drift during measurement. Pair this with a probe thermometer that can continuously monitor your brew during the process, preferably with a high-temperature alarm that sounds when reaching 161°F. For home pasteurization, a precision temperature controller (like those used in sous vide cooking) attached to a water bath provides the most consistent results. Never rely on stovetop dials or visual cues—coffee’s dark color makes visual temperature assessment impossible, and stovetop controls lack the precision needed for safe pasteurization.
Proper Containers and Transfer Systems
Use only food-grade containers specifically designed for hot liquids during pasteurization. Glass mason jars with tempered glass can withstand temperature changes but require careful handling to avoid thermal shock. Stainless steel containers provide better heat distribution but may subtly affect flavor. Avoid plastic containers unless explicitly labeled for hot food use—many plastics leach chemicals when exposed to pasteurization temperatures. When transferring hot pasteurized coffee, use stainless steel funnels with heat-resistant handles to prevent spills and maintain sterility. For bottling, select containers with tight-sealing lids that create an oxygen barrier, as residual oxygen after pasteurization can lead to spoilage despite successful pathogen reduction.
Step-by-Step Cold Brew Pasteurization Process
Preparing Your Cold Brew for Treatment
Begin with freshly strained cold brew that has been refrigerated for no more than 24 hours. Filter through a fine mesh strainer followed by a paper coffee filter to remove all sediment—particles can shield bacteria from heat treatment. Measure your cold brew into your pasteurization container, leaving 1-2 inches of headspace to prevent boil-overs during heating. Chill the coffee to 40°F or below before starting—this provides a consistent starting point and prevents accidental over-pasteurization from residual warmth. Check the pH using food-safe test strips; if above 6.0, consult food safety guidelines as higher pH requires more aggressive pasteurization parameters.
Executing the Pasteurization Cycle
Heat your cold brew using a double boiler method or temperature-controlled water bath to ensure even heating without scorching. Monitor the temperature continuously with your probe thermometer, stirring gently every 30 seconds to distribute heat evenly. As the temperature approaches 160°F, increase monitoring frequency—reaching 161°F triggers your 15-20 second timer. Maintain this exact temperature without exceeding 165°F, as even brief spikes above this threshold begin degrading flavor compounds. When your timer completes, immediately begin rapid cooling—this “come-down” phase is equally critical to prevent continued cooking. Transfer the container to an ice bath, stirring constantly until the temperature drops below 40°F within 30 minutes.
Proper Cooling and Storage Techniques
Rapid cooling preserves both safety and quality—slow cooling creates another window for bacterial growth. Use a large ice bath with a 1:1 ice-to-water ratio, replacing melted ice as needed. Stir continuously during cooling to ensure even temperature reduction throughout the liquid. Once below 40°F, transfer to sterilized storage containers, filling to the brim to minimize oxygen exposure. Store pasteurized cold brew at 34-38°F in the coldest part of your refrigerator, not in the door where temperatures fluctuate. Label containers with the pasteurization date—properly pasteurized cold brew remains safe for 14-21 days under refrigeration, compared to just 3-5 days for unpasteurized versions.
Troubleshooting Common Pasteurization Problems

Inconsistent Temperature Issues
If your thermometer shows fluctuating temperatures during pasteurization, you’re likely experiencing uneven heating. This creates cold spots where bacteria survive. Solution: Use a wider, shallower container for better heat distribution and increase stirring frequency to every 15 seconds as you approach target temperature. Verify your thermometer’s accuracy by testing in ice water (should read 32°F) and boiling water (212°F at sea level).
Off-Flavors After Pasteurization
Bitter or “cooked” flavors indicate overheating. This happens when localized spots exceed 175°F while the main batch is still reaching target temperature. Prevention: Use lower heat settings and more gradual temperature increases—patience prevents quality loss. If flavors are compromised, the batch should be discarded as you cannot reverse thermal damage to delicate coffee compounds.
Separation or Cloudiness
Some separation after pasteurization is normal due to protein denaturation, but excessive cloudiness suggests incomplete filtration before treatment. Remedy: Strain through a superfine mesh or paper filter after cooling but before final bottling. This maintains clarity without compromising safety—just ensure all equipment contacting the cooled coffee is sterilized.
Extending Shelf Life While Maintaining Quality
Pasteurization alone isn’t enough for maximum shelf life—proper storage completes the safety chain. Use oxygen-barrier containers like glass bottles with airtight seals rather than standard mason jars. Consider adding a food-safe antioxidant like ascorbic acid (vitamin C) at 0.05% concentration to slow oxidation without altering flavor. For commercial producers, implementing a strict cold chain from pasteurization through distribution is non-negotiable—temperature abuse after pasteurization negates all safety benefits. Home brewers should designate a specific refrigerator zone exclusively for pasteurized products to avoid cross-contamination with raw ingredients.
When Pasteurization Isn’t Enough: Additional Safety Considerations
Pasteurization reduces but doesn’t eliminate all microorganisms, so proper handling remains critical. Never top off pasteurized cold brew with unpasteurized product—this reintroduces pathogens. Discard any batch showing signs of spoilage like off-odors, unusual cloudiness, or gas production (bubbles). For commercial operations, implement regular microbial testing protocols to verify your pasteurization process effectiveness. Remember that pasteurization doesn’t address chemical contaminants—always start with high-quality water and beans from reputable sources. If your cold brew exceeds safe pH levels (above 6.0), consult a food safety professional as standard pasteurization parameters may be insufficient.
Pasteurizing cold brew coffee transforms it from a short-lived delicacy into a safe, shelf-stable product without sacrificing its distinctive smoothness. By following these precise temperature guidelines and handling procedures, you protect consumers while extending your product’s marketability. The 15-20 seconds at 161°F represents the critical safety threshold—neither more nor less time delivers optimal results. As you implement this process, maintain meticulous records of temperature logs and cooling times to ensure consistency across batches. For home brewers sharing their creations, this knowledge isn’t just about quality—it’s a food safety responsibility. Whether you’re producing for personal use or small-scale sales, proper pasteurization elevates your cold brew from a simple beverage to a professionally crafted product that meets food safety standards while preserving the qualities that make cold brew so special.


