
Is your Nespresso coffee maker suddenly displaying error codes, brewing weak coffee, or failing to heat properly? A simple reset often resolves these frustrating issues without requiring expensive repairs or replacement. Knowing exactly how to reset your Nespresso coffee maker is essential troubleshooting knowledge that can restore your machine’s performance in minutes. Whether you own an OriginalLine Pixie or a VertuoNext model, this guide provides precise reset instructions that work for every Nespresso machine currently on the market.
Most coffee lovers don’t realize their Nespresso contains sophisticated electronics that sometimes need a reboot—just like your computer or smartphone. When temporary glitches accumulate in the machine’s memory, a reset clears them out and returns your coffee maker to optimal functioning. The best part? You don’t need special tools or technical expertise to perform this essential maintenance task.
Recognizing When Your Nespresso Requires a Reset
Spotting the early warning signs that your Nespresso needs resetting helps you address problems before they disrupt your morning routine. Several clear indicators suggest a reset could solve your machine’s issues without professional intervention.
Blinking lights and error codes provide the most direct signal that something’s wrong. When your Nespresso flashes specific patterns like three rapid blinks or displays codes such as E01 (water tank issue) or E02 (heating problem), a reset often clears these temporary errors. Pay attention to whether the lights blink in a consistent pattern or erratically—consistent patterns usually indicate resettable issues.
Inconsistent brewing performance frequently responds well to resetting. If your machine suddenly produces half-strength coffee, takes longer to heat up, or delivers inconsistent volumes shot after shot, the internal sensors may have drifted from their proper calibration. A reset restores the factory programming that ensures precise water temperature and volume control.
Unresponsive controls represent another common reset candidate. When your Nespresso ignores button presses, fails to power on properly, or behaves erratically during operation, the control board likely needs refreshing. Try a reset before assuming hardware failure—most of the time, this simple procedure restores normal responsiveness.
Unexpected shutdowns during brewing often indicate temporary software hiccups rather than mechanical problems. If your machine powers off mid-brew or fails to complete its normal heating cycle, a reset typically resolves the issue by clearing corrupted memory that’s interfering with proper operation.
Essential Prep Work Before Resetting Your Nespresso
Proper preparation ensures your reset attempt succeeds on the first try and prevents potential damage to your machine. Taking just two minutes to prepare properly saves you from repeating the process multiple times.
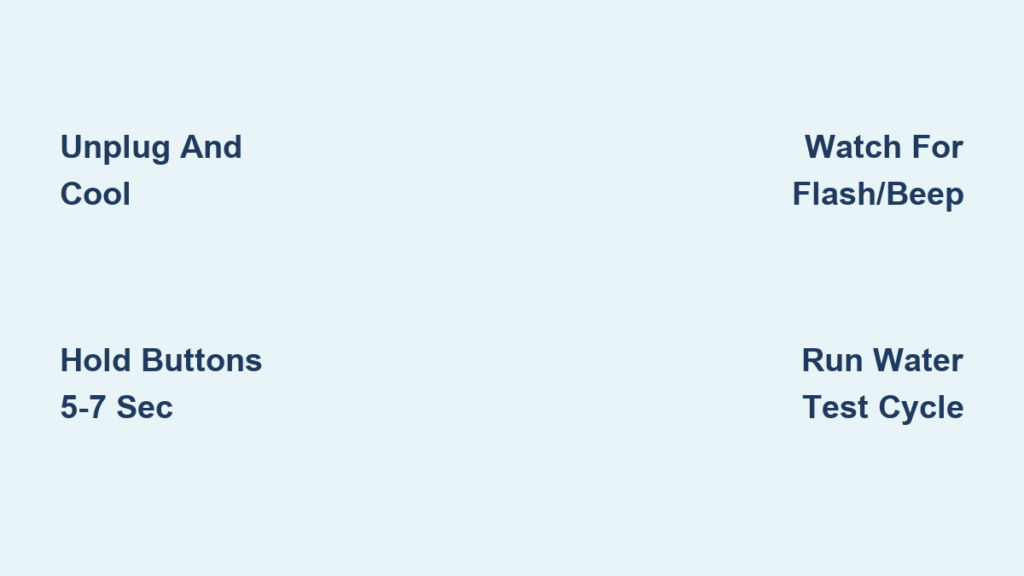
First, unplug your Nespresso and let it cool completely for at least 10 minutes. Never attempt a reset on a hot machine—residual heat can interfere with the electronics reset process. This cooldown period also allows internal capacitors to discharge fully, which is crucial for a complete reset.
Clear all capsules from the system by opening the brew head and removing any fresh capsules from the holder. Also empty the used capsule container to prevent accidental brewing during the reset sequence. A completely empty machine responds better to reset procedures and reduces the risk of coffee residue interfering with sensors.
Check your water tank level to ensure it contains at least one-third full of fresh water. While some reset procedures don’t require water flow, having adequate water prevents potential pump damage during test cycles after the reset. Never attempt resets with an empty tank as this can cause unnecessary strain on the pump system.
Position your machine on a stable surface with good lighting so you can clearly see indicator lights during the reset process. Many reset procedures require watching for specific light patterns, and proper visibility ensures you don’t miss the critical visual confirmation that the reset worked.
Resetting OriginalLine Nespresso Models

OriginalLine machines like the Pixie, CitiZ, Essenza, and Inissia share a consistent reset procedure that involves precise button timing. Getting this sequence right matters—too short or too long and the reset won’t complete properly.
Standard OriginalLine Reset Technique:
With your machine plugged in and powered on, press and hold both the small cup button and large cup button simultaneously for exactly 5 seconds. Watch the lights carefully—they should flash rapidly three times in unison, then return to normal. This triple flash confirms a successful reset. Release the buttons immediately after seeing the third flash pattern.
For GranLattissima models, use a specialized reset sequence to accommodate the milk system. Press and hold the “Lungo” button and “Steam” button together for 7 full seconds until all lights flash twice. This extended timing ensures both coffee and milk systems reset properly, which is critical for machines with integrated frothers.
After resetting, run a blank water cycle by closing the brew head and pressing any cup size button. This flushes the system and confirms proper operation—water should flow freely without sputtering or unusual sounds. If the blank cycle completes successfully, your machine is ready for regular coffee brewing.
Resetting VertuoLine Nespresso Machines
VertuoLine models (Vertuo, VertuoPlus, VertuoNext, Evoluo) require different reset procedures due to their barcode-reading technology and centrifugal brewing system. These resets need precise timing to work correctly.
VertuoLine Reset Procedure:
Ensure your machine is powered on with the brew head closed. Press and hold the central brew button for exactly 7 seconds while watching the indicator lights. When all lights flash simultaneously and the machine emits two distinct beeps, release the button. This double beep confirms successful completion—don’t continue holding after hearing it.
For VertuoPlus models with adjustable height, verify the brew head is fully closed before starting. An open head prevents the reset from initiating properly. If your machine has Bluetooth connectivity, note that this reset clears all paired devices—you’ll need to reconnect through the Nespresso app afterward.
After resetting, reprogram your preferred cup sizes by brewing your desired volumes and holding each button until it beeps. Vertuo machines revert to factory default volumes after a reset, so this step ensures your favorite cup sizes are properly saved to memory.
Troubleshooting Failed Reset Attempts
When your Nespresso refuses to reset properly, specific troubleshooting steps can overcome common obstacles without professional help.
Non-responsive buttons often stem from residual power in the system. Unplug your machine completely for 15 minutes to allow a full discharge, then try the reset sequence again. If buttons remain unresponsive after this, clean around the button edges with a cotton swab dipped in rubbing alcohol to remove any coffee residue interfering with contact.
Flashing lights without reset confirmation typically indicates incorrect timing. Most failed resets happen because users release buttons too soon or hold them too long. Practice the timing on a stopwatch—OriginalLine needs exactly 5 seconds, VertuoLine requires 7 seconds of continuous pressure.
Error codes returning immediately after a successful reset signal underlying hardware issues rather than software glitches. Persistent E02 codes usually indicate heating element problems, while recurring E05 errors point to water sensor malfunctions that require professional service.
Preventing Future Reset Needs Through Proper Maintenance
Regular maintenance dramatically reduces how often you’ll need to reset your Nespresso machine. Implement these simple habits to keep your coffee maker operating smoothly between resets.
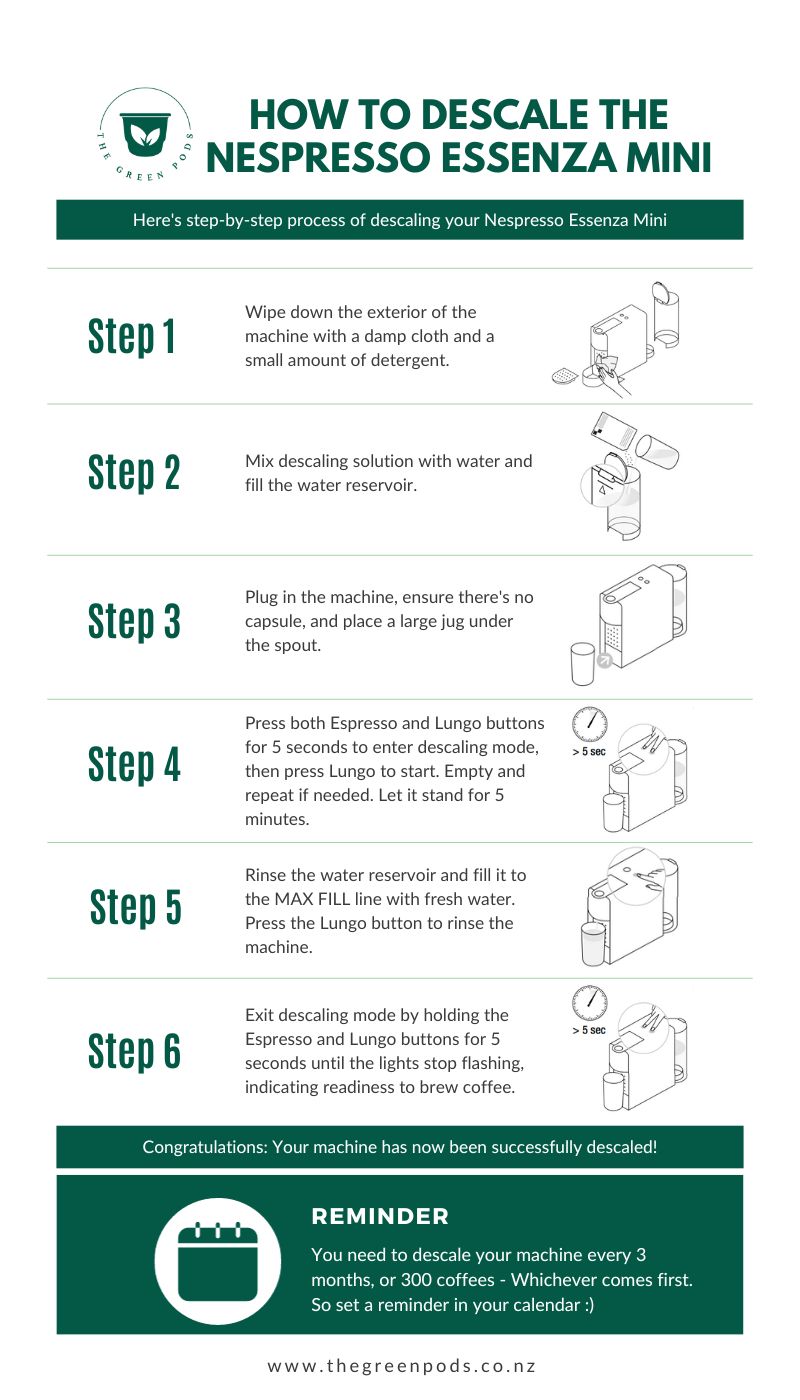
Descaling every 3 months prevents mineral buildup that triggers most error codes. Fill the water tank with Nespresso’s official descaling solution mixed with water, then run the descaling cycle as instructed by your machine’s lights. Follow with 5 full water tank rinses to remove all solution residue.
Weekly brew head cleaning prevents coffee residue from interfering with sensors. With the head open, wipe the interior with a damp microfiber cloth, paying special attention to the capsule piercing needles. For stubborn buildup, use a soft-bristled toothbrush to gently remove dried coffee grounds.
Daily water tank management maintains optimal performance. Empty and refill the tank with fresh water each morning—never let water sit for more than 24 hours as this promotes bacterial growth that affects taste and machine operation. Monthly, wash the tank with mild soap and rinse thoroughly before reuse.
When Professional Help Becomes Necessary
While resets solve most temporary issues, certain problems require Nespresso’s professional service team. Contact support immediately if you notice:
- Persistent error codes that return within minutes of a successful reset
- Visible leaks around the water tank or brew head that continue after cleaning
- Electrical issues like sparks, burning smells, or inconsistent power
- Complete failure to power on after multiple reset attempts and power cycle tests
Most Nespresso machines come with a 2-year warranty covering these types of hardware failures. Contact Nespresso customer service with your model number and specific symptoms—they’ll guide you through warranty verification and arrange service if needed.
Final Reset Tips for Perfect Coffee Every Time
Mastering how to reset your Nespresso coffee maker puts you in control of common issues that would otherwise ruin your morning routine. Keep these final tips in mind for optimal results:
- Always confirm reset success with a blank water test cycle before brewing coffee
- Reset your machine monthly as preventative maintenance even without issues
- After resetting Vertuo models, reprogram all cup sizes to your preferences
- If resets become frequent, schedule descaling immediately as mineral buildup often triggers repeat errors
By understanding these precise reset procedures for your specific Nespresso model, you’ll spend less time troubleshooting and more time enjoying café-quality coffee in the comfort of your home. A properly reset machine delivers consistent temperature, perfect extraction, and the rich crema that makes Nespresso coffee special—so keep this guide handy for whenever your machine needs a quick electronic refresh.


