
That first sip of smooth, rich cold brew on a hot morning—it’s pure bliss. But if your cold brew coffee maker is sitting unused in the cabinet because you’re not sure how to get started, you’re missing out on coffee shop quality brew at home. Many coffee lovers struggle with inconsistent results, weak flavor, or messy cleanups when first using their cold brew systems. The good news is that learning how to use a cold brew coffee maker properly transforms your morning routine with minimal effort and maximum flavor. In this guide, you’ll discover exactly how to operate any standard cold brew coffee maker for consistently smooth, rich results every time—without the bitterness of traditional iced coffee.
Cold brew’s popularity has exploded for good reason: it contains up to 67% less acidity than hot-brewed coffee, making it gentler on sensitive stomachs while delivering a naturally sweet, complex flavor profile. Unlike iced coffee that’s simply hot coffee poured over ice (which dilutes and often tastes bitter), true cold brew steeps coarse grounds in cold water for an extended period. The secret to perfect cold brew isn’t expensive equipment—it’s understanding the precise coffee-to-water ratio, steep time, and filtration process that turns basic ingredients into liquid gold. Whether you just unboxed your first cold brew maker or that device has been gathering dust, this guide eliminates the guesswork so you can start brewing café-quality cold brew at home today.
Choosing the Right Coffee Beans and Grind Size

Why Coarse Grind Is Non-Negotiable for Cold Brew
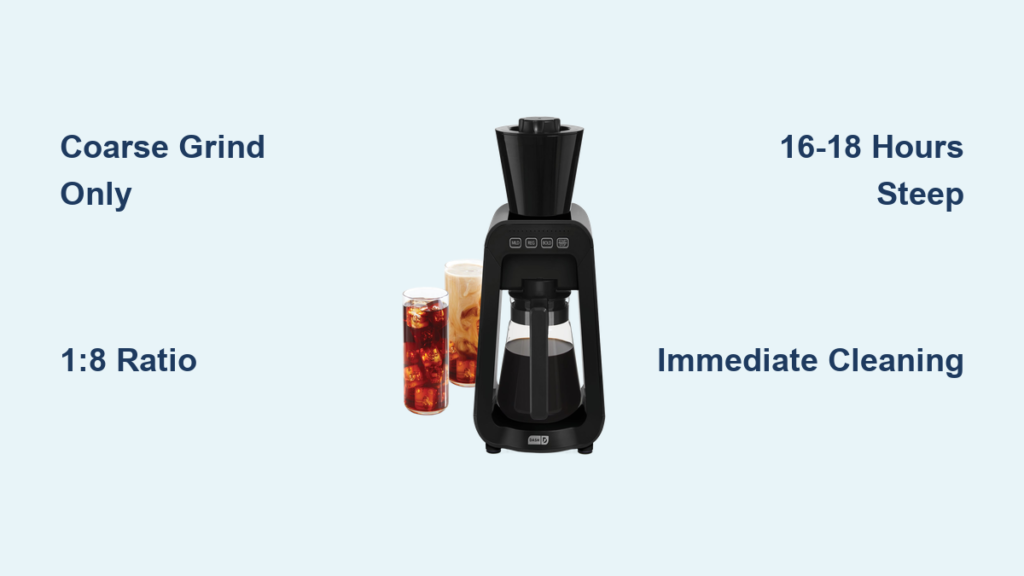
Using the wrong grind size is the #1 mistake beginners make with cold brew coffee makers. Your standard drip coffee grinder setting creates particles too fine for cold brew, resulting in over-extraction, sediment in your final brew, and difficult filtration. For optimal cold brew, you need an extra-coarse grind—similar to breadcrumbs or rough sea salt. This larger particle size allows for proper water flow during the extended steeping process while preventing fine grounds from slipping through the filter.
If your coffee maker came with a mesh filter, the grind requirement becomes even more critical. Blade grinders often create inconsistent particle sizes, so a burr grinder set to the coarsest setting delivers the most reliable results. No grinder? Many local coffee shops will grind beans extra-coarse specifically for cold brew if you ask.
Selecting Beans That Shine in Cold Brew
While you can technically use any coffee beans, certain varieties perform better in cold brew’s slow extraction process. Single-origin beans from Brazil, Guatemala, or Sumatra often showcase chocolatey, nutty notes that shine when brewed cold. Avoid ultra-light roasts that may taste flat when cold-brewed—medium to dark roasts typically deliver the richest flavor profile. Freshness matters less with cold brew than hot brewing (since oxidation happens slower), but beans roasted within the past month will still produce superior results. Pro tip: Skip flavored beans, as the cold brew process minimizes those artificial notes while potentially creating off-flavors.
Perfecting Your Cold Brew Coffee Maker Setup
The Critical Coffee-to-Water Ratio Most People Get Wrong
Getting the ratio right separates amateur cold brew from professional-quality results. The ideal starting point is a 1:8 coffee-to-water ratio by weight (for example, 100g coffee to 800g water). If you don’t have a kitchen scale, use this volume equivalent: 1 cup (about 4 ounces) of coarsely ground coffee per 4 cups of cold, filtered water. Resist the temptation to use more coffee thinking it will strengthen your brew—this actually creates over-extraction and bitterness. Want stronger coffee? Reduce water rather than increase coffee grounds.
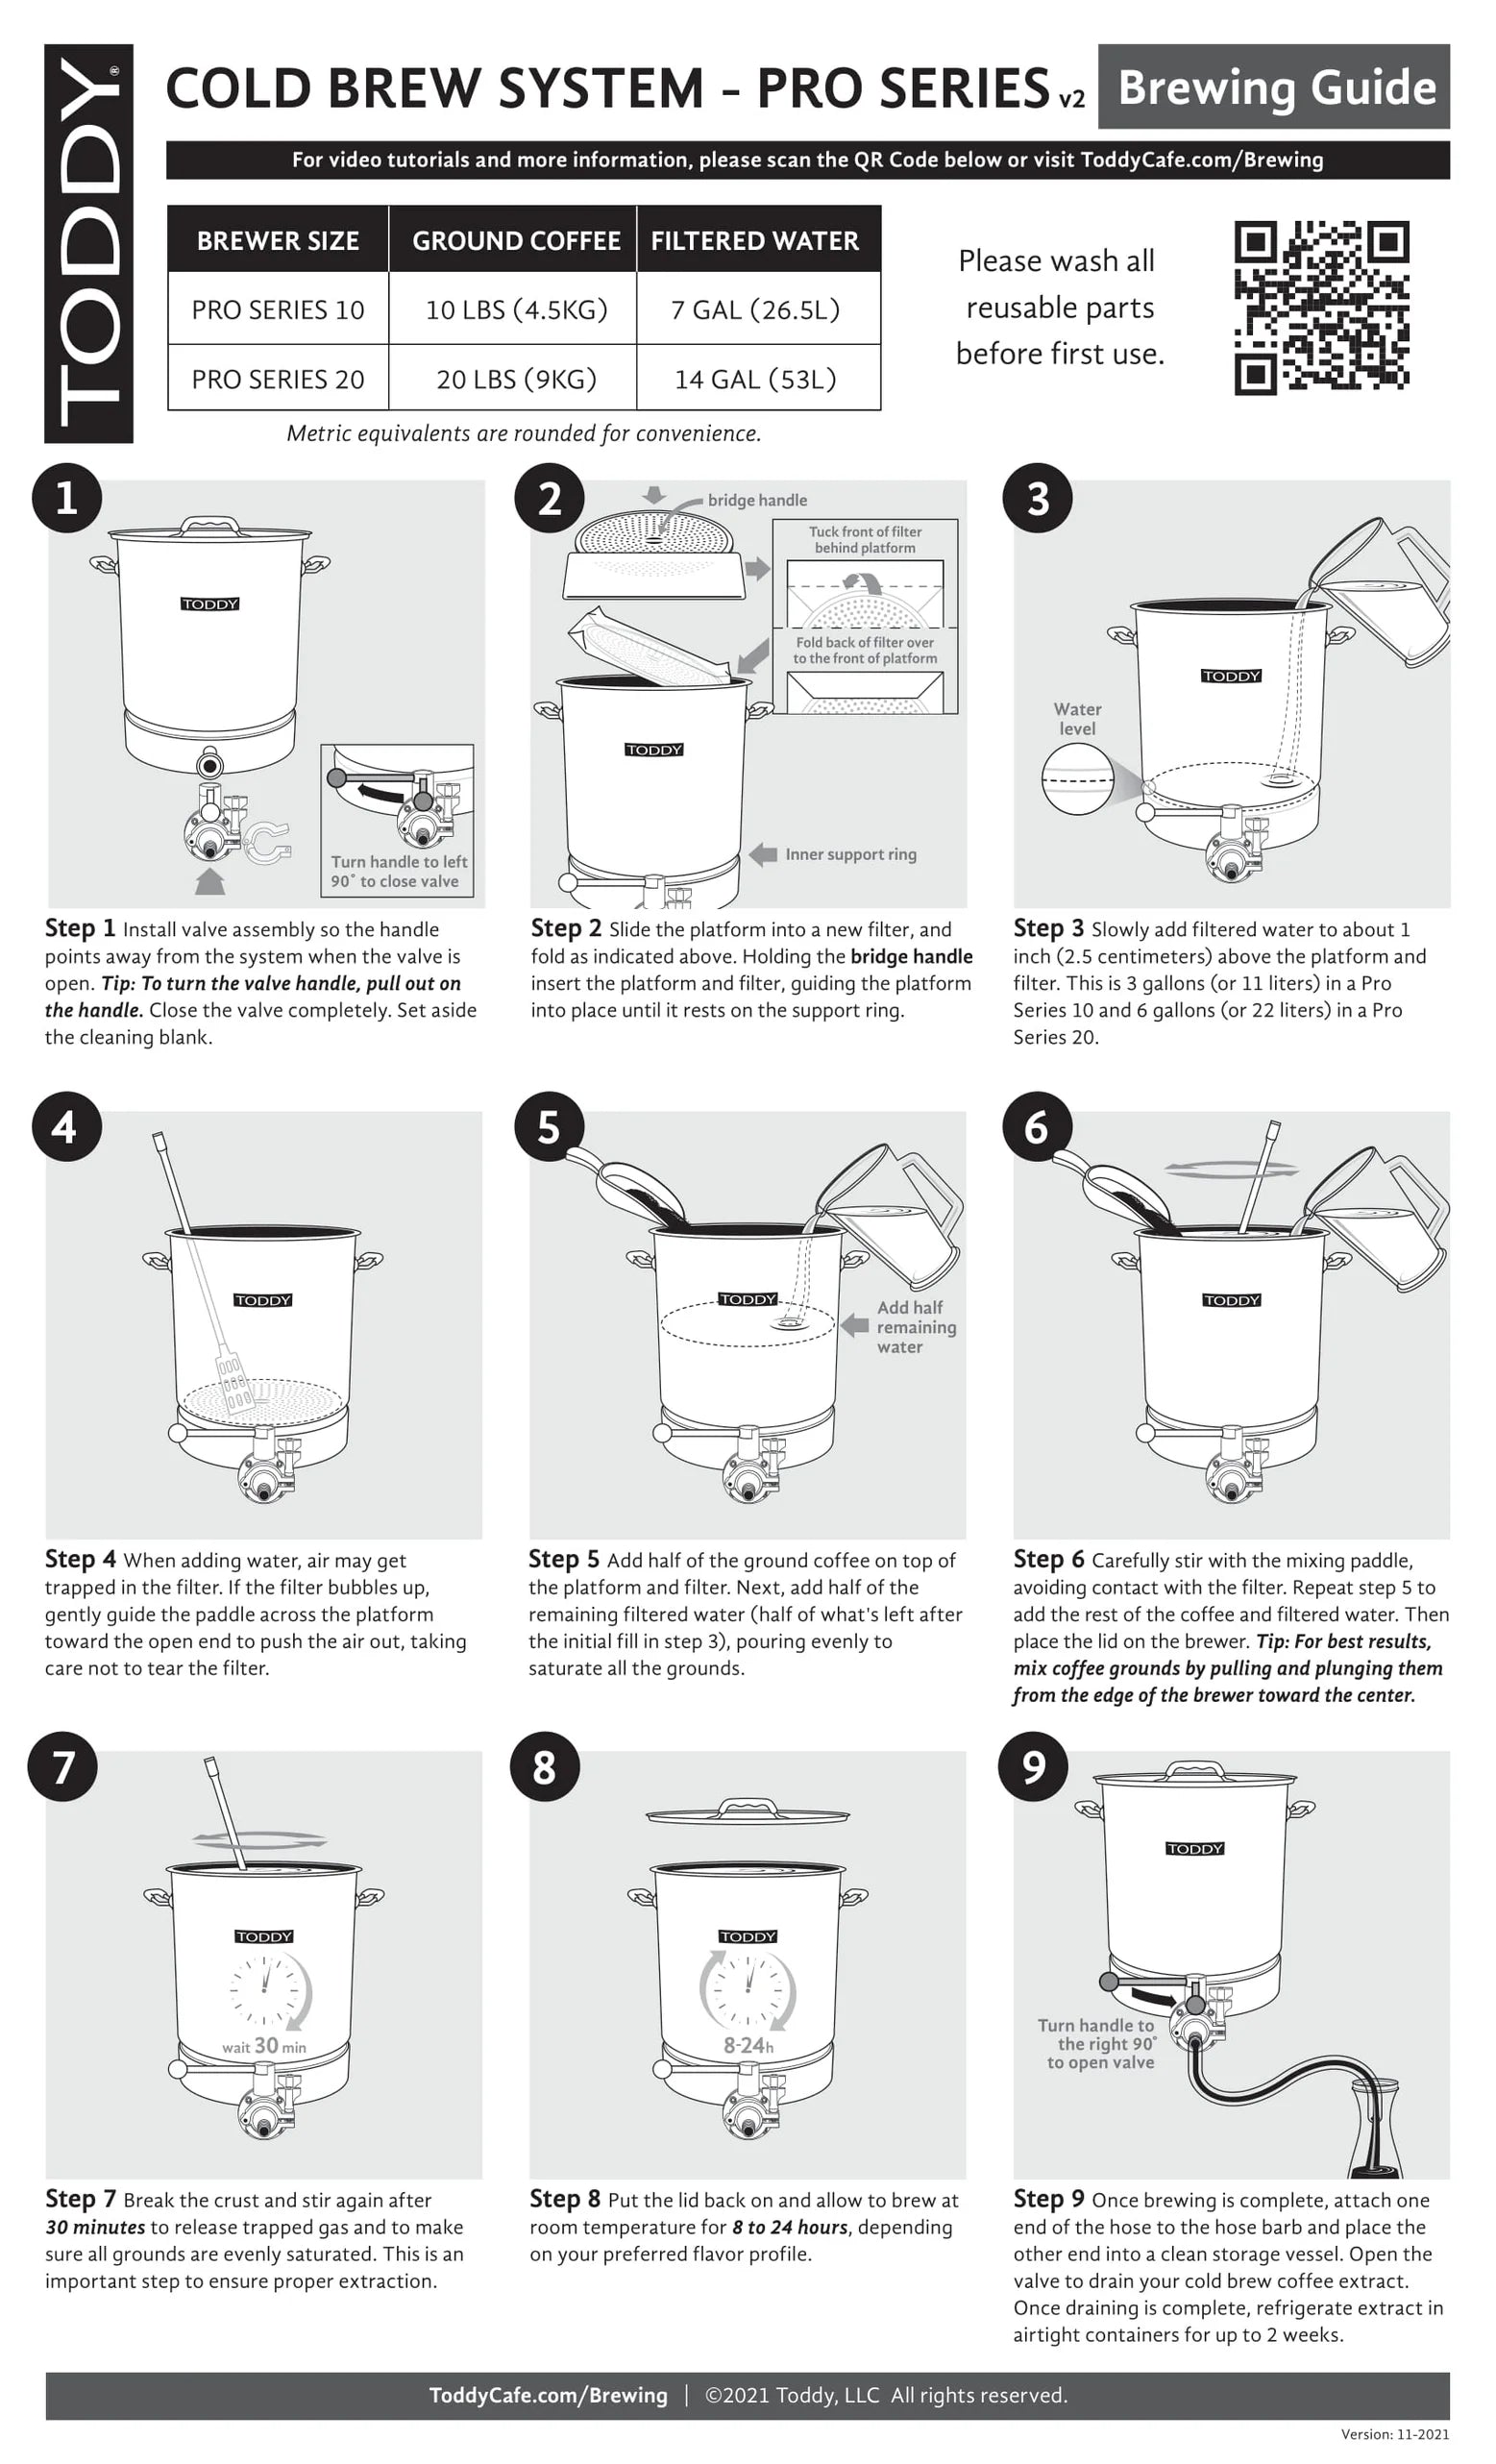
Step-by-Step Assembly of Your Cold Brew System
- Place your coffee maker on a stable, level surface—most accidents happen during assembly
- Insert the filter basket or mesh filter according to your model’s design (some sit at the bottom, others suspend in the middle)
- Add your measured coarse grounds directly into the filter basket
- Slowly pour cold, filtered water over the grounds in a circular motion to ensure even saturation
- Gently stir the “bloom” layer that forms on top to eliminate dry pockets
- Secure the lid with proper alignment—most leaks occur from improper lid placement
- Position the collection chamber directly beneath the filter to catch every drop
Optimizing Your Cold Brew Steeping Process
Determining Exact Steep Time for Your Taste Preference
The magic of cold brew happens during the steeping phase, but timing is crucial. Steep too short (<12 hours) and you’ll get weak, sour coffee; too long (>24 hours) and it becomes overly strong with bitter notes. For balanced flavor, steep for 16-18 hours at room temperature. If you prefer milder coffee, reduce to 14 hours; for bolder flavor, extend to 20 hours. Never exceed 24 hours regardless of your taste preference—this risks spoilage and off-flavors. Pro tip: Set your phone timer for 16 hours as your starting point, then adjust based on your preference for future batches.
Critical Environmental Factors That Affect Quality
Where you place your cold brew maker during steeping impacts your results more than most realize. Avoid direct sunlight or heat sources that accelerate extraction unevenly. The ideal location is a cool, dark cabinet away from appliances that generate heat. If your kitchen runs particularly warm, consider steeping in the refrigerator—though this requires extending steep time by 4-6 hours. Never place your cold brew maker near strong-smelling foods; coffee readily absorbs surrounding odors through the plastic components.
Troubleshooting Common Cold Brew Coffee Maker Problems
Why Your Cold Brew Is Taking Too Long to Filter
When your cold brew drips slower than a leaky faucet, the culprit is almost always grind size. Finer grounds clog the filter pores, creating a traffic jam of coffee particles. If you’re using a mesh filter, try these immediate fixes: gently tap the sides of the maker to redistribute grounds, or carefully lift the filter basket slightly to create a new channel for water flow. For future batches, adjust to a coarser grind. If using a paper filter system, ensure you’re not overfilling the basket beyond manufacturer capacity.
Fixing Weak or Bitter Cold Brew Results
Weak cold brew usually means insufficient extraction—either too little coffee, too coarse a grind, or insufficient steep time. Bitter cold brew typically indicates over-extraction from too fine a grind, too long steeping, or water that’s too warm. To rescue a weak batch, dilute less when serving (use less water or milk). For bitter brew, add a pinch of salt to neutralize harshness or dilute with cold water before serving. Prevention is better than cure: stick to the 1:8 ratio, use proper coarse grind, and maintain consistent 16-18 hour steep times.
Cleaning and Maintaining Your Cold Brew Coffee Maker
The Essential Post-Brew Cleaning Routine
What separates coffee enthusiasts from casual users is proper cleaning immediately after brewing. Never let wet coffee grounds sit in your maker for hours—this creates rancid oils and difficult-to-remove residue. Disassemble all components within 30 minutes of completing your brew. Rinse the filter basket under hot water while grounds are still wet (they harden when dry). For stubborn coffee oils, create a cleaning solution of equal parts white vinegar and water, let sit for 15 minutes, then scrub with a soft brush. Avoid harsh detergents that leave chemical residues affecting future brews.
Preventing Mold and Mildew in Hard-to-Reach Areas
The spout and narrow neck of cold brew makers are breeding grounds for mold if not properly dried. After washing, disassemble all parts and place them on a clean towel in a well-ventilated area—never store components while damp. For models with narrow openings, use a bottle brush designed for baby bottles to reach interior crevices. Once monthly, perform a deep clean with a dedicated coffee equipment cleaner to remove built-up oils invisible to the eye. Pro tip: Store your completely dry maker with the lid slightly ajar to prevent musty odors from developing.
Maximizing Your Cold Brew Coffee Maker’s Versatility

Creating Concentrate for Custom Strength Control
The beauty of cold brew concentrate is customizing strength to your exact preference. Instead of the standard 1:8 ratio, try a 1:4 ratio (twice as strong) for true concentrate. This thicker brew stores better in the refrigerator and gives you complete control when serving—dilute with water, milk, or alternative milks to your ideal strength. One ounce of concentrate mixed with one ounce of liquid creates standard strength; for stronger coffee, use a 2:1 concentrate-to-liquid ratio.
Experimenting with Flavor Infusions During Steeping
Elevate your basic cold brew by adding flavor elements during the steeping process. Add a cinnamon stick, vanilla bean (split lengthwise), or citrus peel directly to the grounds before adding water. Whole spices work better than ground—they won’t pass through the filter. For chocolate notes, include 2-3 unsweetened cocoa nibs per cup of water. Always remove flavor additions before serving to prevent over-infusion. Start with small quantities—a little goes a long way in cold brew’s concentrated environment.
Storing and Serving Your Perfect Cold Brew
Proper Refrigeration Techniques for Maximum Freshness
Transfer your finished cold brew to an airtight glass container immediately after filtering—plastic can impart flavors over time. Store in the main part of your refrigerator (not the door) where temperatures remain most consistent. Properly stored, cold brew maintains peak flavor for 7-10 days. For longer storage, freeze in ice cube trays then transfer to freezer bags—these coffee cubes won’t dilute your drink as they melt. Never store cold brew in direct sunlight or near strong-smelling foods that could affect flavor.
Professional-Style Serving Methods That Impress
Skip the basic glass and ice cubes for café-worthy presentation. Chill your serving vessel beforehand to maintain optimal temperature without excessive dilution. For layered drinks, slowly pour cold brew over the back of a spoon to create beautiful strata with milk or cream. Garnish with coffee beans, citrus twists, or edible flowers for special occasions. Want to impress guests? Serve in a wine glass with a single large ice sphere and an orange twist—the wide bowl allows aromas to develop like fine wine.
Final Note: Mastering your cold brew coffee maker takes just one successful batch to build confidence. Stick to the precise 1:8 coffee-to-water ratio, use properly coarse grounds, and maintain consistent 16-18 hour steep times for reliable results. Clean components immediately after each use to prevent flavor contamination in future batches. Once you’ve nailed the basics, experiment with concentrate ratios and flavor infusions to create your signature brew. Your perfect cold brew journey starts today—simply measure, steep, filter, and enjoy the smooth, rich results that make the morning worth waking up for.


